RSS Feed

‘Sweet Treats’ Category

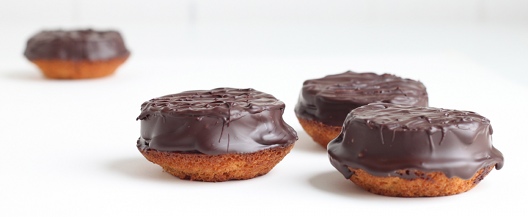
  1. Gluten-Free Primal Jaffa Cakes

    March 19, 2013 by Tali

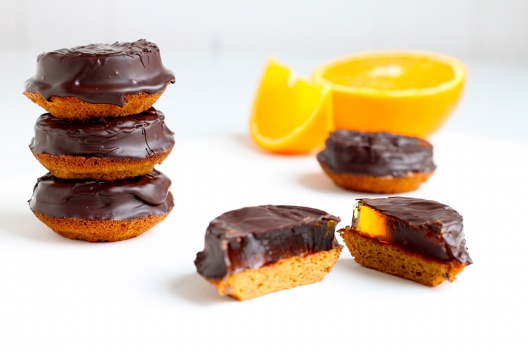
    The other day I had a major hankering for some Jaffa cakes. The magical combination of light sponge, zesty orange jelly topped with a coating of dark chocolate.

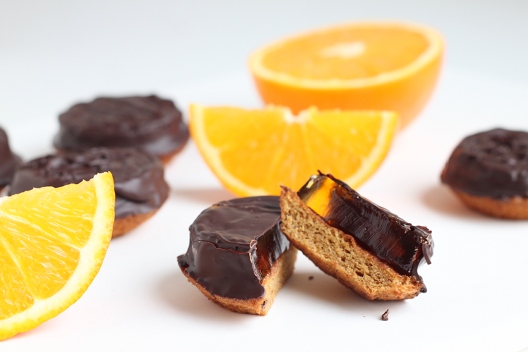
    Biting into one is a true sensory experience – as you bite down, your teeth crack through the delicate snap of tempered dark chocolate into the squidgy Jaffa orange jelly, finishing off with a comforting bounce of delicate sponge cake.

    And the flavours…. well who can argue with the truly exquisite combination of orange and dark chocolate?

    No one I know!

    This snack item is quite deceptive. They are so light and moreish – before you know it – you’ve gobbled up half the pack. And so the only option is to destroy the evidence!

    There is another problem with the humble Jaffa Cake. It contains wheat flour (gluten – nasty stuff), refined sugars, and preservatives. We don’t need or want these things in our food. So I took it upon myself to re-invent the Jaffa Cake, making it gluten-free, refined sugar-free and preservative free!

    I bet you’re thinking ‘yeah, alright, but I bet it’s also taste-free too!’

    Well, you would be wrong!

    These babies are truly epic. You get the same flavour burst and texture combination that makes for a totally immense sensory experience – without any of that yucky business.

    How did you manage that? – you ask!?

    Well just take a wee look!

    Gluten-Free Primal Jaffa Cakes

    Makes: 12   Takes: 40mins

    Ingredients:
    2 large free range eggs
    50g(1.76oz) raw coconut palm sugar
    50g(1.76oz) ground almonds

    2 large oranges (preferably Jaffa)
    1 Tbsp orange marmalade (optional)
    1 (11g/0.38oz) sachet gelatine OR 4 leaves of gelatine sheets (soaked)

    150g (5.5oz) dark chocolate (minimum 70% cocoa solids)

    Make the sponge

    • Pre-heat oven to 180 C/350 F. Grease a 12 hole cupcake/muffin tin
    • Place the eggs and coconut palm sugar in a heat resistant bowl. Place on top of a pan of simmering water making sure the bowl doesn’t touch the water
    • Whisk the eggs and sugar (by hand or using an electric hand beater) until it reaches the ribbon stage. This should take 4-5 minutes with an electric beater, and 5-10 minutes by hand
    • Add the ground almonds and mix to combine
    • Divide the mixture evenly between the 12 muffin holes. I found it useful to use my medium sized scoop to portion these out evenly
    • Place in the middle of the oven and bake for 8-10mins. They should spring back when gently pressed
    • Gently remove out of the baking pan, and leave to cool on a wire rack

    While the sponge is baking, make the jelly

    • Line a square brownie tin with plastic wrap – allow excess over-hang
    • Zest 1 orange, and place the zest in a saucepan. Juice the 2 oranges (you should hopefully get around 150-200ml of juice – that’s just over 1/2 cup-3/4 cup) place this into the saucepan along with the (optional) tablespoon of marmalade
    • Heat the mixture up until the marmalade has dissolved. Make sure the mixture doesn’t boil
    • Once the mixture has heated up, sprinkle the gelatine onto the surface and whisk briskly until the gelatin is thoroughly dissolved and incorporated into the mix
    • Gently pour the liquid into the tin and fold over the excess plastic wrap to touch the surface
    • Allow this to cool to room temperature before placing in the fridge to set properly.

    Putting the Jaffa cakes together and chocolate coating them

    • Take your jelly out the fridge, making sure it has set fully. Then cut 12 rounds slightly smaller than the tops of the sponge cakes
    • Place the jelly on top of the sponge
    • Chop your dark chocolate and put it into a microwavable bowl
    • Warm up your chocolate at half power in 30 second bursts mixing gently between each 30-second burst
    • Be patient and make sure not to over-heat your chocolate. You want to keep that chocolate tempered to ensure a nice crisp shell (for that full sensory experience!)
    • Once the chocolate is ready, using a silicone pastry brush – any of these will do – brush the chocolate over the top of the jelly allowing it to coat the sides and just onto the surface of the sponge
    • Leave them to set on a wire rack
    • Arrange them on a pretty plate and serve to guests – OR – devour and repeat recipe, then serve!

    The recipe does look long and a little overwhelming but it’s really not so difficult and it’s worth the effort! It may be wordy but I just wanted to make sure you get all the steps right!

    If you are just after the gluten-free (and aren’t so worried about the refined sugar) feel free to use the jelly recipe from here to fill your Jaffa cakes. I tested this recipe but actually found that the flavour of the orange jelly using the fresh orange juice produced a more authentic Jaffa cake taste.

    True story!


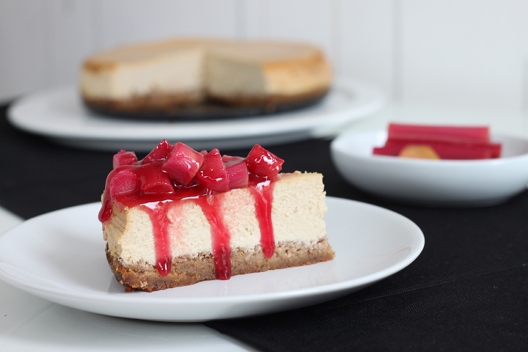
  2. Primal Ginger Cheesecake with Rhubarb Compote

    March 15, 2013 by Tali

    For the last few weeks I have had the craziest craving for cheesecake. Not unusual. I often get cravings for sweet things.

    As a way to control myself I try to make the foods that I’m craving. That way I appreciate them more, and more importantly, I can control what goes in them – which is pretty important when you’re trying to eat a Primal diet.

    Some people may argue over the true primal-ness of dairy – and whether it should be a part of our adult diet. I admit that I should cut back a little on my dairy consumption – but I find that I cope just fine with a little dairy in my diet.

    Do whatever works for you!

    I would recommend checking the ingredients list of the cream cheese you buy. I found that a brand like Philadelphia contains all kinds of additives, and my supermarket own brand soft cheese simply lists: milk. I like that! Or better yet – make your own cream cheese! But who has time for such things?!

    Cheesecake is not something I eat often and so I wanted to have something as close to the real deal as possible! Without all those additives, all that gluten and those refined sugars.

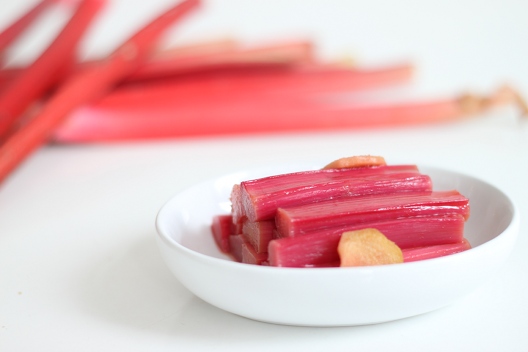
    It was only when the first crops of forced rhubarb hit the shelves that I thought it would be a brilliant idea to make a Rhubarb Cheesecake!

    AND whats goes brilliantly with rhubarb…. GINGER of course!

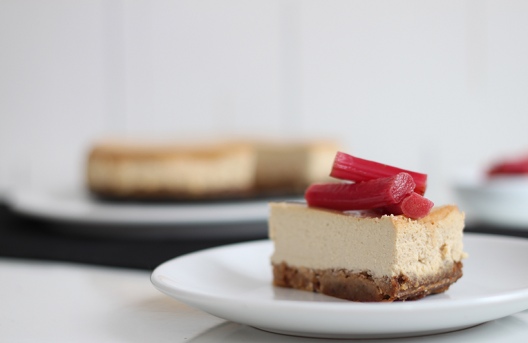
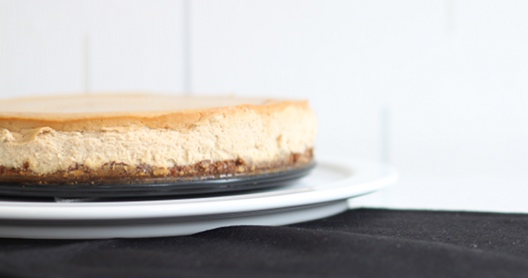
    There were so many ways in which I could have gone about putting this cheesecake together but in the end I decided to make a ginger cheesecake and use the rhubarb as a compote to accompany it.

    My recipe came to be with a little help from Adriana at Living Healthy with Chocolate.

    Primal Ginger Cheesecake with Rhubarb Compote

    Makes: 1 8-inch cake   Takes: 2.5hrs

    Crust
    Ingredients:

    1/2 cup pecans
    1 cup ground almonds/almond meal
    1 Tbsp Raw Honey
    1/2 tsp ground ginger
    6 Tbsp Butter/coconut oil (melted)

    • Preheat oven to 150 C/300 F
    • Place pecans in a food processor with blade attachment. Process until finely ground
    • Add ground almonds, honey, ground ginger and melted butter – process until it all comes together
    • Press into the base of a greased and lined 8 inch spring-form pan
    • Bake for 10-12mins. Set aside to cool

    Cheesecake Filling
    Ingredients:

    450g full fat cream cheese (at room temperature)
    1 cup full fat Greek yoghurt
    4 large eggs
    15g fresh stem ginger (grated)
    3 Tbsp raw coconut palm sugar

    • Turn oven temperature down to 110 C/230 F
    • Cream together the cream cheese, yoghurt and coconut palm sugar until light and fluffy
    • Add eggs to the mixture, one at a time
    • Finely grate the fresh ginger and fold it into the mix
    • Pour mixture on top of cooled base. Place in the oven and bake for about 1.5 hours. Start checking from 1 hour. You will notice that it will be wobbly in the centre. You want to bake this until it JUST stops wobbling. For me it took 1.5 hours in a fan assisted oven
    • Switch off oven leaving the door slightly a jar and let the cake cool with the oven. After 20-30mins, remove from oven and set aside to cool
    • Once the cheesecake is at room temperature, you can cover and place it into the fridge to chill until you are ready to serve

    Rhubarb Compote
    Ingredients:

    400g fresh rhubarb stems
    250ml water
    20g coconut palm sugar
    35g raw honey

    • Preheat oven to 180 C/350 F
    • Chop rhubarb stems into even pieces, lay them evenly in a shallow dish
    • Dissolve the coconut palm sugar and honey in the water, then pour over the rhubarb
    • Place dish in oven, and roast for 15mins, until the rhubarb is tender but still holds its shape.
    • Leave to cool

    When ready to serve, slice cheesecake (best done when cheesecake has been well chilled, preferably overnight) and top with a couple of spoons of rhubarb compote.

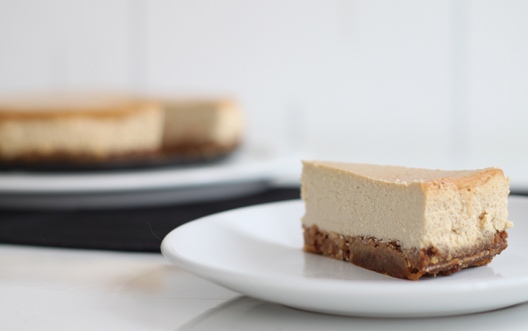
    I found that the ginger cheesecake on its own was was quite delightful – and that it didn’t really need the compote. Don’t get me wrong, the tart rhubarb compote was a welcome contrast to the creamy and gingery cheesecake – but if you were to skip the rhubarb this dessert will not disappoint!

    You could even serve this with another complimentary ingredient to ginger… chocolate for example. Ooo or a citrus curd, lemon OR lime would work great along-side the ginger. Or go exotic and pair the cheesecake with perfectly ripe mango slices. Oh, I could go on and on!

    Notes:
    I found the base to be a little on the soggy side – I guess this could be because it’s made with nuts. Next time I may try using coconut palm sugar instead of honey and maybe coconut oil instead of butter to see if that makes a difference.

    In a further attempt to rid the cheesecake base of moisture – I will attempt next time to drain the cream cheese and yoghurt of as much moisture as possible by straining it though some cheesecloth.


  3. Honey Roasted Figs

    February 27, 2013 by Tali

    Don’t you just love it when seriously delicious and fairly rare fruits appear on the shelves of your stores?

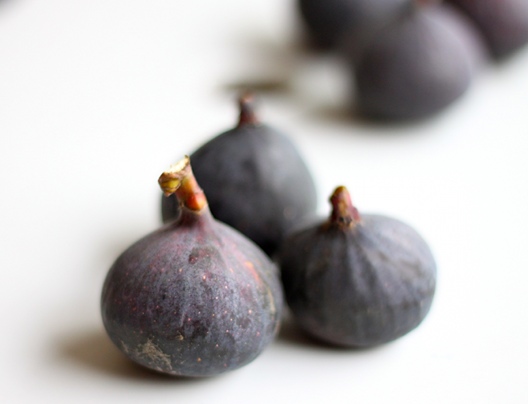
    I couldn’t say no to these beautiful figs – even if they do come all the way from South Africa. I’m not usually a big fan of buying foods with lots of air-miles… but they are from my homeland and it would therefore only be rude not to buy them!

    I was never a big fan of figs when I was younger. They often found their way into the kitchen in dried form – and therefore fresh figs where always a little bit of a mystery!
    There was also the story of my dad’s childhood experience. Having just picked figs off the tree in his back garden – He took a healthy bite into one fresh off the tree only to look down and discover that the inside was crawling with ants… some may argue he was getting a healthy dose of protein with those carbs, but that’s enough to put someone off figs for life!

    I always cut open and check my figs before eating!

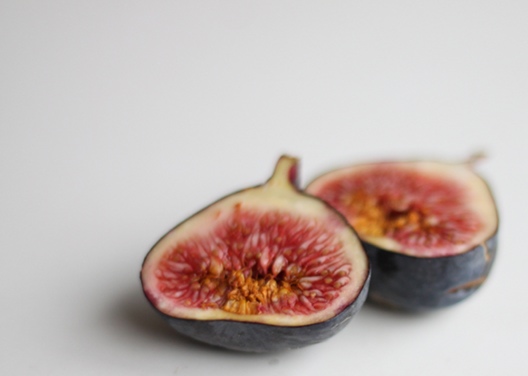
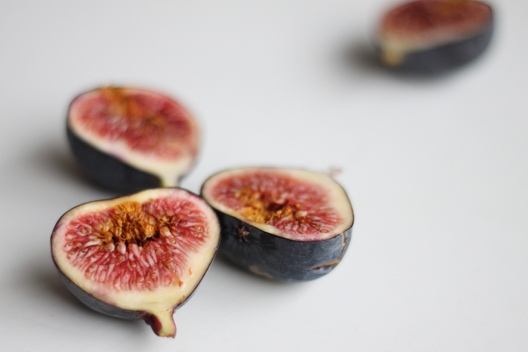
    Who could possibly resist the bold pink tones of the flesh of these sweet juicy nuggets of fruity pleasure?

    To me, the best way to prepare a fig (if you’re not gonna eat it fresh) is oven roasting it…

    …with a drizzle of honey.

    This recipe could not be more simple, or more delicious.

    Honey Roasted Figs

    Makes: as many as you wish (although I would suggest 1.5-2 figs per person)   Takes: 20 mins

    Ingredients:
    Figs
    Honey
    Walnut Halves

    • Pre-heat your oven to 180C/350F
    • Line a baking sheet with foil or baking parchment
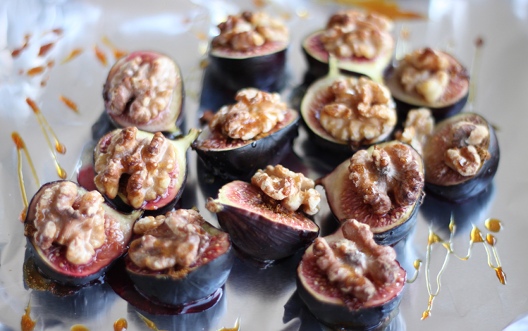
    • Slice the figs in half and lay (cut side up) out onto the baking sheet
    • Place a walnut half on top of each fig
    • Drizzle with Honey – don’t over do it. You want the honey to bring out the sweetness of the figs, not over-power it!
    • Place the sheet in the centre of the oven and let them roast for about 15 mins – be sure to check them around 10 mins as all ovens tend to be different. They may need up to 20-25mins.
    • Once done, transfer onto a serving dish (or plate up each individual serving – oooo how posh!) and devour whilst warm!

    Feel free to add a dollop of whipped cream/coconut cream, mascapone or vanilla ice cream next to these bad boys for a truly decadent dessert.

    YUM!


  4. Chocolate Torte

    June 18, 2012 by Tali

    Everyone needs to indulge in a little chocolate sometimes.

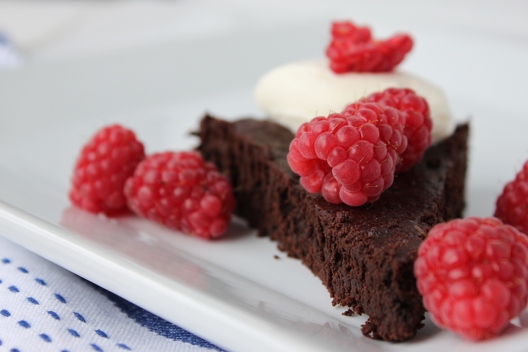
    What better way to enjoy the food of the gods than in rich, dense and powerful cake-like form?

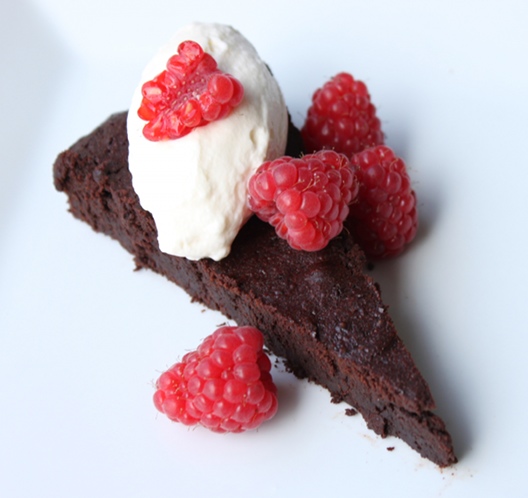
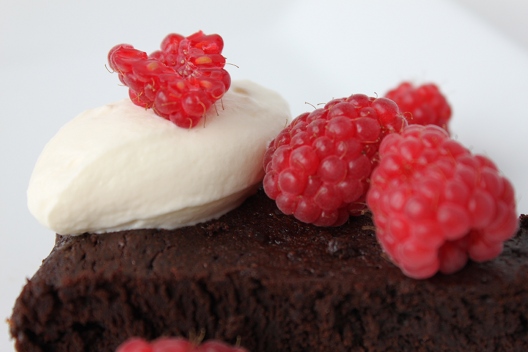
    I say cake-like because this isn’t really a cake – not in the sense that I know of cake; to me a cake needs to be fluffy, light and, to be honest, have a little more height to it. This is not a pie or a tart either.  One could liken its texture to something like a brownie – it is dense, fudgey and intoxicating in its chocolatey-ness. I have decided to label this delicious baked good as a torte.

    This temptress of a dessert packs a real punch. There is A LOT of dark chocolate AND cocoa powder involved in this recipe. It is gluten, nut and (any kind of) flour free. This baby would be acceptable to a vast number of people – unless of course they don’t like chocolate; but let’s be realistic – anyone who doesn’t like chocolate needs their head checked!

    I came across this recipe a few weeks ago when looking for something that was both nut and gluten free. I was baking for a friend’s bridal shower/kitchen tea. The lady of the hour is allergic to nuts, and her sister is gluten intolerant so in an effort to please them both I searched for a recipe that could fulfil both their dietary requirements. It just so happened that it also allowed room to satisfy my requirements as a primal enthusiast.

    This recipe uses a short list of ingredients and an even shorter method – therefore this should please anyone who hates spending too much time in the kitchen.

    In short – This recipe pleases pretty much everyone!

    To make this more Primal-acceptable – I adapted the sweetener from the original recipe which I found here.

    By replacing the caster sugar with unrefined coconut palm sugar I made this an almost guilt-free treat. But believe me – this stuff is so good – you’ll think you’ve just sinned BIG TIME!

    I’d like to try this with honey at some point – it may make the texture even better. If you experiment with that – please let me know how it turns out!

    Primal Chocolate Torte
    Adapted from a recipe by Shana Hillman

    Makes: One 8 inch pan/tart dish  Takes: 45mins

    Ingredients:
    120g Dark Chocolate ( I used Lindt 70%)
    120g Unsalted Butter
    150g Coconut Palm Sugar
    80g Cocoa Powder
    3 Eggs (beaten)
    1 tsp Vanilla extract
    1 pinch Sea Salt

    • preheat oven to 150C/300F. Grease an 8/9 inch tart pan.
    • place the butter and chocolate in a bowl, over a double boiler and let it melt, very gently
    • meanwhile, beat your eggs then add vanilla extract
    • place all of your dry ingredients – coconut palm sugar, salt and cocoa powder (sifted) – into a bowl
    • when your butter and chocolate have melted, remove from heat
    • add egg, incorporating fully, then fold in the dry ingredients
    • once the mixture is combined, pour into tart pan and spread evenly
    • place in your preheated oven for 25-30mins
    • remove from the oven and cool

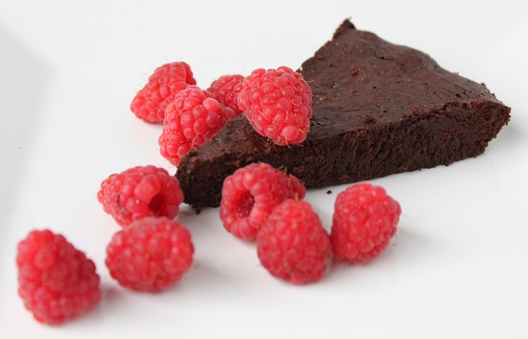
    Serve as a dessert – warm with cream/ice cream and some tart, fresh berries. Or let cool to room temperature and enjoy with a cup of tea or coffee – add the cream and berries for extra indulgence.

    You could amp up the decadence scale and top this with a luscious chocolate ganache to turn it into a seriously dangerous indulgent treat.


  5. Primal Lemon Curd

    May 4, 2012 by Tali

    Lemon curd, its fruity sweetness and citrus tang make for a seriously delicious taste sensation.

    I had never tasted lemon curd until I was the age of about 10. I remember thinking it was one of the most delicious yet unusual breakfast spreads I’d ever tasted. I was more familiar with spreads such as peanut butter, jam, honey, maybe even the occasional treat of chocolate spread. I never acquired a taste for marmalade, and the bitterness that comes with it. So tasting this unusual citrus spread, which was both sweet & sour culminating in a smooth and creamy mess was a totally new experience.

    Little did I know that the versatility of lemon curd could stretch so far! I later discovered it works amazingly as a filling for cakes, or used within pie crusts or tart shells. Not just (generously) spread over toast.

    You’re probably wondering how I could possibly have lived such a sheltered life, having never tasted a lemon meringue pie until I was at least 12 – I too wonder the same!

    This may have had something to do with me making a bee-line for chocolate related desserts, but as my palette matured and developed, I began to appreciate the greater things in the culinary world.

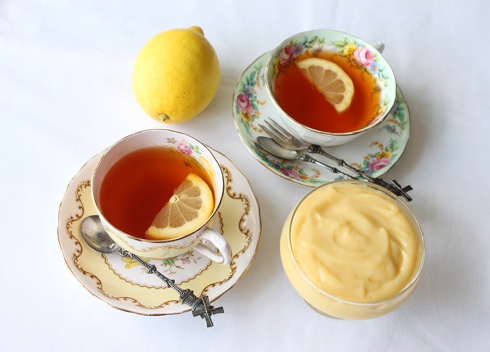
    The other day, my dad had some friends over to play cards, and the evening is often rounded off with teas and coffees along with some cake and savory snacks. I’m often roped into making something for this – which I find is always a great opportunity to try out a new recipe or improve on a old favourite.

    This particular occasion, I decided that I wanted to make something that allowed me to explore some primal recipes, but make it user friendly towards the (non-primal) clientelle.

    I don’t know what made me think of Lemon Meringue Pies – possible just a personal craving of mine, but I thought it would be great to make the filling primal – surely there is a recipe out there for primal friendly lemon curd!?

    I did some research and discovered this great recipe which uses honey as the sweetener.

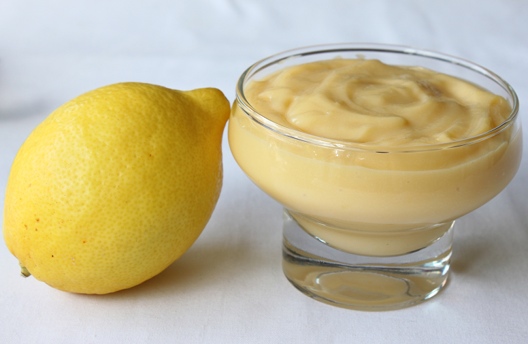
    I followed the recipe and produced a delicious, smooth and silky lemon curd. As the linked recipe suggests, this is a Lemon Honey curd, and you really can taste the honey.

    I’m very keen to attempt this recipe another time using less honey and if I can get hold of them, some Meyer lemons. They are a sweeter lemon (the taste of a lemon and tangerine combined) which I hope would help to round out the flavour of this curd with a reduced honey content. Unfortunately Meyer lemons are out of season… and from what I understand impossible to get hold of here in the UK anyway – therefore I’ll have to wait for the season and hit up every gourmet food market I can!

    In the mean-time, I might consider investing in a plant… although I’ve not got a great track record with plants… but we shall see!

    I doubled the recipe from Friday Delights – because I wanted to use the curd for both a batch of mini lemon meringue pies, and to have some left over.

    Primal Lemon Curd

    Makes: 3 cups Takes: 15 mins

    Ingredients:
    10 large Egg Yolks
    2 large Eggs
    1 1/3 cups freshly squeezed Lemon Juice (about 6-8 lemons)
    2 teaspoons grated Lemon Zest
    3/4 cup Honey
    8 tablespoons Butter (unsalted) cubed

    • start by zesting your lemons
    • then warm up and roll the lemons between your hands to encourage the juices. Using a hand held or electric juicer, extract as much lemon juice outta them fruits as possible. You can always save any left overs for another recipe
    • place ingredients except the butter into a bowl and combine, then place the bowl over a pot of simmering water – making sure the water doesn’t touch the bowl, and stir
    • continue stirring for 10-12 mins while the mixture thickens. It will be slow at first, but will suddenly thicken at the 9-10 min mark. You’ll want to keep it moving and thickening for a little while longer. This will produce a sturdier product
    • once you have reached your desired consistency, remove the bowl from the heat
    • add the cubed butter and keep stirring to fully incorporate and cool the mixture
    • once the butter has been well incorporated, transfer into a shallow dish and cover the surface with clingfilm to avoid a crust forming
    • let the lemon curd cool down a bit before placing in the fridge until you’re ready to use it

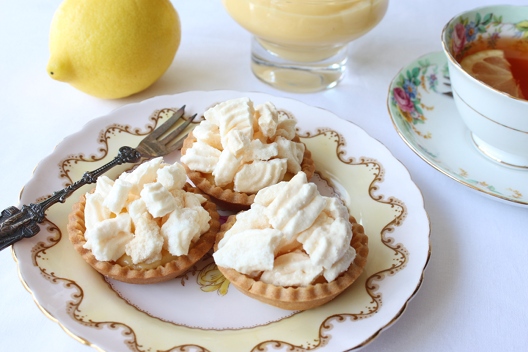
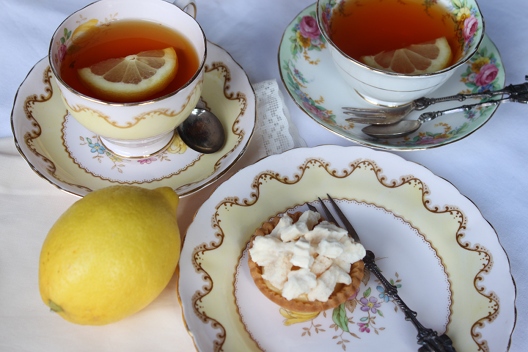
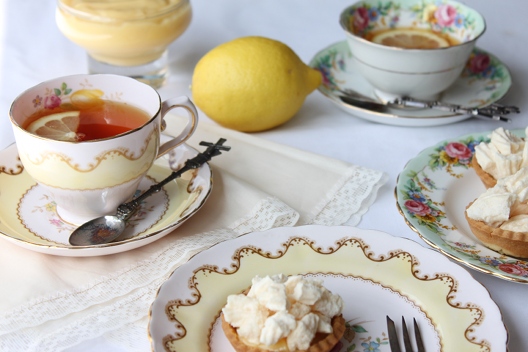
    For my dad’s card evening, I made some (non-primal) miniature lemon meringue pies. I made a simple pate sucre, which I rolled to 2-3mm thick and then cut into circles, which I placed into a muffin pan making small tart shells.

    Pate Sucre

    Makes: 20 mini tart shells   Takes: 5 mins + 30mins chilling time

    Ingredients:
    250g Soft Flour
    1 pinch Salt
    125g Butter (unsalted)
    65g Caster Sugar
    1 Medium-Large Egg
    1-2 drops Vanilla Extract

    • begin by sifting your flour and salt together, set aside
    • cream together your butter and sugar
    • gently beat your egg to break it up, then add bit-by-bit to your butter and sugar mixing well between each addition
    • once well combined, add vanilla extract
    • mix in sifted flour and salt, until the mixture  JUST comes together, bring into a ball and flatten
    • cover in cling film and leave it to rest in the fridge for 30mins or more (the longer the better)

    I then placed a cupcake liner on top of each pastry disc and filled with baking beans; after blind baking for 10mins I removed the beans and liners, and then baked them for a further 5-6mins until they were a nice golden brown.

    I left these to cool.

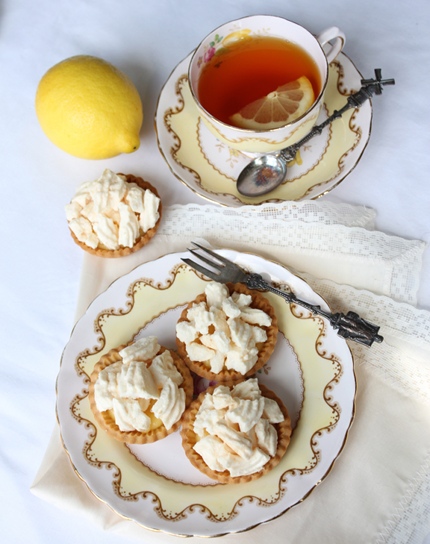
    Once I was ready to assemble the tarts, I filled the mini tart shells with 1 1/2 to 2 teaspoons of lemon curd, and then topped them off with an Italian meringue which I browned with a blow torch.

    Italian meringue

    Ingredients:
    60g egg whites
    120g caster sugar
    water

    • place the egg whites in a stand mixer, or bowl if using a hang whisk
    • with the sugar in a small saucepan, JUST cover the surface with water and place on the stove at medium heat
    • once the sugar has dissolved turn the heat up and begin to whisk your egg whites
    • once the sugar syrup reaches around 120C/248F remove from the heat
    • reduce the speed of your mixer and slowly and steadily, pour your sugar syrup into you egg whites along the side of the bowl. Be careful that stuff is HOT
    • once all the sugar has been added, turn up the speed of your mixer to max, and continue to mix until your meringue drops in temperature. you should have a sturdy and glossy Italian meringue

    Transfer this to a piping bag, with a round or star-tipped nozzle. Pipe meringue onto your tartlets and finish by using a blow torch to burn the top or place under the grill/broiler for a few minutes.

    (unfortunately I wasn’t able to photograph the ones I made with the fresh Italian meringue, but I saved a few shells, baked off the surplus meringue, filled the tarts with left-over curd and then topped them with crushed baked meringue)

    Even though these were a quick fix solution because I couldn’t be bothered didn’t have time to make a small batch of Italian meringue – I feel they are still appealing, and add something in the texture department. The buttery crisp bite of the tart shell, with the sweet but tangy lemon curd topped with sweet crunchy meringue. YUM – E!


  6. Blackberry Macarons

    March 14, 2012 by Tali

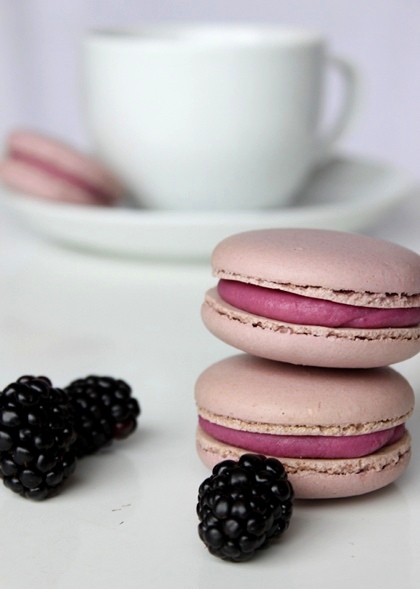
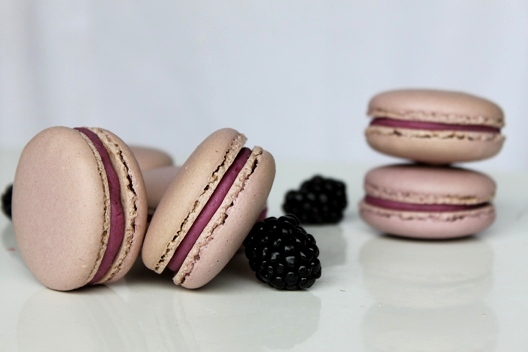
    3 weeks into my 4 week 100% Primal challenge, and I’ve found myself baking a batch of macarons…

    Don’t worry though people! I’m keeping on track – rather impressively in fact! Considering my weekend was spent on a hen/bachelorette weekend, where pretty much all food on offer was processed, coated in breadcrumbs and/or involved some form of bread or pastry.

    I managed to control any urge to eat anything I shouldn’t have, and I took along some primal snack items including my onion crackers and some primal chocolate chip cookies which I had been experimenting with a couple of days before.

    I know, I know – I probably shouldn’t have eaten treats such as cookies during a pure challenge, but I anticipated the junk food and thought its probably better to have primal snacks to nibble at, rather than eat what was on offer. I was pretty pleased with my efforts – except I did get back on Sunday evening feeling like I needed to eat as much as possible to make up for being deprived. Thankfully it was all primal approved fodder!

    I did however drink a crazy amounts of wine :S

    Oops!

    Well… it’s full of antioxidants right?!

    Now, “why on earth am I making macarons during this challenge?” you ask. “You have but a mere 5 days until your challenge is up!”

    WHY!?

    I’ll tell you why!
    Yesterday evening I attended a book launch. (HA! I love how that makes me sound all important, like I rub shoulders with stars of the literary world! I suppose in such circumstances, I did)
    Mo’s Aunt Miriam is launching Illegal the second book in her cycle of three novels set on Hayling Island, Hampshire, UK.

    I was asked to make a tasty treat for the exclusive family-only after party – and I was very quick to accept the challenge, and immediately jumped at the chance to make some more macs! After my last batch of salted butter popcorn macarons, I was back with the mac buzz, and raring to go!

    My only concern was what flavour to make them!

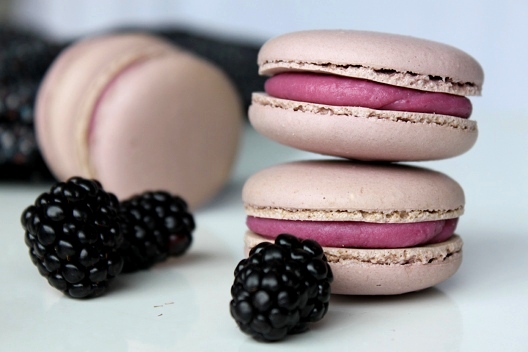
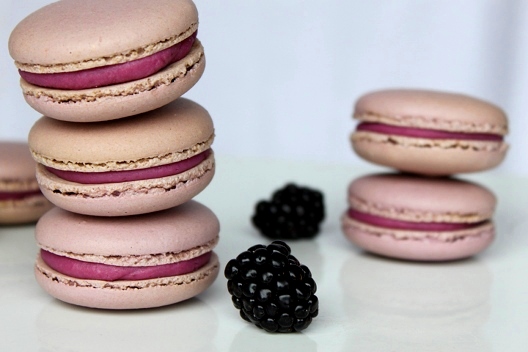
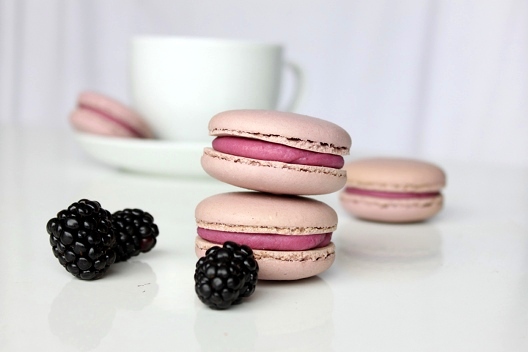
    I knew that a lot of the audience might not have appreciated the wacky flavour combinations of Adriano Zumbo, so I tried to think up a more tame choice. I got Mo to help me out, and with blackberries being one of his favourite fruits, and them being on offer at the supermarket, I decided to tackle the mighty blackberry.

    I turned to the master of macs, Pierre Herme and my go-to book when making macarons. I searched through the entire book, and there was NO sign of blackberry anywhere, so I moved on to my SIX other macaron dedicated books, which also showed no sign of a  blackberry inspired recipe.

    Of course, I could have worked up some kind of simple blackberry buttercream… but I don’t work like that. I wanted to create something AWESOME!

    I went back to Monsieur Herme’s Macarons and decided to adapt his recipe for blackcurrent macarons. I mean, they’re both a type of berry!

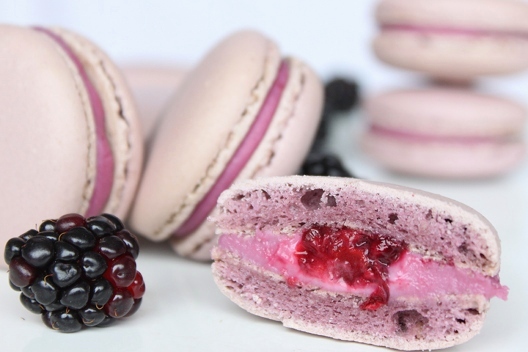
    The recipe was decided upon, I was to make a blackberry ganache in the same way M. Herme makes his blackcurrent ganache, and macerate the blackberries in much the same way he macerates his blackcurrents. SORTED!

    Blackberry Macarons
    Adapted from Pierre Herme’s Macarons Cassis

    Makes: 50 generous sized Macarons (72 regular)  Takes: Long times

    Ingredients for the macerated blackberries:
    200g blackberries (the smaller the better)
    200g water
    100g caster sugar

    • start by making your macerated blackberries the day before
    • place water and sugar in a small-medium saucepan, bring to the boil.
    • once boiling, add your blackberries and wait until the water just starts to come back to a boil, remove pan from heat and transfer to a bowl. Leave to cool, then cover and refridgerate until needed. (preferably overnight)

    Ingredients for the ganache:
    450g blackberries
    400g white chocolate

    • next, make your ganache.
    • Puree your blackberries, and then pass the puree through a fine sieve to remove all the seeds and tough pulp
    • place the puree into a small saucepan
    • transfer the white chocolate to a bain marie
    • while the chocolate is gently melting, slowly heat your blackberry puree
    • stir your chocolate constantly and once is has all melted, remove from heat and pour in your warm puree 1/3 at a time. stirring well between each addition
    • once the ganache has come together, pour into a dish and cover the surface with clingfilm/plastic wrap
    • place ganache in the fridge to cool and set

    Ingredients for the macarons:
    300g ground almonds
    300g icing sugar
    300g caster sugar
    75g water
    220g egg whites
    red gel food colouring
    blue gel food colouring

    • prepare your baking trays with parchment paper or silicone mats
    • sift the ground almonds and icing sugar to remove the coarse pieces of almond
    • in the bowl of your mixer with whisk attachment weigh out 110g of egg whites
    • place the remaining 110g with your almond/icing sugar mix
    • place water and caster sugar into a small saucepan, and start to heat it up – placing a thermometer in the pan
    • while the sugar is heating up, combine the egg whites with the almond and icing sugar into a paste
    • at this point add colouring. Blackberries aren’t actually black, so you’ll want to bring your mix to a purple. be sure to make the shade extra intense, once you add the meringue the colour will dilute, a lot
    • once your sugar syrup has reached 115C/239F turn your mixer on high speed to begin whipping up your egg whites.
    • when the temperature reaches between 118-121C/224-249F carefully take the pan of boiling sugar over the the mixer
    • turn the speed down to very low and gently pour the boiling sugar down the side of the bowl
    • once all of the sugar has been poured in, increase the mixer speed back up  to maximum, and let the meringue whip until it has dropped in temperature
    • fold meringue into the almond mix 1/3 at a time, being sure to break up the paste-like mixture. once all the meringue has been added, you can start to work the mix to the correct consistency.
    • fold, and work the mix so that that it changes to a lava-like consistency. A good way to test this is to allow the mix to ribbon, then wait a few seconds and the definition of the lines should disappear
    • transfer the mix to a piping bag fitted with a 6mm round nozzle
    • pipe uniformly sized rounds of mix onto your ready-lined trays
    • once piped, turn your oven on to 140C/280F
    • the macarons will need to be left to dry out for about 30mins to an hour – once the oven has warmed up, and the macarons have formed skins, and are no longer tacky to the touch, you can place your first few trays in the oven to bake.
    • they should take 12-14mins to bake, check regularly, and maybe turn them about 8mins into the cooking time
    • to check if they are done, the top of the macaron shouldn’t wobble very much
    • when out the oven, remove paper/silicone mat off tray and leave on a counter-top to cool down
    • once cool, pair up the macarons ready to fill them
    • drain the macerated blackberries and lay them out on paper-towel to dry off, if they are large, cut them in half
    • place a small blackberry or half a blackberry onto the centre of a macaron half,
    • tranfer the ganache into a piping bag, pipe your ganache neatly around the berry
    • place the macaron top over the filling, and pack away into an airtight container and place in the  fridge
    • allow macarons around 2 hours to come up to room temperature for an optimum indulgent experience
    • eat and enjoy!

    [I used fresh blackberries, but you can use frozen, just remember to allow time for them to defrost]

    Phew! As always – A LOT of work and time – but totally satisfying!

    The hardest part for me was not being able to taste them – I’ve stashed some away in the freezer so I can have a binge taste on Sunday – my cheat day! Woohoo!

    Mo, the official taster, gave his verdict – it was positive. Everyone else who tried one last night seemed to enjoy them – I noticed some people even went back for thirds and fourths!

    I, however, will have to verify their success on Sunday!

    If you yourself are interested in making a batch of macarons and are new to the skill, I found Mad about Macarons by Jill Colonna to be a really helpful starter guide to making macarons. Pierre Herme’s Macarons is also an excellent book (even despite the few translation errors) for anyone who is a macaron fan – this is THE book to own – even if its just to gawk at the pictures!


  7. Salted Butter Popcorn Macarons

    February 10, 2012 by Tali

    Five posts in, and not a single sign of a macaron – I thought for post number six it was about time I got a recipe in.

    I had intended on keeping things fairly healthy from now on… wedding is in just 6 months!

    I then considered how ‘healthy’ my previous primal chocolate tart post was, and then considered how strange it is to have a blog named Macnifique with no actual macarons in sight.

    So, to make myself feel better, and to allow you guys the pleasure, here you are!

    I did have to consider which route to go down with these macs. Pierre Herme really is the master, and working from one of his recipes is an obvious (but incredibly good) choice.

    Instead I decided to go crazy, down the Adriano Zumbo route with these. Making use of one of the many books I received for my birthday!

    For those of you who’ve never heard of Zumbo, and are thinking: What does some kinda fitness regime have to do with macarons!?, then this is for you:

    Adriano Zumbo is an incredibly creative, talented and very well respected Australian pastry chef. His macarons are renowned for being unusual, colourful, involving some wacky flavour combinations, and being totally delicious!

    His Patisserie holds a ‘Zumberon day’ every year, selling ONLY macarons for that one single day – with an average total of around 65 different flavours! Now that is a reason to visit Oz in itself!

    [Note to self: Find out when the next Zumberon day is!]

    His book, Zumbo was on my wishlist for quite some time, and very generously my soon-to-be in-laws bought me a copy for my birthday! It was the first present I opened on my birthday, and I spent a good 25-30mins looking through the book before opening any other presents! This is impressive! Believe me!

    This book doesn’t only contain macaron recipes, there is an abundance of quirky and wacky desserts, pastries, chocolates and cakes – which I fully intend on attacking in the not too distant future, but for now, I had to pick one recipe – one macaron recipe to be precise.

    I decided on the ‘salted butter popcorn’ macarons because:
    a) who doesn’t love a sweet and salty combo
    b) It was fun and quirky and the idea of crushed popcorn on the outer-shell just excited me for some reason AND…
    c) It didn’t require me buying/searching for too many weird and wonderful ingredients. (I’m on a budget here folks!)

    So, I attacked the recipe head-on.

    I feel I should stress just how enjoyable it was to make macarons again, stirring in every ounce of love I feel for them!

    I spent a few months last year churning out batches of macs and it just turned from a labour of love, into well… something I no-longer enjoyed.

    I think the break from mac’ baking allowed me to fall back in love with them, reminding me both how delicious they are, and how enjoyable the art of making them is. So, I can assure you there will be plenty more macarons appearing on here!

    I used the Zumbo recipe in its entirety, and followed all of his instructions – I think because it felt like so long since I’d made macs, I wanted to be 100% sure I was doing it right. It paid off, because they came out beautifully. The only thing I need to work on is piping them out more uniformly. I still tend to get a few 3 and 5cm macs but a fair average of around 4cm, which works out nicely, just not good enough for the obsessive, compulsive perfectionist in me!

    Salted Butter Popcorn Macarons
    by Adriano Zumbo from Zumbo

    Makes: 50    Time: a few hours – this is an art people!

    For the macaron shells:
    300g ground almonds
    300g icing sugar
    110g egg whites (at room temp)
    300g caster sugar
    75g water
    2g dried egg white powder
    110g egg whites (at room temp)

    • combine your ground almonds and icing sugar, work through a fine sieve, removing all the large pieces of almond
    • place one measure of egg whites into the bowl of your stand mixer, with whisk attachment and the caster sugar and water into a pan over low heat.
    • once the sugar has dissolved, turn the heat up. once the syrup reaches around 100C/210F throw the egg white powder into the mixer bowl, and beat egg whites until frothy by the time they have reached this stage, your sugar syrup should have reached 118C/244F 
    • turn your mixer onto high, and slowly pour the boiling sugar in a steady stream down the side of the bowl, avoiding the syrup directly hitting the whisk.
    • let the meringue continue on high speed until the mixture has cooled down – about 8 mins,
    • take your second measure of egg whites, and add it to your almond and icing sugar and combine
    • add your meringue to the almond mix in three stages, and work your mixture until it loosens up enough to slowly drip from your spatula (this is the tricky part, you don’t want to over work the mix, but if you under-work it, you’ll end up with lumps and bumps on your macs… no good!) This is just one of those techniques which you need to get a feel for
    • transfer the mix to a piping bag fitted with a 13mm plain round nozzle
    • pipe mixture onto lined baking sheets (I prefer to use silicone/coated mats)
    • pipe 4cm rounds, leaving room for spreading, and once the whole tray is piped, sharply hit the tray on the table to let he mix spread and level-out
    • leave the piped mix to form a crust for about 30mins. While waiting pre-heat oven to 135C/275F
    • when ready, bake for 16mins, turning the trays around after 10mins
    • leave the shells to cool before removing from the sheets, and pairing them up in prep for the popcorn and the filling!

    For decorating the macarons:
    1 bag microwavable popcorn plain or butter flavoured (I went for buttered)

    Melted, unsalted butter (I ended up using about 50g)

    • cook popcorn according to instructions, place about half into a food processor and process until desired size
    • brush cooled, melted butter onto the tops of each macaron shell, and dip into the popcorn crumbs, leave to set in fridge.

    Salted Buttercream
    100g caster sugar

    38g water
    75g lightly beaten whole egg
    45g egg yolk
    200g unsalted butter, cubed and softened
    3g sea salt flakes (I used Maldon)

    • place caster sugar and water into a pan, heat on low until sugar has dissolved. turn up to high and heat up to 121C/250F
    • place egg and yolks into your stand mixer with whisk attachment, and mix at medium speed for 2mins
    • when sugar is at 121C, pour gently down the side of the mixer bowl, and whisk mixture on high speed until the temp drops to around 50C/122F
    • while still mixing, slowly add cubes of butter, one at a time, and mix further until you are sure the lumps of butter have completely worked through the butter cream. Fold in the sea salt
    • transfer to a piping bag with a 9mm nozzle, and pipe buttercream onto half of shells, then gently stick the other half of the shells on top. Place assembled macs onto a tray and leave to set in the fridge
    • Bring to room temp, serve and devour!

    Yeah… LONG recipe! One which I thoroughly enjoyed working through.

    This really is one for the dedicated!

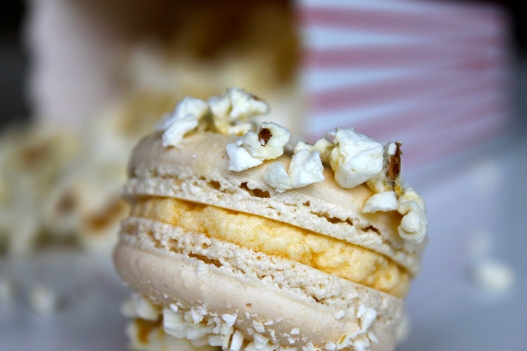
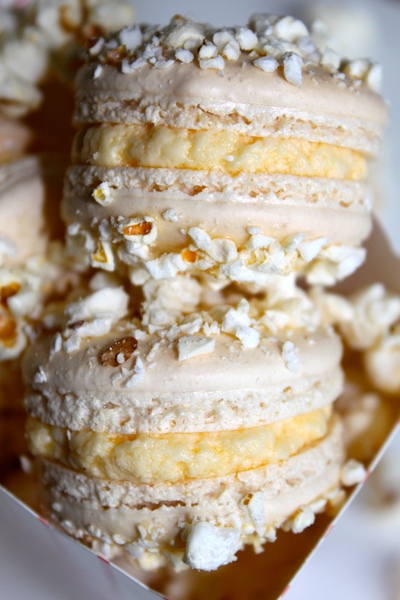
    Let me tell you one thing. These macarons are YUM!! A perfect sweet/salty combination that balances fun factor with refinement.

    Who knew popcorn could be so classy?

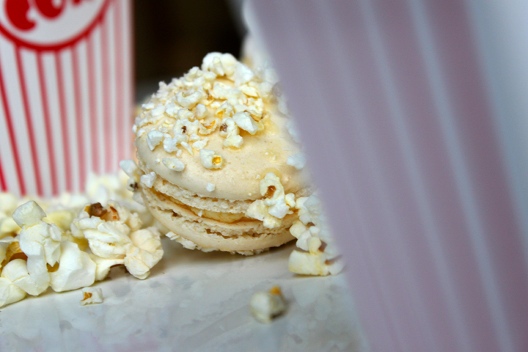
    As you can see above, I decided to play around a little with the macs, leaving a few shells bare and coating the edges of the buttercream filling in the popcorn crumbs 🙂


  8. Double Chocolate Crisps (Havreflarn)

    February 5, 2012 by Tali

    errrrrr…… you said what now!?

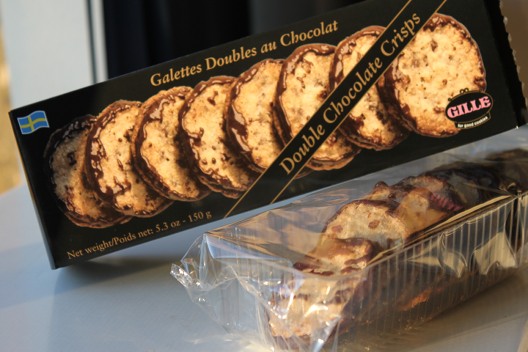
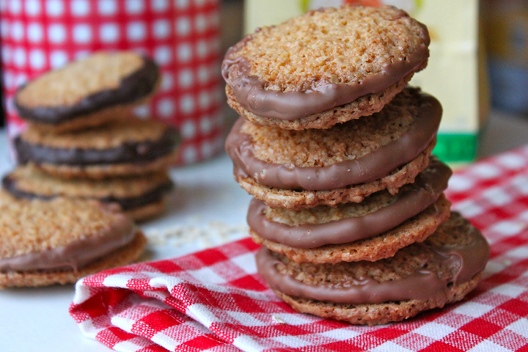
    So, quite a few months ago – maybe even a year ago, Mo’s mom had bought a box of these strange looking biscuits/cookies.

    (Mo is my fiance for those that are interested)

    The box called them ‘double chocolate crisps’. I was intrigued, but not overly excited.

    I don’t tend to get all that excited about biscuits and the like.

    One bite of these babies and I was hooked! I could have eaten the entire box! Thankfully I was in company, and totally lacking in chutzpah.

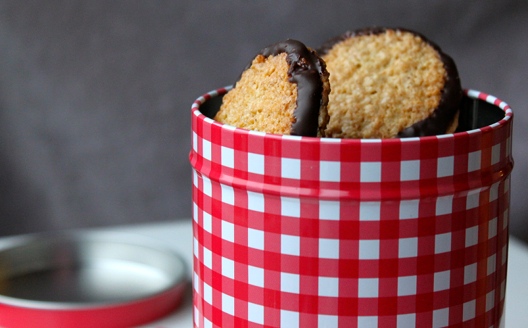
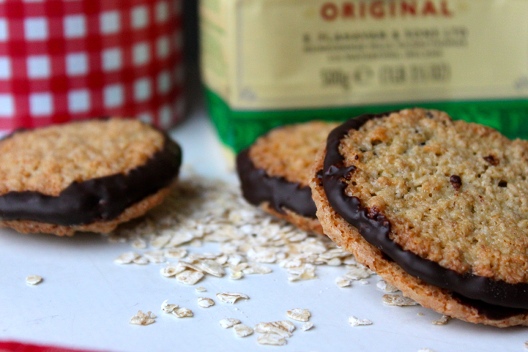
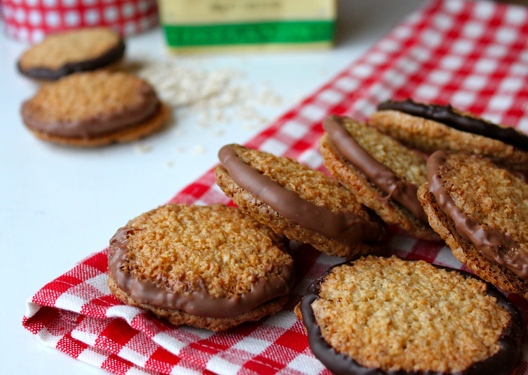
    They were incredibly crisp, totally delicious, oat-ey with and almost nutty flavour (although no nuts are mentioned in the recipe) and a generous amount of chocolate adhering the 2 halves together make them rich and totally decadent, the perfect partner to a cup of tea or coffee.

    It was on that day, I decided that these were my favourite of all store bought biscuit/cookie confections.

    Being the lover of baking that I am, I finally decided to take it upon myself to attempt to recreate these gems!

    I knew (from the packaging) that these were a Swedish biscuit. But I had no idea what the Swedes called these, or how to find a genuine recipe.

    I was largely helped along, by Clotilde of Chocolate & Zucchini who started off a search for a recipe (in 2004) by asking her readers if they knew of any. The contributions range from 2004 up until 2011 and there were a few different suggestions mentioned.

    What I found largely beneficial, was discovering the Swedish name for them, HAVREFLARN,  which allowed me to search further for an appropriate recipe.

    It comes as no surprise to me that there was a vast array of recipes online. Some were similar, some identical and some quite strange.

    My first attempt used one of the more simple recipes (including syrup in the mix). It produced a very tasty, but highly textured cookie whereas the boxed version has a lot less texture.

    I then decided to try processing the oats – with disastrous results! They turned out crumbly and dry.

    I then attempted an alternative recipe whose ingredients better matched up to those noted on the box – minus all the added preservatives…

    I decided to try a half recipe, see how it turned out, and in my rushed attempt to throw the mixture together,  I made a few little errors.

    Firstly, the whole recipe calls for 1 egg, instead of using half an egg I threw in a whole one, making the mix rather wet. Secondly, I also failed to use half the amount of sugar. I’ve never claimed to be a genius!

    I spooned a few dollops onto a baking tray anyway, and was quite pleased with my results! They didn’t look quite as refined as the boxed cookies, but they had a similar crunch, just not quite as nutty in flavour. Maybe the people over at GILLE toast their oats?

    So in some ways, I guess I developed my own recipe, and despite the doubling of sugar, they weren’t overly sweet. Woohoo!

    Double Chocolate Crisps / Havreflarn

    Makes: 10 double cookies   Time: 40-45 mins

    Ingredients

    50g Butter, melted
    120g Oats
    1 whole Egg
    130g Caster Sugar
    1 Tbsp Plain Flour
    1 tsp Baking Powder

    150g good quality dark chocolate

    Preheat oven to 175 C/ 347 F

    • Combine oats, sugar, egg and melted butter.
    • Sift in flour and baking powder, and mix through.
    • Take teaspoon sized amounts of mixture, roll into balls, and space generously onto a lined baking tray. (You should have approx 20 pieces to make 10 biscuits)
    • Wet the back of a teaspoon and gently flatten the balls, they will spread, but this should allow them to spread evenly, reducing a dome in the centre.
    • Place trays in preheated oven and bake for 7mins, then turn trays, and bake for a further 3-4mins.
    • They should be a nice even golden brown so you may have to adjust your timing to suit your oven.
    • Once ready, place onto a cooling rack.
    • Chop chocolate finely, and melt either over a bain marie, or very gently in the microwave.
    • Once biscuits are cool, and chocolate is melted, dip the underside of once, and then place another underside onto the chocolate, adhering the two together, leave to set. If you are impatient like me, stick them in the fridge to set.
    • Pour yourself a cold glass of milk, or pop the kettle on and make yourself a brew.
    • Eat and thoroughly enjoy!

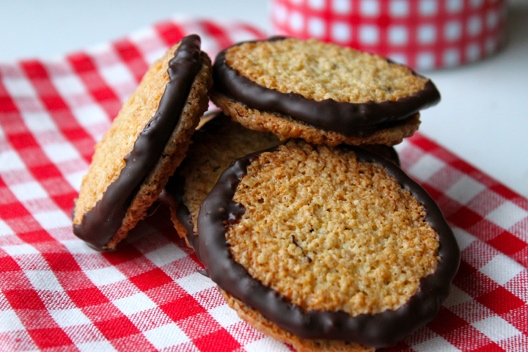
    When I made this batch pictured, I was feeling a little experimental, and decided to try some with milk chocolate.

    They were good, but I think part of the charm of these biscuits is the intensity of the rich dark chocolate, paired with the warm nuttiness of the crisp, oat-ey biscuit.

    I feel like maybe I could have refined this recipe a little further, but I’ll leave that to another day.

    I’m pretty certain this is a recipe I’ll come back to!

    Hmm… Think I’ll go get myself that glass of milk – these things aren’t gonna eat themselves!


  9. M&M’s Truffles

    January 31, 2012 by Tali

    Yes… I said it! Truffles and M&M’s in one single delectable form!

    Where does this come from you ask?

    Well, Let me tell you!

    Last weekend was a friend’s birthday. After a little research, I discovered that she was a big fan of both original choco and crispy M&M’s.

    How was I to take humble M&M’s and turn them into something exciting, slightly unusual and totally delicious?

    I began by trying to see what others had done creatively with M&M’s, and most of my research drew me to cakes, brownies, cheesecakes and cookies. I wanted to do something a little different… something special… something unique!

    Now… I guess I had noticed for some time, that there is a definite trend in truffles popping up online, and I suppose that is what triggered the idea of M&M truffles!

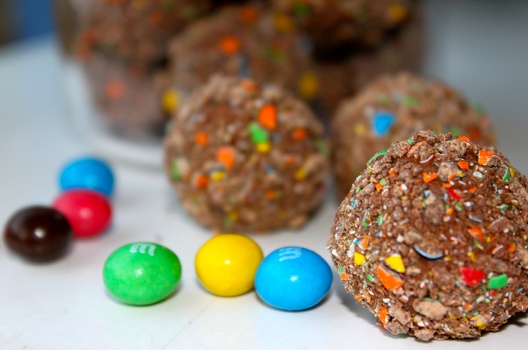
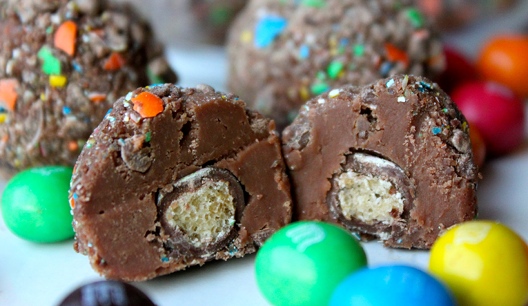
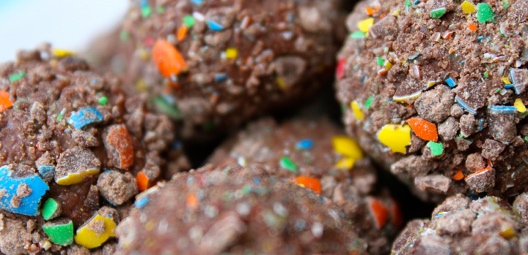
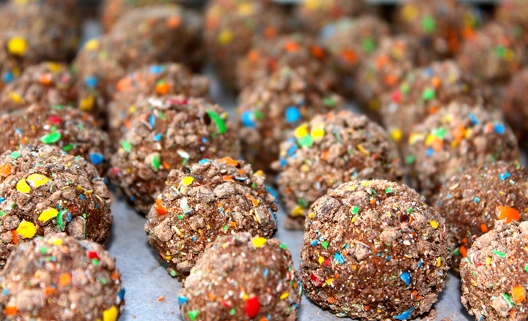
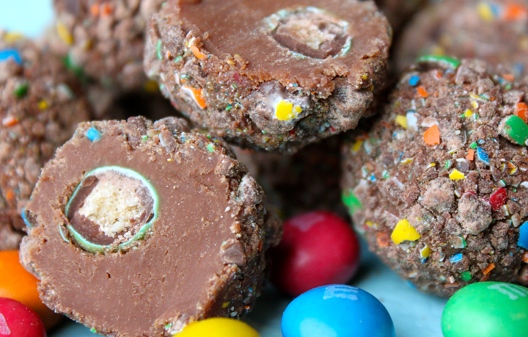
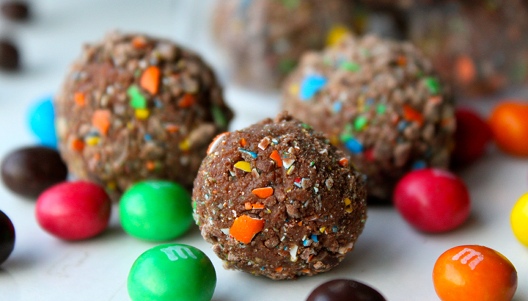
    Having a brief that included both original and crispy M&M’s in the mix, I began to imagine, a crispy M&M, surrounded by a rich and creamy milk chocolate ganache, coated in crushed choco M&M’s, with the intention of all the broken up colourful shells to pop brightly against the rich warmth of the chocolate tones.

    Mmmmmmmmmm!

    I did a little research to see if anyone else had thought up the same idea, and to my surprise there was a complete lack of truffle recipes containing M&M’s!!! I found one single truffle recipe which mentions M&M’s from Busy-at-Home. This though, was nothing like what I had in mind.

    Had I thought up something original?

    Had I stumbled upon the almost-undiscovered?

    (possibly not – someone may have made these and just not blogged about it.)

    I got very excited about these truffles – I wanted to make them instantly. Only, for some reason I found it a little difficult to get hold of M&M’s from my local supermarket. Shameful! I had to go to my 3rd choice store!

    Anyhow! Once I had got my ingredients together I set to work on making these marvelous confections.

    I was using a fairly humble confection as my feature ingredient, yet I still wanted these truffles to be of the highest standard. So, I threw together a ganache using a high quality milk chocolate and luxurious double cream. The truffle element needed to be refined – to allow the M&M’s to be taken to the next level.

    M&M Truffle Recipe

    Makes: 25-30 pieces  Time: 30-35mins

    Ingredients:
    300g good quality milk chocolate
    150g double cream
    60g crispy M&M’s (2 small bags)
    185g choco M&M’s (large bag)

    • Chop your milk chocolate very finely, a serrated knife works best. Place into a shallow bowl or dish.
    • While preparing your chocolate, start to heat up the cream in a saucepan over a medium to low heat to avoid overheating it and scalding the cream.
    • Once the cream has heated (but not boiling) pour over your chocolate, let it settle for a few seconds, and then gently stir together.
    • When fully combined, cover the surface with cling film, and place in the fridge until firm, or until you are ready to make the truffles (the ganache can be made a day or 2 in advance).
    • Prepare 2 baking trays by placing a sheet of greaseproof paper on each.
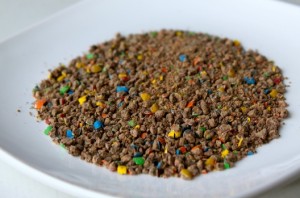
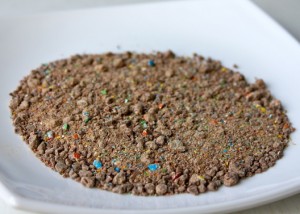
    • Place your choco M&M’s in a sealable bag, and using a rolling pin, or another device, evenly crush the M&M’s. be sure to leave some remnants of the colourful sugar shells. Pour some out into a shallow dish or plate.
    • Scrape a heaped teaspoon of the ganache, and warm up gently in your hands (I wore gloves for this process) when slightly softened, take a crispy M&M and place it in the centre, enrobe it in the smooth milk chocolate ganache. Roll into a ball, and place onto one of the baking sheets. Continue to do this until you have used up all of your ganache and/or crispy M&M’s
    • Once you have all the balls ready, they will have firmed up slightly, so you will need to warm them up gently in your hands before coating in the crushed choco M&M’s.
    • Place your coated M&M’s truffles onto your clean, lined tray, and place in the fridge to firm up. Store in fridge.
    • Wrap up for a gift, or eat and ENJOY!

    Making the Truffles

    These should last about a week. However I seriously doubt they would live to see more than 3 days… even if they’re lucky. My left over truffles lasted no more than a day and a half.

    (I feel I must stress they were not all eaten by myself!)

    This recipe could produce more truffles if you chose to make them a lot smaller. The ganache to crispy M&M’s ratio is not exactly 1:1, so if when I make these in the future, I will definitely play around with the size of the truffles! Maybe use a level teaspoon of ganache? If you chose to do this, you will need more crispy M&M’s and possibly more crushed choco M&M’s for coating.

    I should add, that I tried two methods in breaking down the M&M’s for the coating, the first was the obvious – placing the sweets in a zip-sealing bag, and hammering them with a rolling pin or other utensil, the other method I attempted was putting the sweets in a food processor, and pulsing until ready.

    By Hand

    By Machine

    I found that the first method produced better results.

    In my opinion, the machine didn’t process them evenly, so I was left with some pieces which were just too big and mounds that were just too fine for coating the truffles. Therefore I recommend the ‘by hand’ method, making it a lot easier to control AND you get to relieve yourself of some frustration… those poor little M&M’s dudes!

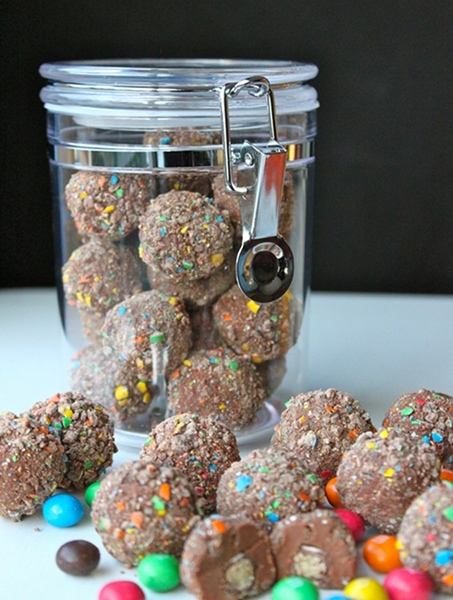
    For their purpose I filled a jar with as many M&M truffles as could fit. I presented these babies to my friend, who very quickly hid them at the back of her fridge for her own personal consumption. I don’t blame her – and neither would you!

    These things are EPIC!

    Therefore there is no real need for the recipient of these delightful gems to share them with anyone. You have my blessing.

    These could quite possibly only be bettered by using pretzel M&M’s in the centre… Or peanut butter M&M’s… Or just plain ol’ peanut!

    Oh WOW!

    Off I go to track some down!


  10. Hello World! This is Honeycomb!

    January 18, 2012 by Tali

    I’d been toying with the idea of starting a blog for quite some time.

    I knew it was going to involve food – particularly baking.

    Being the slave to procrastination that I am, it took me a while to get things started, and even then it has taken me quite some time (I dare not tell you how long) – to get this first post started. My hope is that once this gets rolling it will keep on going.  *fingers crossed*

    Besides being momentarily unemployed, one of the elements that truly sparked this mission was my love of baking. [I was training to become a pastry chef – see about me for more details.] It is something I would like to share with the world – because sometimes some of the people around me don’t appreciate/understand/care about me rambling on about how its Macarons NOT macarOOns! or how cupcakes are very different to muffins, or how buying a good quality chocolate really does make ALL of difference!

    Wanting to share my passion and experiences in the kitchen, I have been further spurred on by being completely spoiled on my birthday and received the following pile of books:

    I was serious about the pile! Whats worrying is that I received a few other books just a few days later for Chanukah/Christmas!

    My wonderful Fiance bought most of these books for me – I cant decide if he is mad for buying these all at once – or just really keen for me to fatten him up!? I did have them on my wish list- I just did not expect to receive them all on one day – not even in the same month….. oh dear!

    Now – I’ve not exactly set myself a mission a la Julie Powell, but I have got a vague plan to work my way through a vast array of recipes from the super healthy to over-crazy gorge-on-this-once-in-a-lifetime kinda treats.

    The book shelf - and I've just realised there are a number of my books that are not on there. They didn't fit on the shelf, so I'm working on convincing my dad to donate another shelf to his dear daughter!

    I’ve got a growing list of things I would like to make and post. Whilst flipping through Couture Chocolate by William Curley this morning (looking for his recipe for Pistachio Opera) I stumbled upon his recipe for Honeycomb and decided on that instant that I needed to make some honeycomb- TODAY!

    Its something I’ve never really felt any acute urge to make – until this morning. I know of a certain friend would will be banging my door down once she finds out what I’ve been up to.

    So I pulled all the ingredients together – luckily I had everything to hand in the kitchen. Within mere minutes, I had made my batch of Honeycomb. William Curley calls for the block to be broken down once cool and then coated in dark and milk chocolate (what would a Curley recipe be without chocolate?). I had no good quality chocolate lying around, so a trip to the supermarket it was!

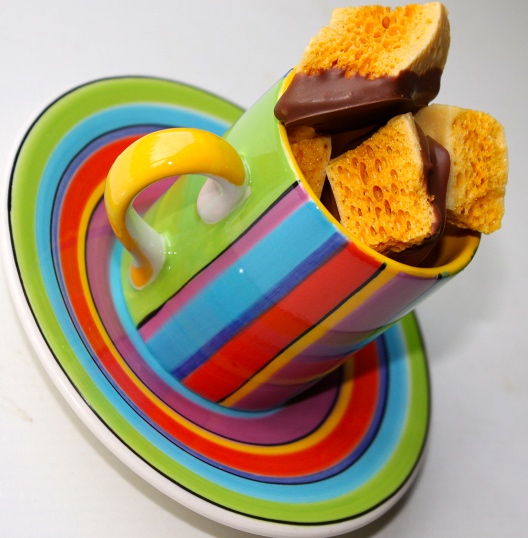
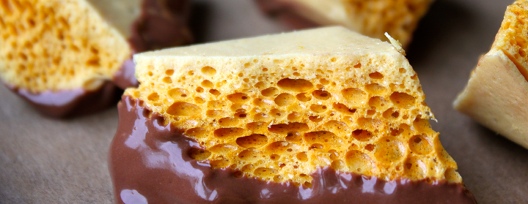
    Golden slabs of crunch-yummy goodness!

    At first, as it came out the pan the honeycomb was quite pale in colour, but as it was left to cool and set, the rich golden colour developed. One of the most enjoyable tasks, was hacking into the large slab and cracking off oddly shaped piece of the honeycomb…

    Nugget!

    …then enrobing each nugget in rich, Velvety chocolate.

    I chose to coat most in milk chocolate. Having tried both the milk and dark chocolate coated honeycomb I think I prefer the richer dark chocolate. It took some getting used to after a childhood of eating Cadbury’s Crunchies. But I feel that the darker chocolate brought out the deeper caramel tones of the honeycomb.

    When you start to run out of chocolate....

     
    Chocolate Coated Honeycomb
    Adapted From William Curley, Couture Chocolate: A Masterclass in Chocolate (Cinder Toffee)
     
    Ingredients
    50ml Water
    190g Caster Sugar
    50g Light Soft Brown Sugar
    140g Liquid Glucose*
    60g Honey
    10g Bicarbonate of Soda (sifted)
    500g Tempered Dark Chocolate
    500g Tempered Milk Chocolate
     
    • Line a pan or large shallow dish with baking parchment.
    • Place into a large pan, Water, Caster Sugar, Brown Sugar, Glucose and Honey. Combine. Turn flame/heat on low, and allow all the sugar to fully dissolve. When this has fully melted – making sure all sugar has dissolved, turn heat onto medium/high and let the mixture boil until is reaches 144-146 C (291-295 F).
    • Take the pan off the heat immediately, add the Bicarbonate of Soda, and mix in well, quickly. The mixture will rise, once it looks as though its about to over-flow, pour directly into your lined pan/dish. Leave this in a cool, moisture free place to cool down and set.
    • Once cool, remove paper, and cut into reasonable bite-sized portions.
    • Prepare your chocolate being careful not to over-heat, and dip half the honeycomb into the dark, and the other half into the milk chocolate. Alternatively you could keep it as it is and leave it bare – but as my man would say – anything is good if chocolate is involved!
    • Be sure to store in an air-tight container.

    *William Curley’s recipe actually calls for 150g liquid glucose and 50g honey, as my tube of glucose only contained 140g, I substituted that 10g with an extra 10g of honey. It seemed to turn out just fine… sometimes we have to adapt our recipes to suit whats lying around in the kitchen!


    Golden nuggets, enrobed in rich milk chocolate... Mmmm!


    They are perfect for wrapping up in cellophane gift bags, tying with a ribbon and giving to someone as a gift.

    Serve up a few pieces with a shot of espresso!

    Equally as delicious accompanying a large cup of tea 🙂

    Mmmmmmm!