RSS Feed

‘Primal Snacks’ Category

  1. Gluten-Free Primal Jaffa Cakes

    March 19, 2013 by Tali

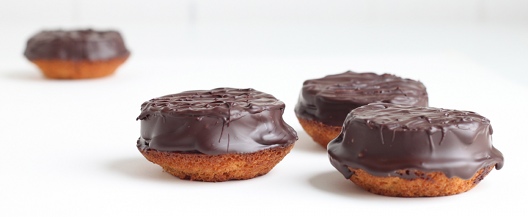
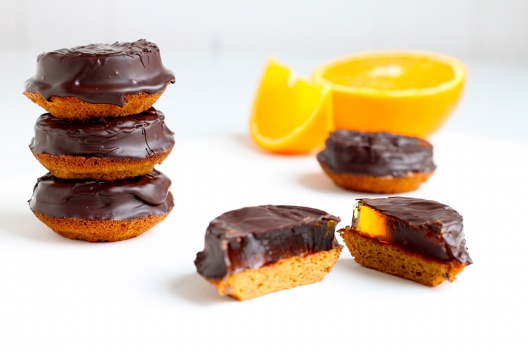
    The other day I had a major hankering for some Jaffa cakes. The magical combination of light sponge, zesty orange jelly topped with a coating of dark chocolate.

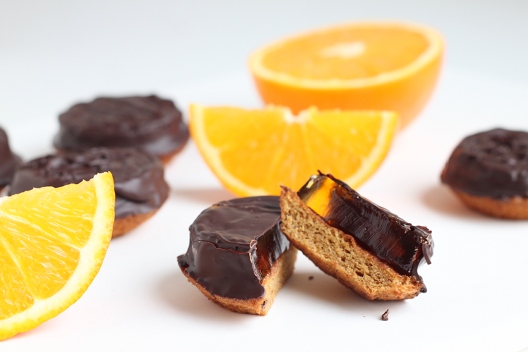
    Biting into one is a true sensory experience – as you bite down, your teeth crack through the delicate snap of tempered dark chocolate into the squidgy Jaffa orange jelly, finishing off with a comforting bounce of delicate sponge cake.

    And the flavours…. well who can argue with the truly exquisite combination of orange and dark chocolate?

    No one I know!

    This snack item is quite deceptive. They are so light and moreish – before you know it – you’ve gobbled up half the pack. And so the only option is to destroy the evidence!

    There is another problem with the humble Jaffa Cake. It contains wheat flour (gluten – nasty stuff), refined sugars, and preservatives. We don’t need or want these things in our food. So I took it upon myself to re-invent the Jaffa Cake, making it gluten-free, refined sugar-free and preservative free!

    I bet you’re thinking ‘yeah, alright, but I bet it’s also taste-free too!’

    Well, you would be wrong!

    These babies are truly epic. You get the same flavour burst and texture combination that makes for a totally immense sensory experience – without any of that yucky business.

    How did you manage that? – you ask!?

    Well just take a wee look!

    Gluten-Free Primal Jaffa Cakes

    Makes: 12   Takes: 40mins

    Ingredients:
    2 large free range eggs
    50g(1.76oz) raw coconut palm sugar
    50g(1.76oz) ground almonds

    2 large oranges (preferably Jaffa)
    1 Tbsp orange marmalade (optional)
    1 (11g/0.38oz) sachet gelatine OR 4 leaves of gelatine sheets (soaked)

    150g (5.5oz) dark chocolate (minimum 70% cocoa solids)

    Make the sponge

    • Pre-heat oven to 180 C/350 F. Grease a 12 hole cupcake/muffin tin
    • Place the eggs and coconut palm sugar in a heat resistant bowl. Place on top of a pan of simmering water making sure the bowl doesn’t touch the water
    • Whisk the eggs and sugar (by hand or using an electric hand beater) until it reaches the ribbon stage. This should take 4-5 minutes with an electric beater, and 5-10 minutes by hand
    • Add the ground almonds and mix to combine
    • Divide the mixture evenly between the 12 muffin holes. I found it useful to use my medium sized scoop to portion these out evenly
    • Place in the middle of the oven and bake for 8-10mins. They should spring back when gently pressed
    • Gently remove out of the baking pan, and leave to cool on a wire rack

    While the sponge is baking, make the jelly

    • Line a square brownie tin with plastic wrap – allow excess over-hang
    • Zest 1 orange, and place the zest in a saucepan. Juice the 2 oranges (you should hopefully get around 150-200ml of juice – that’s just over 1/2 cup-3/4 cup) place this into the saucepan along with the (optional) tablespoon of marmalade
    • Heat the mixture up until the marmalade has dissolved. Make sure the mixture doesn’t boil
    • Once the mixture has heated up, sprinkle the gelatine onto the surface and whisk briskly until the gelatin is thoroughly dissolved and incorporated into the mix
    • Gently pour the liquid into the tin and fold over the excess plastic wrap to touch the surface
    • Allow this to cool to room temperature before placing in the fridge to set properly.

    Putting the Jaffa cakes together and chocolate coating them

    • Take your jelly out the fridge, making sure it has set fully. Then cut 12 rounds slightly smaller than the tops of the sponge cakes
    • Place the jelly on top of the sponge
    • Chop your dark chocolate and put it into a microwavable bowl
    • Warm up your chocolate at half power in 30 second bursts mixing gently between each 30-second burst
    • Be patient and make sure not to over-heat your chocolate. You want to keep that chocolate tempered to ensure a nice crisp shell (for that full sensory experience!)
    • Once the chocolate is ready, using a silicone pastry brush – any of these will do – brush the chocolate over the top of the jelly allowing it to coat the sides and just onto the surface of the sponge
    • Leave them to set on a wire rack
    • Arrange them on a pretty plate and serve to guests – OR – devour and repeat recipe, then serve!

    The recipe does look long and a little overwhelming but it’s really not so difficult and it’s worth the effort! It may be wordy but I just wanted to make sure you get all the steps right!

    If you are just after the gluten-free (and aren’t so worried about the refined sugar) feel free to use the jelly recipe from here to fill your Jaffa cakes. I tested this recipe but actually found that the flavour of the orange jelly using the fresh orange juice produced a more authentic Jaffa cake taste.

    True story!


  2. Rosemary & Parmesan Crackers

    June 22, 2012 by Tali

    A wine tasting you say!?

    Well, but of course! But… What shall we snack on while tasting these wines!?

    Cheese!

    Obviously.

    Now, I’m not one to pass off the opportunity to have a sip of wine here and there, so when duty called…

    With our wedding coming up (less than 60 days to go! Arghhhh!) we needed to taste some wines to be served at the reception.

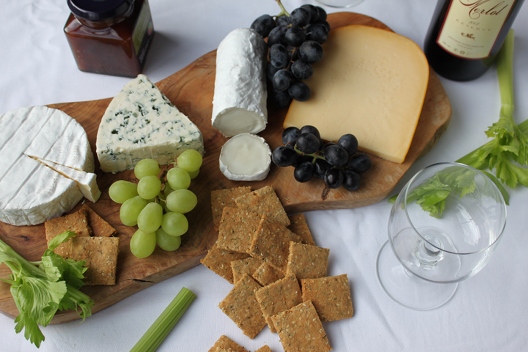
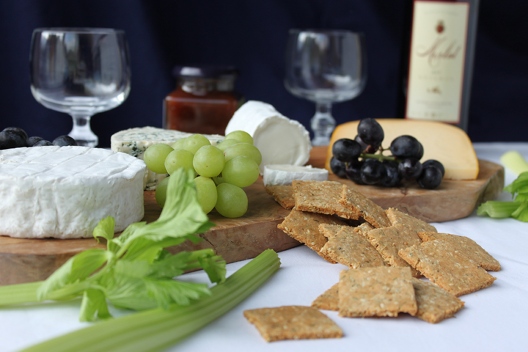
    I suggested the brilliant idea of tasting the reds with a nice spread of cheese. So I popped over to the local store, and bought myself a good selection of quality cheeses.

    Danish Blue, Goats cheese, Camembert, Smoked Brie & Gouda – with that sorted I searched the shelves for a chutney to accompany (that contained no wheat or corn flour as a thickener) and set off home to assemble the cheeseboard!

    But… wait a minute! What am I going to serve the cheese on!? I can’t very well serve them a-top a generic cheese cracker – No. This called for a primal cracker like no other!

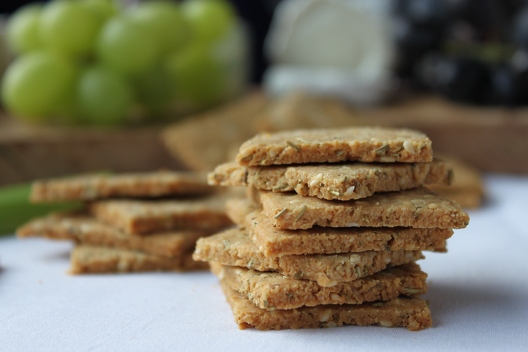
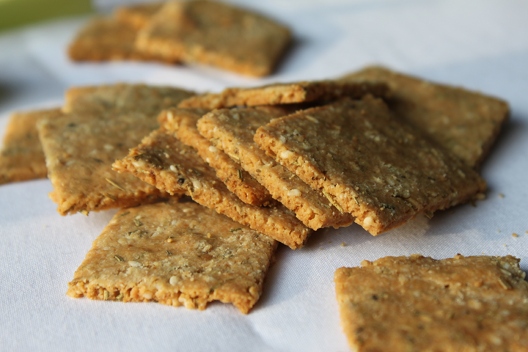
    I took the recipe I used for my Onion and Sesame Almond Crackers and flipped it a few degrees to make these delectable cracker babies. By swapping a few of the flavour elements and adding in some shaved parmesan cheese (because the cheeses on the cheeseboard weren’t nearly enough, obviously) I transformed some punchy crackers into serious taste-bud spiking gems!

    Like the crackers I’ve made before, these are simple to throw together, easy to bake and satisfy the primal eater’s need for something to put that cheese onto (assuming, of course, you’re one of those primal eaters that can tolerate dairy).

    On top of the fact that these hold up some fabulous flavours, they’re also gluten free!

    Rosemary and Parmesan Almond Crackers

    Makes:50 pieces  Takes:35mins

    Ingredients:
    2 cups Ground Almonds
    2 Tbsp Dried Rosemary
    2 Tbsp Grated Parmesan Cheese
    2 Tbsp Sesame Seeds
    1/2 tsp Onion Granules
    1/4 tsp Sea Salt
    1 Egg (beaten)
    2-3 Tbsp Extra Virgin Olive Oil

    • preheat oven to 180 C/350 F
    • measure and combine all dry ingredients – mix well
    • add beaten egg and olive oil mix until it forms a ball
    • divide mixture in 2
    • roll between 2 pieces of parchment paper until about 2-3mm thick. score the surface into desired size and shape of crackers
    • place onto a baking sheet, bake for 20-30mins until golden brown
    • cool on wire rack, break apart and serve as desired

    I chose to serve these with a cheese board but they could be just as delicious if served up with some dips or used as part of a lunch box.

    I’m looking forward to playing around with a few more flavour combinations!

    … Now I’m sure you’re wondering how the wine tasting went – aside from the delicious cheese and crackers of course. Well, Let’s just say we finally came to a decision and we were all pretty merry by the end of it!

    Good Times!


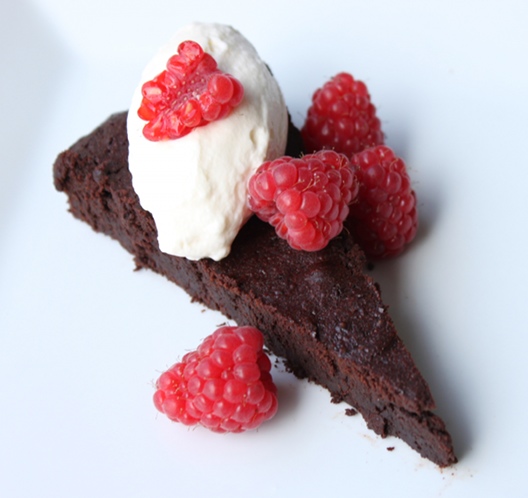
  3. Chocolate Torte

    June 18, 2012 by Tali

    Everyone needs to indulge in a little chocolate sometimes.

    What better way to enjoy the food of the gods than in rich, dense and powerful cake-like form?

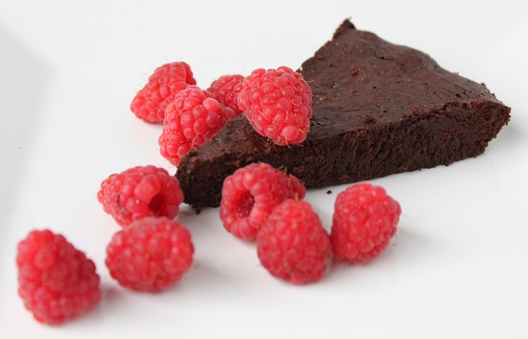
    I say cake-like because this isn’t really a cake – not in the sense that I know of cake; to me a cake needs to be fluffy, light and, to be honest, have a little more height to it. This is not a pie or a tart either.  One could liken its texture to something like a brownie – it is dense, fudgey and intoxicating in its chocolatey-ness. I have decided to label this delicious baked good as a torte.

    This temptress of a dessert packs a real punch. There is A LOT of dark chocolate AND cocoa powder involved in this recipe. It is gluten, nut and (any kind of) flour free. This baby would be acceptable to a vast number of people – unless of course they don’t like chocolate; but let’s be realistic – anyone who doesn’t like chocolate needs their head checked!

    I came across this recipe a few weeks ago when looking for something that was both nut and gluten free. I was baking for a friend’s bridal shower/kitchen tea. The lady of the hour is allergic to nuts, and her sister is gluten intolerant so in an effort to please them both I searched for a recipe that could fulfil both their dietary requirements. It just so happened that it also allowed room to satisfy my requirements as a primal enthusiast.

    This recipe uses a short list of ingredients and an even shorter method – therefore this should please anyone who hates spending too much time in the kitchen.

    In short – This recipe pleases pretty much everyone!

    To make this more Primal-acceptable – I adapted the sweetener from the original recipe which I found here.

    By replacing the caster sugar with unrefined coconut palm sugar I made this an almost guilt-free treat. But believe me – this stuff is so good – you’ll think you’ve just sinned BIG TIME!

    I’d like to try this with honey at some point – it may make the texture even better. If you experiment with that – please let me know how it turns out!

    Primal Chocolate Torte
    Adapted from a recipe by Shana Hillman

    Makes: One 8 inch pan/tart dish  Takes: 45mins

    Ingredients:
    120g Dark Chocolate ( I used Lindt 70%)
    120g Unsalted Butter
    150g Coconut Palm Sugar
    80g Cocoa Powder
    3 Eggs (beaten)
    1 tsp Vanilla extract
    1 pinch Sea Salt

    • preheat oven to 150C/300F. Grease an 8/9 inch tart pan.
    • place the butter and chocolate in a bowl, over a double boiler and let it melt, very gently
    • meanwhile, beat your eggs then add vanilla extract
    • place all of your dry ingredients – coconut palm sugar, salt and cocoa powder (sifted) – into a bowl
    • when your butter and chocolate have melted, remove from heat
    • add egg, incorporating fully, then fold in the dry ingredients
    • once the mixture is combined, pour into tart pan and spread evenly
    • place in your preheated oven for 25-30mins
    • remove from the oven and cool

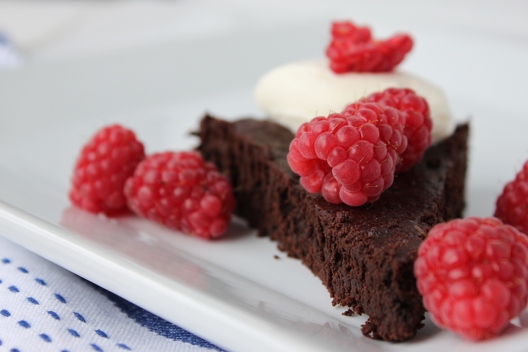
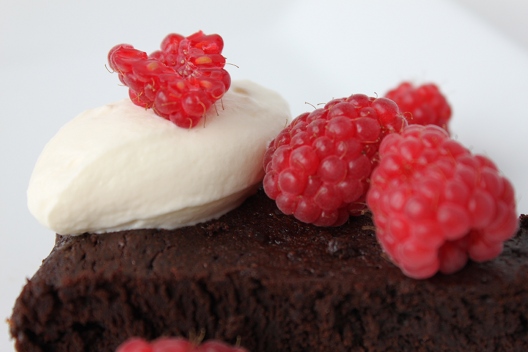
    Serve as a dessert – warm with cream/ice cream and some tart, fresh berries. Or let cool to room temperature and enjoy with a cup of tea or coffee – add the cream and berries for extra indulgence.

    You could amp up the decadence scale and top this with a luscious chocolate ganache to turn it into a seriously dangerous indulgent treat.


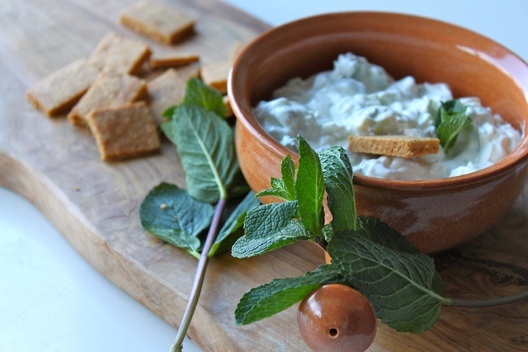
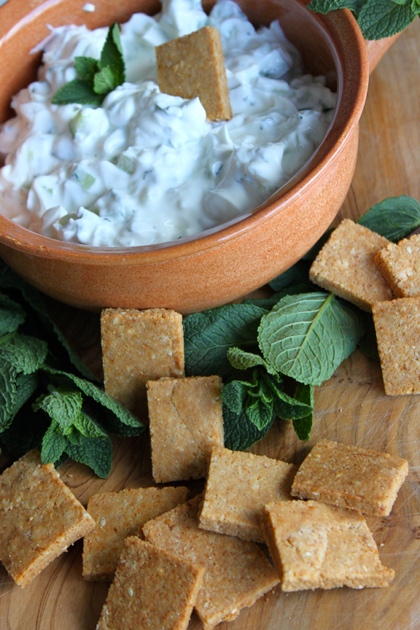
  4. Tzatziki with Onion Almond Crackers

    March 9, 2012 by Tali

    I have always loved Tzatziki.

    Long before I realised how healthy it can be!

    Recently, Mo and I discovered that store bought tzatziki (from Sainsbury’s) was one ready-made dip we could trust (in an emergency at least – no nasty artificial additives etc).

    I know the Primal community encourages making your own, well, everything – but sometimes there just isn’t enough time! And in situations when you have last minute guests coming over or lots of people to cater for – knowing that something ready-made is just about OK… well that rocks!

    We’re not being lazy or pushed for time here, so while I may not have the patience to make my own yoghurt, I’m more than happy to make my own tzatziki (with store bought yoghurt).

    I mean, it’s made up of just a few very simple ingredients, it takes mere minutes to whip up and it just tastes YUM!

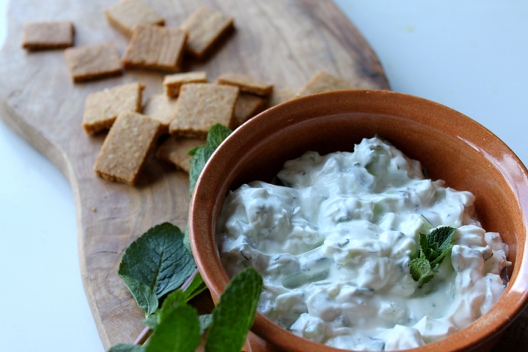
    Mo and I decided to make some last weekend. So using the best full fat Greek yoghurt we could find, we whipped up a serving of this Grecian sensation.

    Tzatziki

    Makes: 2 cups   Takes: 5 mins

    Ingredients:
    1 cup full-fat Greek yoghurt (strained)
    1 cup cubed and de-seeded cucumber
    2 cloves garlic
    handful fresh mint
    salt, to taste (optional)

    • we found a greek yoghurt that is basically ready-strained. If you can’t find such wonders, strain about 1 1/2 cups of yoghurt in cheese cloth overnight) this should leave  you with about 1 cup of strained yoghurt
    • place your cup of yoghurt in a bowl
    • peel and mince/finely chop your garlic. mix well into yoghurt.
    • cut about half a cucumber down the centre lengthways,  and scrap out the seeds. Then cut into strips, and chop into small cubes.
    • throw the chopped cucumber into the yoghurt
    • pick the mint leaves off the stalks, and very finely chop – add to yoghurt cucumber and garlic.
    • salt to taste if required – I didn’t.
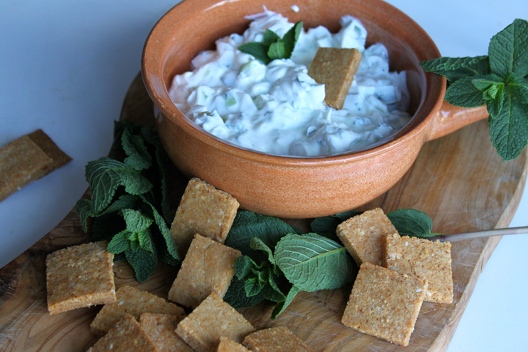
    • transfer into serving dish along-side chopped up veggies or primal crackers (recipe below) and enjoy!

    This is a super easy dip to throw together. It’s fresh, tasty and contains only good stuff (assuming you’re a dairy eater).

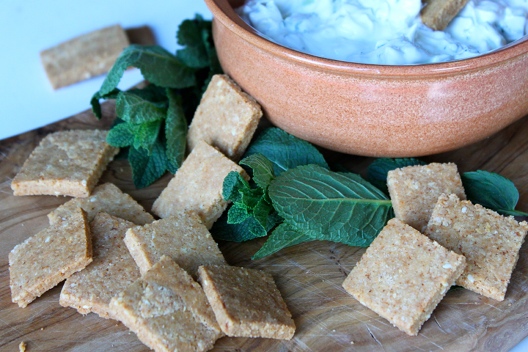
    Mo and I thoroughly enjoyed our tzatziki with a batch of super more-ish and delightful onion crackers.

    I’ll admit that I didn’t make these. These are Mo’s babies, but he has allowed me the honour of sharing the recipe with you…

    Thanks Mo!

    Mo adapted his own recipe with a lot of inspiration from Life As A Plate.

    I’ll be honest, before I tried them, I was a little skeptical. It’s started to become fairly natural for me to turn down anything resembling a wheat product, but I gave these a taste, and my goodness, they’re YUM! So addictive!

    Paleo Onion and Sesame Almond Crackers
    Loosely based on a recipe by Life As A Plate

    Makes: 25    Takes: 35-45Mins

    Ingredients:
    2 cups Almond meal
    3 Tbsp onion powder
    1 tsp garlic salt
    2 Tbsp sesame seeds
    3 Tbsp olive oil
    1 egg, beaten

    • place all dry ingredients in a bowl, mix until well combined
    • pour beaten egg and olive oil into dry ingredients
    • stir until the mixture has formed an even dough
    • form a ball, and place onto greaseproof paper, flatten gently
    • place another piece of greaseproof paper on top, roll out until desired thickness, about 2mm
    • cut into a grid of squares or rectangles – leave together (they will break apart easily once baked)
    • place whole sheet onto a baking tray, and bake at 160 C/320 F for 20-25mins. until lightly browned and crisp
    • cool on a wire rack, and break apart crackers once cool

    I’m quite keen on trying these out with half walnut flour as suggested in the original recipe. I’m sure it will give the cracker a pleasant nuttier taste.

    I’m also quite tempted to play around with flavouring.

    Maybe using a generous measure of freshly ground black pepper in place of the onion powder to make black pepper crackers… or using a higher ratio of sesame seeds to really highlight their deliciousness. I shall have to experiment with these, because they really are quite yummy!

    As is, these crackers are VERY pleasant… maybe even too pleasant considering how addictive they are!

    So I would highly recommend giving them a go, but be warned!

    The combination of the onion/garlicky crackers with the super garlicky tzatziki was awesome! Just don’t expect to get very intimate with anyone after eating this!


  5. I’m back… with Vegetable Crisps (chips)

    March 6, 2012 by Tali

    It feels like I’ve not blogged in a VERY long time. Because, well… I’ve not.

    I got very sick at the beginning of last week which left me bed-bound for a few days and then I found myself struggling to get back into the swing of things.

    It was particularly frustrating as I was only 1 week into my 4 week 100% Primal challenge. I had been eating so well and I got sick! How cruel!

    Trying to keep to Primal guidelines while in bed and unable to physically move is tough. Particularly when your parents don’t fully appreciate or comprehend what eating Primal actually entails… I managed… somehow. Thankfully Mo came over and made me some chicken soup on Wednesday evening and (as chicken soup is known for doing so) I found I had made a miraculous recovery upon waking Thursday morning. I felt like a completely different person!

    But this overly long break from blogging and the real world left me feeling somewhat lost and unsure of where to pick myself up again. Mo suggested we spend the weekend immersed in cooking and trying out recipes we’d been gawking over for a while.

    A brilliant idea in theory!

    In practice, it left me with an over-whelming number of items I wanted to blog about and share with all of you.

    This is:
    a) a little daunting
    b) giving me a back-log of items I need to photograph
    c) delicious!

    The photographic element to this blog is really important to me. In my opinion, great food porn photos can really make a website. I personally take pleasure in drooling over other peoples’ excellent food photography, and so that is something I strive to achieve. It’s all a little new to me, and so setting up my shots takes time, and I’m often very restricted by the time of day and particularly the amount of natural light in my house.

    By the end of the weekend I had 6 or 7 recipes I wanted to share with you all.

    Crazy – I know!

    I’m going to split these all up over a few days, for my own sanity and also – to (hopefully) keep you coming back for more!

    Let’s start off with vegetable crisps – or chips as you Americans and South Africans like to call them!

    I feel I should mention I’m not a massive fan of the potato chip. I might have one or two if they were in a bowl at a party – but I never specifically go for them, I’m more of a sweet-snack kinda gal.

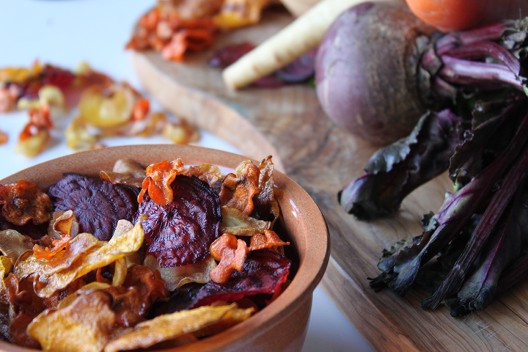
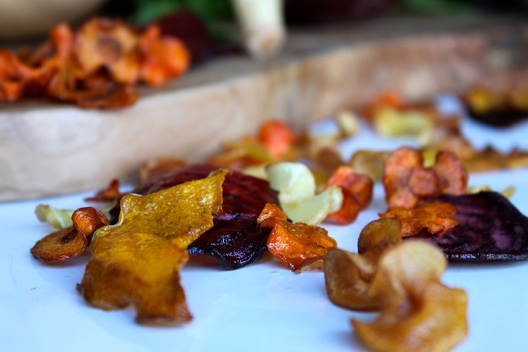
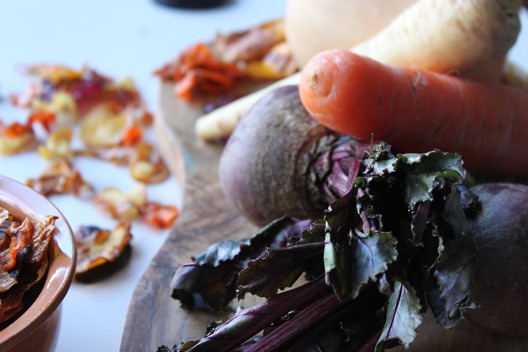
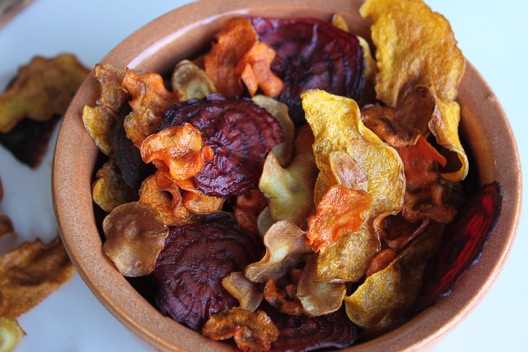
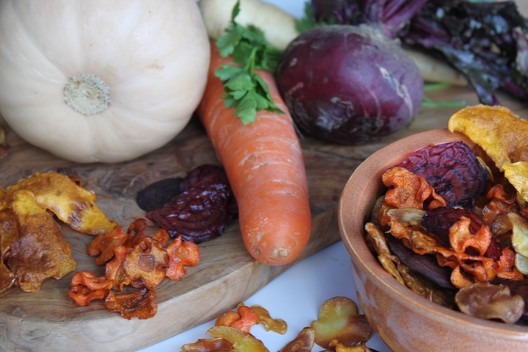
    Root vegetable chips on the other hand… well, that is a different story! These are always a welcome, albeit rare, treat, not widely available and pretty pricey when they are. What could be more exciting than crisps/chips in a gorgeous array of colours, made from delicious vegetables such as beetroot, carrots, parsnips and sweet potato!?

    Mo and I decided we wanted to make our own! We actually attempted a batch of parsnip crisps at his place a while ago, and they didn’t turn out exactly as planned…

    So this was our second attempt – which also involved some other veggies.

    First we had to buy a mandoline. You’ll need one of these in order to get those nice super thin and even slices.

    We then set to work making the chips/crisps.

    Vegetable Crisps

    Makes: lots  Time: 1hr plus

    Ingredients
    2 Large Parsnips
    2 Large carrots
    1/2 Butternut squash
    2 Beetroots
    Olive oil
    Salt

    • pre-heat oven to 170-180 C / 340-350 F
    • starting with the lightest colour vegetable – parsnip in this case, (your mandolin will get stained and if you start with the beets, then your other veg will get stained pink). Slice at an angle on the thinnest blade option, attempting to get the largest sized slices possible.
    • using paper towel, dry off as much moisture as possible from the slices. (this is a point I’ve found most recipes fail to mention)
    • place your dried slices in a bowl, pour in 1-2 tablespoons of olive oil, and 1/8 teaspoon salt, mix until all slices are fully coated.
    • lay slices out onto lined baking sheets and place in oven. they should take  7-10mins to cook, watch them carefully! They are prone to burning easily. They may need to be turned half-way through.
    • once ready, transfer the vegetable chips to a cooling rack.
    • repeat the above procedure for all over veggies. Once all baked, crisped and cooled – Eat and enjoy! 
    • store in an airtight container.

    These can be enjoyed as a side dish to some tasty meat or fish. Or treat yourself and your guests for an occasional snack with pre-dinner drinks.

    Go crazy and try this with any vegetable you like – I would suggest sticking to low water content veggies!

    Maybe whip up a tasty dip to serve along side these, like some baba ganouch or tzatziki?