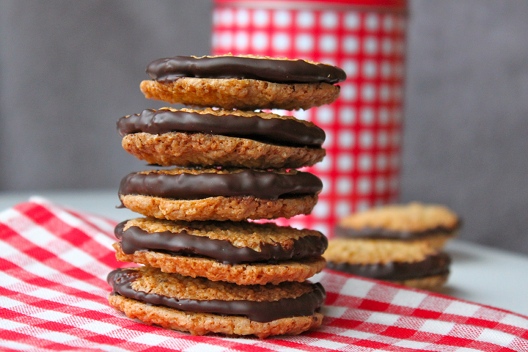
The other day I had a major hankering for some Jaffa cakes. The magical combination of light sponge, zesty orange jelly topped with a coating of dark chocolate.
Biting into one is a true sensory experience – as you bite down, your teeth crack through the delicate snap of tempered dark chocolate into the squidgy Jaffa orange jelly, finishing off with a comforting bounce of delicate sponge cake.
And the flavours…. well who can argue with the truly exquisite combination of orange and dark chocolate?

No one I know!
This snack item is quite deceptive. They are so light and moreish – before you know it – you’ve gobbled up half the pack. And so the only option is to destroy the evidence!

There is another problem with the humble Jaffa Cake. It contains wheat flour (gluten – nasty stuff), refined sugars, and preservatives. We don’t need or want these things in our food. So I took it upon myself to re-invent the Jaffa Cake, making it gluten-free, refined sugar-free and preservative free!

I bet you’re thinking ‘yeah, alright, but I bet it’s also taste-free too!’
Well, you would be wrong!
These babies are truly epic. You get the same flavour burst and texture combination that makes for a totally immense sensory experience – without any of that yucky business.

How did you manage that? – you ask!?
Well just take a wee look!
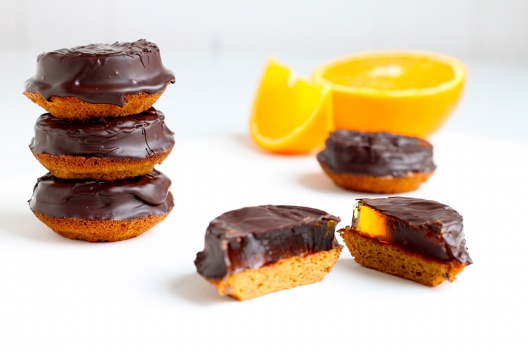
Gluten-Free Primal Jaffa Cakes
Makes: 12 Takes: 40mins
Ingredients:
2 large free range eggs
50g(1.76oz) raw coconut palm sugar
50g(1.76oz) ground almonds
2 large oranges (preferably Jaffa)
1 Tbsp orange marmalade (optional)
1 (11g/0.38oz) sachet gelatine OR 4 leaves of gelatine sheets (soaked)
150g (5.5oz) dark chocolate (minimum 70% cocoa solids)
Make the sponge
- Pre-heat oven to 180 C/350 F. Grease a 12 hole cupcake/muffin tin
- Place the eggs and coconut palm sugar in a heat resistant bowl. Place on top of a pan of simmering water making sure the bowl doesn’t touch the water
- Whisk the eggs and sugar (by hand or using an electric hand beater) until it reaches the ribbon stage. This should take 4-5 minutes with an electric beater, and 5-10 minutes by hand
- Add the ground almonds and mix to combine
- Divide the mixture evenly between the 12 muffin holes. I found it useful to use my medium sized scoop to portion these out evenly
- Place in the middle of the oven and bake for 8-10mins. They should spring back when gently pressed
- Gently remove out of the baking pan, and leave to cool on a wire rack
While the sponge is baking, make the jelly
- Line a square brownie tin with plastic wrap – allow excess over-hang
- Zest 1 orange, and place the zest in a saucepan. Juice the 2 oranges (you should hopefully get around 150-200ml of juice – that’s just over 1/2 cup-3/4 cup) place this into the saucepan along with the (optional) tablespoon of marmalade
- Heat the mixture up until the marmalade has dissolved. Make sure the mixture doesn’t boil
- Once the mixture has heated up, sprinkle the gelatine onto the surface and whisk briskly until the gelatin is thoroughly dissolved and incorporated into the mix
- Gently pour the liquid into the tin and fold over the excess plastic wrap to touch the surface
- Allow this to cool to room temperature before placing in the fridge to set properly.
Putting the Jaffa cakes together and chocolate coating them
- Take your jelly out the fridge, making sure it has set fully. Then cut 12 rounds slightly smaller than the tops of the sponge cakes
- Place the jelly on top of the sponge
- Chop your dark chocolate and put it into a microwavable bowl
- Warm up your chocolate at half power in 30 second bursts mixing gently between each 30-second burst
- Be patient and make sure not to over-heat your chocolate. You want to keep that chocolate tempered to ensure a nice crisp shell (for that full sensory experience!)
- Once the chocolate is ready, using a silicone pastry brush – any of these will do – brush the chocolate over the top of the jelly allowing it to coat the sides and just onto the surface of the sponge
- Leave them to set on a wire rack
- Arrange them on a pretty plate and serve to guests – OR – devour and repeat recipe, then serve!
The recipe does look long and a little overwhelming but it’s really not so difficult and it’s worth the effort! It may be wordy but I just wanted to make sure you get all the steps right!
If you are just after the gluten-free (and aren’t so worried about the refined sugar) feel free to use the jelly recipe from here to fill your Jaffa cakes. I tested this recipe but actually found that the flavour of the orange jelly using the fresh orange juice produced a more authentic Jaffa cake taste.
True story!