RSS Feed

Posts Tagged ‘vegetables’

  1. Primal Ramen

    March 23, 2012 by Tali

    Whilst eating pasta on Sunday, my cheat day, I came to a very clear conclusion that I much prefer a bowl of zucchini spaghetti over the real stuff. In fact, I’d be more than happy to substitute zucchini for pasta any day!

    It can be prepared in a number of ways, but my favourite involves using my spiral vegetable slicer, which spiral cuts any number of vegetables into spaghetti strings. Top with your favourite sauce, some meat balls or make a bowl of this awesome primal ramen!

    You’ll almost forget about the real thing!

    I’m a big fan of Japanese cuisine and there are few other dishes that can comfort you more than a giant bowl of steamy ramen noodles, with a fragrant broth, adorned with slices of meat or fish and a variety of simple yet flavourful toppings. A real mix of flavours and textures.

    This dish Mo and I fashioned on a day we were both craving ramen, and wanted it FAST.

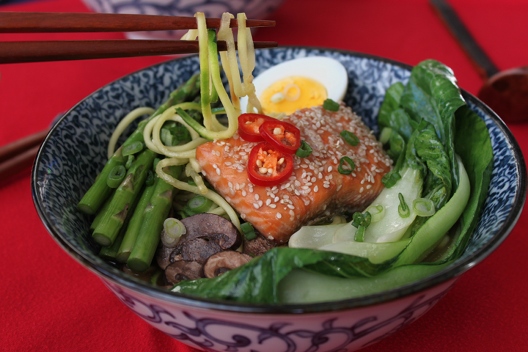
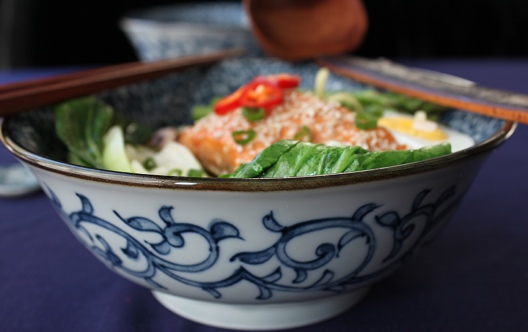
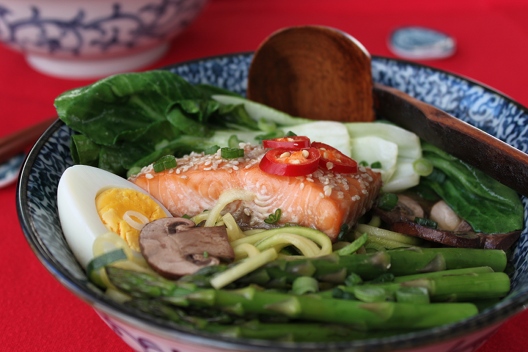
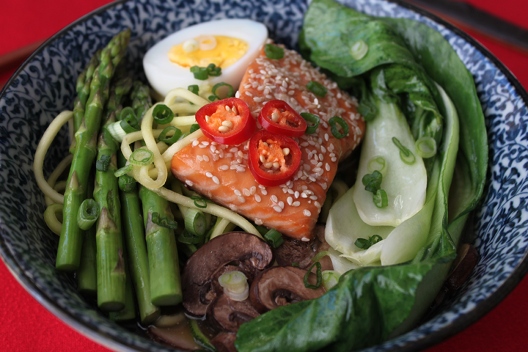
    We simply used a few packets of instant miso soup sachets, added water, some zucchini noodles, mushrooms and a piece of fresh oven baked salmon.

    This recipe is fast, simple and easy. But you could also make your own broth (which I hear, done the traditional way – is a lot of work). Ideally I would make it myself but I was hungry, our nearest Asian supermarket is too much of a hassle to get to and I wanted my ramen NOW!

    However you choose to make it – a hearty, warming bowl of primal ramen – you can’t beat it!

    Primal Zucchini Ramen

    Makes: 2 servings   Takes: 25 minutes

    Ingredients:
    2 pieces of fresh water salmon fillets
    2 tsp liquid aminos/low sodium soy sauce
    1 tsp honey
    1 Tbsp sesame seeds
    2 small/1 large zucchini
    1 Bok Choy
    6 small chestnut mushrooms
    1 bunch of asparagus
    1 chilli
    2 spring onions/scallions
    2 sachets Sanchi gluten free instant miso soup*
    1.5litres boiling water
    3 tsp tahini

    • preheat your oven to 180 C/350 F
    • prep your salmon, rinse in cold water and dry. Place into a baking dish, pour on liquid aminos and honey, place in the fridge to marinate
    • once oven has heated up, sprinkle with sesame seeds and place in the oven for 20-25mins (depending on the size of your fillet and how rare you like your fish)
    • while the salmon is cooking get all your veggies ready.
    • using a spiral slicer, make your zucchini noodles. place in a dish until you’re ready for it
    • slice your mushrooms, wash your bok choy, and trim your asparagus spears
    • pop your kettle on and empty 2 sachets of instant miso soup into a pot. once kettle has boiled pour in, stir and turn on the heat
    • stir in 1 tablespoon of tahini and let the broth come to a simmer
    • chop your spring onions/scallions and chilli
    • when your salmon is about 3 minutes away from being done, throw your mushrooms, bok choy and asparagus into the simmering broth to warm through. You don’t want to over cook them, the freshness and crunch adds to the dish!
    • once you have taken your salmon out the oven, split your ‘noodles’ between your ramen bowls, pour over the broth (the residual heat will be enough to cook your ‘noodles’) place the mushrooms, bok choy and asparagus into the bowls, and then place a fillet of salmon on top
    • garnish with scallions and chilli
    • serve immediately
    • eat and enjoy!

    * I selected this brand of instant miso soup because its ingredient list seemed the least offensive. The ingredients are labelled as: Original Miso (Gluten Free): Hatcho Miso (made from aged and fermented soya beans, water, sea salt, koji [aspergillus oryzae]), Onions, Spring Onions, Wakame Seaweed. It contains no dried tofu, MSG or any other nasty things I’ve seen on other packages.

    As with the real stuff you can prepare your ramen however you like. Using the meat, fish or seafood of your choice and topped off with your favourite seasonal vegetables.

    My best advice is to keep it as fresh as possible and don’t over-cook your vegetables. Not only will they lose their lovely crunch and great texture, but you’ll also be killing off all those great nutrients. We like those nutrients!
  2. Tuna Stuffed Peppers

    March 20, 2012 by Tali

    Sunday was my cheat day. Marking the end of my 4 week primal challenge.

    I could go on and tell you in detail about how my day went, about the foods I ate and how it all made me feel, but I wouldn’t want to bore you.

    So, in short: I confirmed that pasta is pretty insignificant in my life, as is bread. I felt no urge to buy anything ‘forbidden’ whilst on a trip to the supermarket. Only fresh fruit, veg, meat and fish really appealed to me, and the one thing I had been craving for 3 of the 4 weeks of my challenge, ice cream, really managed to hit the spot!

    It wasn’t just any ice cream mind, It was Chin Chin Laboratorists ice cream! London (and Europe’s) first Nitro ice cream parlour in Camden Town. Using liquid nitrogen they turn a high class liquid ice cream base into rich, smooth-as silk, ice cream perfection. With a choice of Pondicherry Vanilla, Valrhona chocolate (80%) or the weekly special PLUS a sauce and topping option. This place (to me) re-invented the concept of ice cream. I was never a huge fan of ice cream until I had this stuff!

    With a serving of 80% Valrhona chocolate ice cream topped with fleur de sel caramel sauce and grilled white chocolate chunks, I was in cheat heaven! My 4 weeks of discipline felt completely worthwhile (with a fair weight loss and feeling of self satisfaction) and after craving ice cream – indulging in the smooth creamy hot cold mess – I felt content! I could have eaten a second one, but my earlier bowl of insignificant pasta disallowed me the privilege!

    I have now learned my lesson!

    Just have the ice cream – two servings preferably!

    Having had the chance to prove I am capable of eating a disciplined primal diet, and having results to show for it, I was ready to  get back on track as soon as possible.

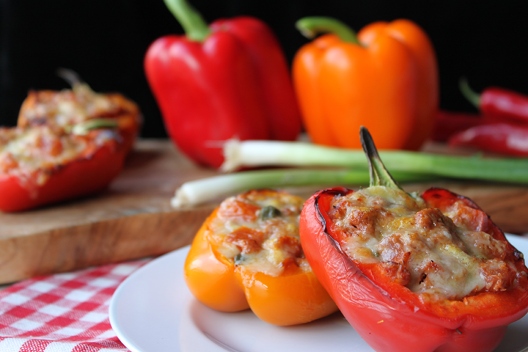
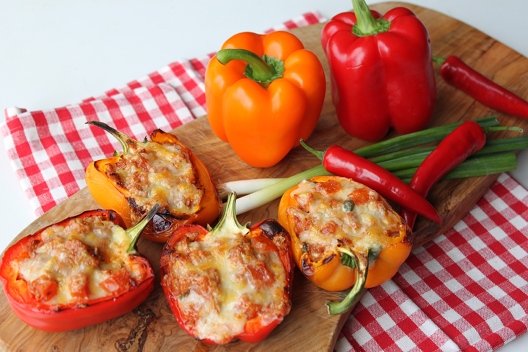
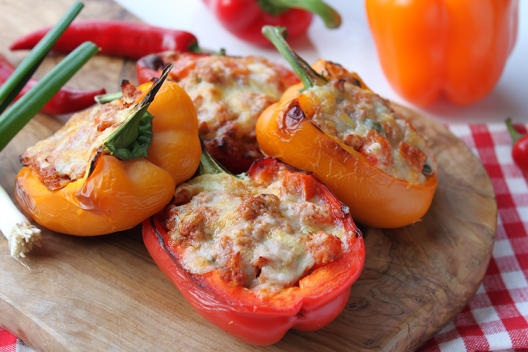
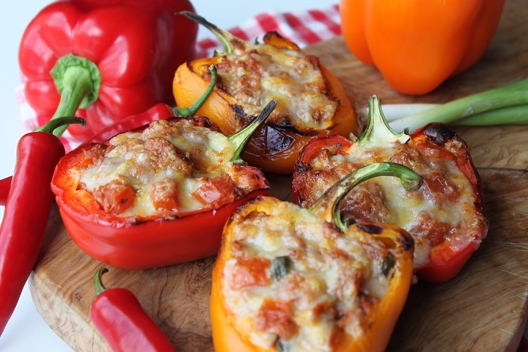
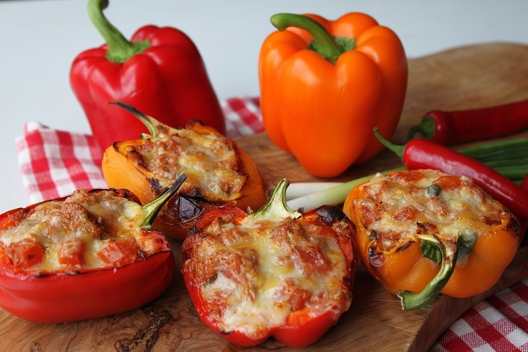
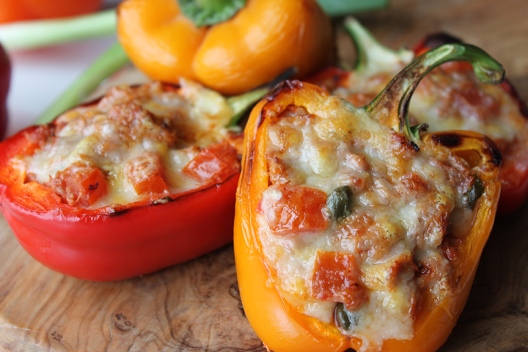
    Tuna stuffed peppers have become quite a regular item on my menu.

    They are quick, easy to make and just damn delicious!

    They are also very versatile. Change up the filling to suit you, throw in things sitting in the fridge, make ’em your own!

    These things really are quite versatile. My recipe below is just one example of what you can add to the basic mix. You can make them as you wish. Throw in whatever.

    Tuna Stuffed Peppers

    Makes: 4 pieces  Takes: 10 minutes

    Ingredients:
    2 bell peppers (colour of your choice)

    1 tin tuna chunks in brine/spring water (130g drained)
    60g grated cheddar cheese
    30g tomato puree (double concentrate)
    1 spring onion/scallion (finely chopped)
    10g capers
    1 tomato (de-seeded and diced)

    • start by turning on your grill (US:broiler) to the highest setting
    • halve your peppers, and de-seed them
    • place cut side down on a lined baking tray, and place under the heat for 3-4 mins, the peppers will just start to soften and the skin will be close to blistering – remove from oven, and flip them over – watch out for the steam trapped inside!
    • while your peppers are under the heat, mix together your filling
    • starting with the tuna and tomato puree, mix until combined
    • next add in 30g of cheese, and all other ingredients
    • once combined, spoon the tuna mix into the hollows and sprinkle the remaining cheese over the top
    • place back under the grill (US: broiler) and cook for another 3-4 minutes or until the cheese has melted, bubbling and starting to crisp up – YUM!
    • plate-up, serve, eat and enjoy!

    Every time I make these stuffed peppers, they’re always slightly different. I’ve added in chopped celery for crunch, a few drops of Tabasco for heat, I’ve even kept it plain and simple when nothing was in the fridge. Just stick to the basic pepper, tuna and cheese then make it your own! ( I do highly recommend including that tomato puree too!)

    You really can add any number of things. Before I was being very careful about what I was eating I mixed in some umami paste – now that was delicious!

    Add in whatever you like, experiment, and let me know what fabulous concoctions you come up with!

    Throw in some chopped black olives, capers, Italian seasoning, and use mozzarella instead of cheddar and you’ll have yourself an Italian stuffed pepper!

    Make it French, Moroccan, Indian, Chinese, Spanish – whatever cuisine you’ve a hankering for. Just use the appropriate spicing and ‘bits’ and you’ll have yourself a healthy, filling and speedy meal.

    Wishing you all a very happy pepper stuffing experience!

    Oooo you could even go completely crazy and use tinned salmon!

    Ah! the possibilities are endless!


  3. I’m back… with Vegetable Crisps (chips)

    March 6, 2012 by Tali

    It feels like I’ve not blogged in a VERY long time. Because, well… I’ve not.

    I got very sick at the beginning of last week which left me bed-bound for a few days and then I found myself struggling to get back into the swing of things.

    It was particularly frustrating as I was only 1 week into my 4 week 100% Primal challenge. I had been eating so well and I got sick! How cruel!

    Trying to keep to Primal guidelines while in bed and unable to physically move is tough. Particularly when your parents don’t fully appreciate or comprehend what eating Primal actually entails… I managed… somehow. Thankfully Mo came over and made me some chicken soup on Wednesday evening and (as chicken soup is known for doing so) I found I had made a miraculous recovery upon waking Thursday morning. I felt like a completely different person!

    But this overly long break from blogging and the real world left me feeling somewhat lost and unsure of where to pick myself up again. Mo suggested we spend the weekend immersed in cooking and trying out recipes we’d been gawking over for a while.

    A brilliant idea in theory!

    In practice, it left me with an over-whelming number of items I wanted to blog about and share with all of you.

    This is:
    a) a little daunting
    b) giving me a back-log of items I need to photograph
    c) delicious!

    The photographic element to this blog is really important to me. In my opinion, great food porn photos can really make a website. I personally take pleasure in drooling over other peoples’ excellent food photography, and so that is something I strive to achieve. It’s all a little new to me, and so setting up my shots takes time, and I’m often very restricted by the time of day and particularly the amount of natural light in my house.

    By the end of the weekend I had 6 or 7 recipes I wanted to share with you all.

    Crazy – I know!

    I’m going to split these all up over a few days, for my own sanity and also – to (hopefully) keep you coming back for more!

    Let’s start off with vegetable crisps – or chips as you Americans and South Africans like to call them!

    I feel I should mention I’m not a massive fan of the potato chip. I might have one or two if they were in a bowl at a party – but I never specifically go for them, I’m more of a sweet-snack kinda gal.

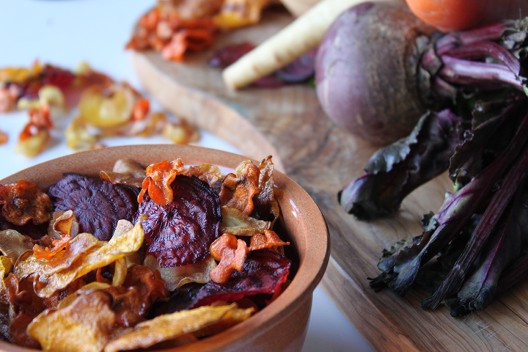
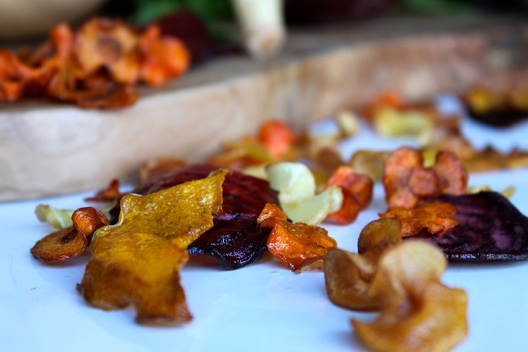
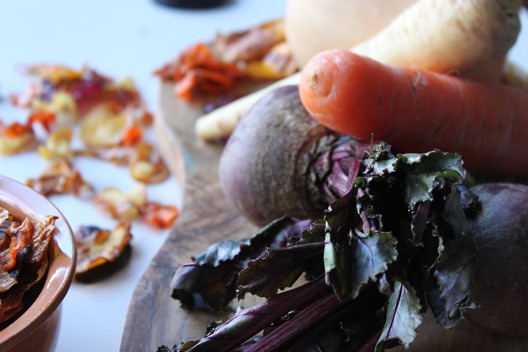
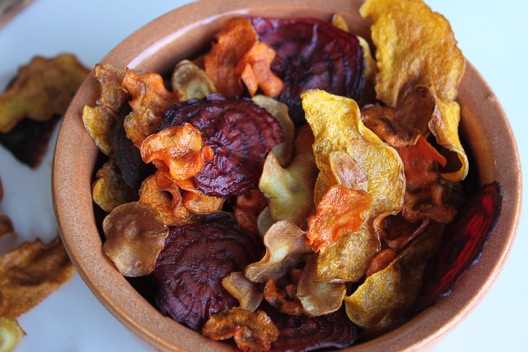
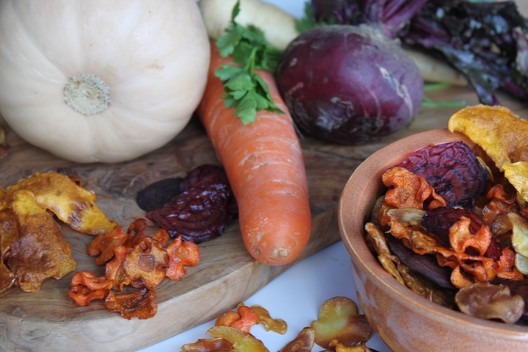
    Root vegetable chips on the other hand… well, that is a different story! These are always a welcome, albeit rare, treat, not widely available and pretty pricey when they are. What could be more exciting than crisps/chips in a gorgeous array of colours, made from delicious vegetables such as beetroot, carrots, parsnips and sweet potato!?

    Mo and I decided we wanted to make our own! We actually attempted a batch of parsnip crisps at his place a while ago, and they didn’t turn out exactly as planned…

    So this was our second attempt – which also involved some other veggies.

    First we had to buy a mandoline. You’ll need one of these in order to get those nice super thin and even slices.

    We then set to work making the chips/crisps.

    Vegetable Crisps

    Makes: lots  Time: 1hr plus

    Ingredients
    2 Large Parsnips
    2 Large carrots
    1/2 Butternut squash
    2 Beetroots
    Olive oil
    Salt

    • pre-heat oven to 170-180 C / 340-350 F
    • starting with the lightest colour vegetable – parsnip in this case, (your mandolin will get stained and if you start with the beets, then your other veg will get stained pink). Slice at an angle on the thinnest blade option, attempting to get the largest sized slices possible.
    • using paper towel, dry off as much moisture as possible from the slices. (this is a point I’ve found most recipes fail to mention)
    • place your dried slices in a bowl, pour in 1-2 tablespoons of olive oil, and 1/8 teaspoon salt, mix until all slices are fully coated.
    • lay slices out onto lined baking sheets and place in oven. they should take  7-10mins to cook, watch them carefully! They are prone to burning easily. They may need to be turned half-way through.
    • once ready, transfer the vegetable chips to a cooling rack.
    • repeat the above procedure for all over veggies. Once all baked, crisped and cooled – Eat and enjoy! 
    • store in an airtight container.

    These can be enjoyed as a side dish to some tasty meat or fish. Or treat yourself and your guests for an occasional snack with pre-dinner drinks.

    Go crazy and try this with any vegetable you like – I would suggest sticking to low water content veggies!

    Maybe whip up a tasty dip to serve along side these, like some baba ganouch or tzatziki?