RSS Feed

Posts Tagged ‘chocolate’

  1. Gluten-Free Primal Jaffa Cakes

    March 19, 2013 by Tali

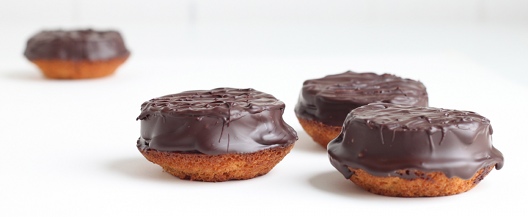
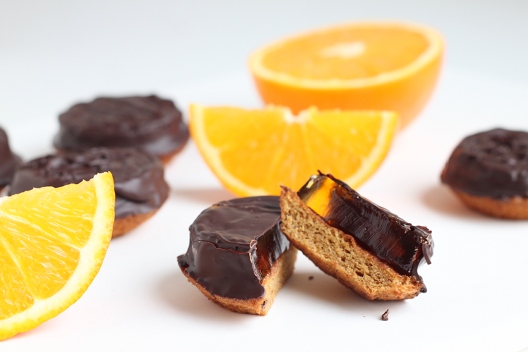
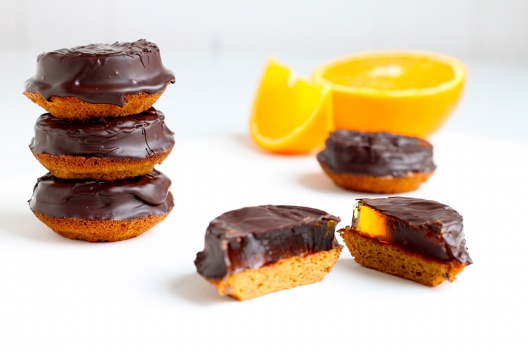
    The other day I had a major hankering for some Jaffa cakes. The magical combination of light sponge, zesty orange jelly topped with a coating of dark chocolate.

    Biting into one is a true sensory experience – as you bite down, your teeth crack through the delicate snap of tempered dark chocolate into the squidgy Jaffa orange jelly, finishing off with a comforting bounce of delicate sponge cake.

    And the flavours…. well who can argue with the truly exquisite combination of orange and dark chocolate?

    No one I know!

    This snack item is quite deceptive. They are so light and moreish – before you know it – you’ve gobbled up half the pack. And so the only option is to destroy the evidence!

    There is another problem with the humble Jaffa Cake. It contains wheat flour (gluten – nasty stuff), refined sugars, and preservatives. We don’t need or want these things in our food. So I took it upon myself to re-invent the Jaffa Cake, making it gluten-free, refined sugar-free and preservative free!

    I bet you’re thinking ‘yeah, alright, but I bet it’s also taste-free too!’

    Well, you would be wrong!

    These babies are truly epic. You get the same flavour burst and texture combination that makes for a totally immense sensory experience – without any of that yucky business.

    How did you manage that? – you ask!?

    Well just take a wee look!

    Gluten-Free Primal Jaffa Cakes

    Makes: 12   Takes: 40mins

    Ingredients:
    2 large free range eggs
    50g(1.76oz) raw coconut palm sugar
    50g(1.76oz) ground almonds

    2 large oranges (preferably Jaffa)
    1 Tbsp orange marmalade (optional)
    1 (11g/0.38oz) sachet gelatine OR 4 leaves of gelatine sheets (soaked)

    150g (5.5oz) dark chocolate (minimum 70% cocoa solids)

    Make the sponge

    • Pre-heat oven to 180 C/350 F. Grease a 12 hole cupcake/muffin tin
    • Place the eggs and coconut palm sugar in a heat resistant bowl. Place on top of a pan of simmering water making sure the bowl doesn’t touch the water
    • Whisk the eggs and sugar (by hand or using an electric hand beater) until it reaches the ribbon stage. This should take 4-5 minutes with an electric beater, and 5-10 minutes by hand
    • Add the ground almonds and mix to combine
    • Divide the mixture evenly between the 12 muffin holes. I found it useful to use my medium sized scoop to portion these out evenly
    • Place in the middle of the oven and bake for 8-10mins. They should spring back when gently pressed
    • Gently remove out of the baking pan, and leave to cool on a wire rack

    While the sponge is baking, make the jelly

    • Line a square brownie tin with plastic wrap – allow excess over-hang
    • Zest 1 orange, and place the zest in a saucepan. Juice the 2 oranges (you should hopefully get around 150-200ml of juice – that’s just over 1/2 cup-3/4 cup) place this into the saucepan along with the (optional) tablespoon of marmalade
    • Heat the mixture up until the marmalade has dissolved. Make sure the mixture doesn’t boil
    • Once the mixture has heated up, sprinkle the gelatine onto the surface and whisk briskly until the gelatin is thoroughly dissolved and incorporated into the mix
    • Gently pour the liquid into the tin and fold over the excess plastic wrap to touch the surface
    • Allow this to cool to room temperature before placing in the fridge to set properly.

    Putting the Jaffa cakes together and chocolate coating them

    • Take your jelly out the fridge, making sure it has set fully. Then cut 12 rounds slightly smaller than the tops of the sponge cakes
    • Place the jelly on top of the sponge
    • Chop your dark chocolate and put it into a microwavable bowl
    • Warm up your chocolate at half power in 30 second bursts mixing gently between each 30-second burst
    • Be patient and make sure not to over-heat your chocolate. You want to keep that chocolate tempered to ensure a nice crisp shell (for that full sensory experience!)
    • Once the chocolate is ready, using a silicone pastry brush – any of these will do – brush the chocolate over the top of the jelly allowing it to coat the sides and just onto the surface of the sponge
    • Leave them to set on a wire rack
    • Arrange them on a pretty plate and serve to guests – OR – devour and repeat recipe, then serve!

    The recipe does look long and a little overwhelming but it’s really not so difficult and it’s worth the effort! It may be wordy but I just wanted to make sure you get all the steps right!

    If you are just after the gluten-free (and aren’t so worried about the refined sugar) feel free to use the jelly recipe from here to fill your Jaffa cakes. I tested this recipe but actually found that the flavour of the orange jelly using the fresh orange juice produced a more authentic Jaffa cake taste.

    True story!


  2. Chocolate Torte

    June 18, 2012 by Tali

    Everyone needs to indulge in a little chocolate sometimes.

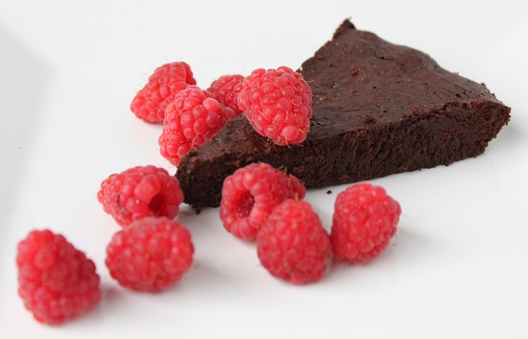
    What better way to enjoy the food of the gods than in rich, dense and powerful cake-like form?

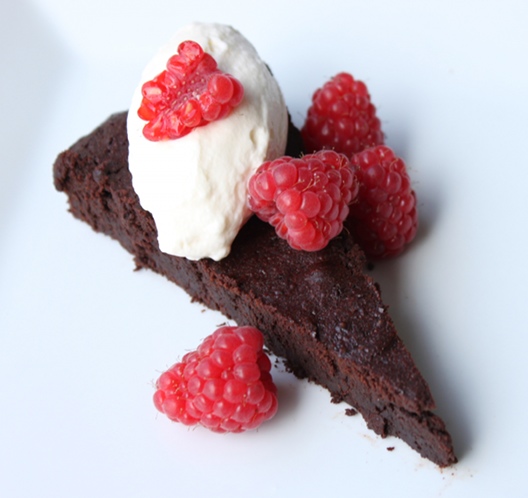
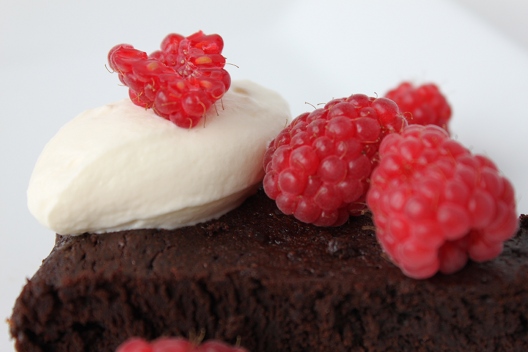
    I say cake-like because this isn’t really a cake – not in the sense that I know of cake; to me a cake needs to be fluffy, light and, to be honest, have a little more height to it. This is not a pie or a tart either.  One could liken its texture to something like a brownie – it is dense, fudgey and intoxicating in its chocolatey-ness. I have decided to label this delicious baked good as a torte.

    This temptress of a dessert packs a real punch. There is A LOT of dark chocolate AND cocoa powder involved in this recipe. It is gluten, nut and (any kind of) flour free. This baby would be acceptable to a vast number of people – unless of course they don’t like chocolate; but let’s be realistic – anyone who doesn’t like chocolate needs their head checked!

    I came across this recipe a few weeks ago when looking for something that was both nut and gluten free. I was baking for a friend’s bridal shower/kitchen tea. The lady of the hour is allergic to nuts, and her sister is gluten intolerant so in an effort to please them both I searched for a recipe that could fulfil both their dietary requirements. It just so happened that it also allowed room to satisfy my requirements as a primal enthusiast.

    This recipe uses a short list of ingredients and an even shorter method – therefore this should please anyone who hates spending too much time in the kitchen.

    In short – This recipe pleases pretty much everyone!

    To make this more Primal-acceptable – I adapted the sweetener from the original recipe which I found here.

    By replacing the caster sugar with unrefined coconut palm sugar I made this an almost guilt-free treat. But believe me – this stuff is so good – you’ll think you’ve just sinned BIG TIME!

    I’d like to try this with honey at some point – it may make the texture even better. If you experiment with that – please let me know how it turns out!

    Primal Chocolate Torte
    Adapted from a recipe by Shana Hillman

    Makes: One 8 inch pan/tart dish  Takes: 45mins

    Ingredients:
    120g Dark Chocolate ( I used Lindt 70%)
    120g Unsalted Butter
    150g Coconut Palm Sugar
    80g Cocoa Powder
    3 Eggs (beaten)
    1 tsp Vanilla extract
    1 pinch Sea Salt

    • preheat oven to 150C/300F. Grease an 8/9 inch tart pan.
    • place the butter and chocolate in a bowl, over a double boiler and let it melt, very gently
    • meanwhile, beat your eggs then add vanilla extract
    • place all of your dry ingredients – coconut palm sugar, salt and cocoa powder (sifted) – into a bowl
    • when your butter and chocolate have melted, remove from heat
    • add egg, incorporating fully, then fold in the dry ingredients
    • once the mixture is combined, pour into tart pan and spread evenly
    • place in your preheated oven for 25-30mins
    • remove from the oven and cool

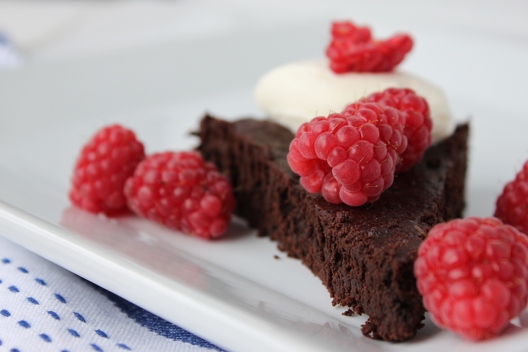
    Serve as a dessert – warm with cream/ice cream and some tart, fresh berries. Or let cool to room temperature and enjoy with a cup of tea or coffee – add the cream and berries for extra indulgence.

    You could amp up the decadence scale and top this with a luscious chocolate ganache to turn it into a seriously dangerous indulgent treat.


  3. Primal Chocolate Ganache Tart

    February 8, 2012 by Tali

    Oh the excitement! February the 14th is drawing ever nearer!

    Yup!

    Can you feel it? All that love in the air! The romance?  – No, neither can I!

    I’ve never been a massive Valentine’s day fan. It’s just a way for card companies, chocolatiers and florists to make money! right?!
    I think (as most girls do – however unconventional they are) that it would be nice if that special someone made some kind of gesture on St Valentines’s day [even if we do say we’re not into it].

    Yes, I think we are probably testing you!

    I don’t expect diamonds (though I would never decline!) but maybe cook us a nice meal? Take us out, plan a random surprise, it doesn’t have to cost much, or anything at all. Just… make us feel like you haven’t completely forgotten about us.

    Asking to be acknowledged romantically is not very lady-like!

    Oh, and a set of gym weights is NOT an acceptable Valentine’s day gift!

    I honestly never meant for this post to turn into a rant so I shall move on!

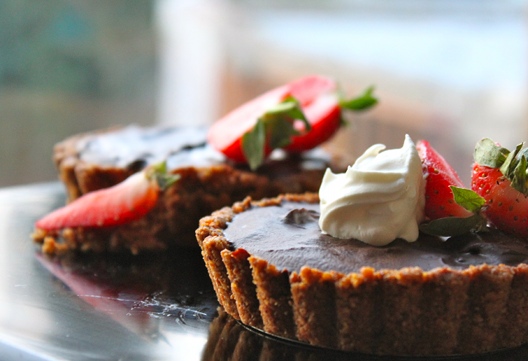
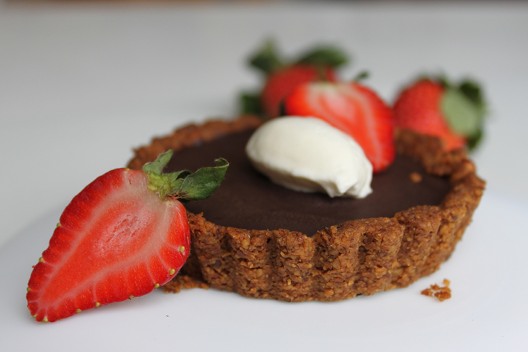
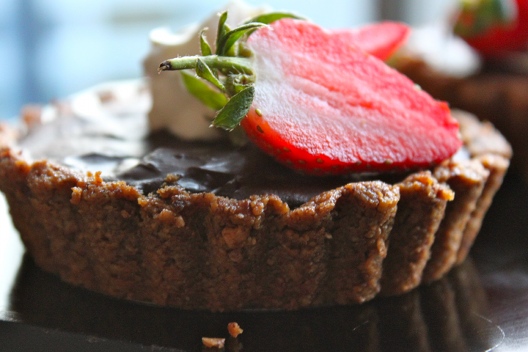
    I had been meaning to make Mo a chocolate tart for quite some time.

    It was after seeing some in the window of La Maison du Chocolat in Paris, about a year and a half ago (just a day before he proposed to me). See! Keeping it all romantic and stuff!

    Now, I’m pretty sure the tarts we saw in the window were baked chocolate tarts having referred to the photo above, I see that the ones from La Maison du Chocolat, are indeed ganache tarts, which involve very careful baking in the oven makes this whole process so much easier for me to pull off!

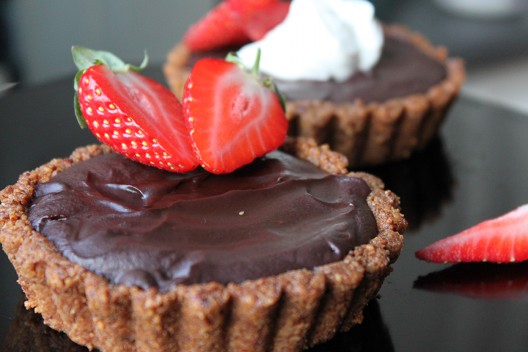
    My reason for choosing a ganache tart is not out of laziness. In fact, I plan to one day find/discover/invent a recipe for paleo/primal baked chocolate tart. For the purpose of keeping the number of ingredients to a minimum and to avoid adding sweeter, I decided to make Mo a primal friendly dark chocolate ganache tart!

    For Christmas, Mo’s mom made some primal pumpkin pie (we had a Thanksgiving meal for Christmas). The recipe she used was from Mark’s Daily Apple. In the post Mark mentions that the crust can be used for any number of pies and tarts, and so I was very keen to attempt to make his walnut pie crust, as a tart shell, and make some primal appropriate chocolate ganache to fill it!

    The crust is simple to make, as is the ganache. So I really had no excuse to hold out on Mo any longer!

    Primal Chocolate Ganache Tart

    Makes: 6 x 10cm tartlets   Time: 30-40mins

    Ingredients:
    280g Walnuts
    30g Unsalted Butter
    1 tsp Baking Soda
    1/4 tsp Salt

    300g Dark Chocolate (I used 72%)
    165ml Double Cream

    • Pre-heat oven to 175C or 350F
    • Place walnuts into a food processor, and pulse until nuts are ground.
    • add baking soda, salt and cubed butter (Mark suggests melting the butter, but the pastry chef in me was keen on using cold butter) pulse once again until the mixuture is fully combined, and begins to clump together.
    • divide the mixture between 6 10cm (4 inch) tartlet tins and press into the sides and bottom until even and well packed in
    • bake these for 15-20 mins until evenly browned.
    • once the crusts have cooled, make your ganache.
    • chop the chocolate finely, and gently par-melt in the microwave at 50%.
    • gently warm up your cream in a pan, and once the chocolate is melted and the cream is warm, (but not boiling!) Pour cream over chocolate, and gently stir until you have a nice glossy ganache.
    • pour the ganache into the tart shells and let them set in the fridge.
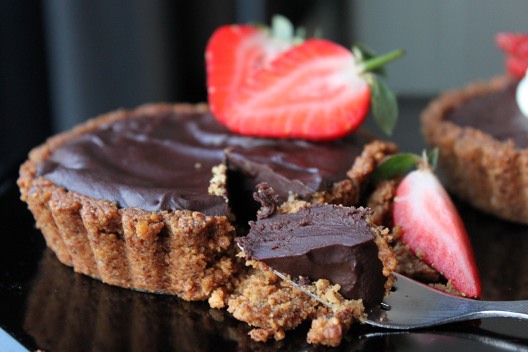
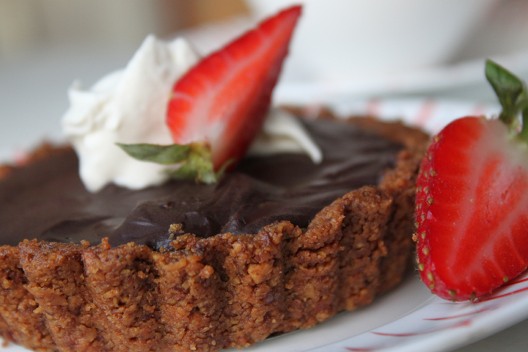
    • when ready to serve, VERY gently remove from the tartlet tins, and serve with some whipped cream and a complementary fruit (the tartness – pun intended! – of the fruit will be a welcome contrast to the rich chocolate).

    WARNING: These tartlets are INCREDIBLY rich! Don’t be surprised if you can only manage a few mouthfuls!

    They are rich, and they are not exactly sweet. So not for the faint hearted, but great for the dark/bitter chocolate lovers out there!

    You could maybe use a slightly less intense chocolate for the ganache, but bear in mind, the higher cocoa content your chocolate has, the better it is for you! Also, chocolates from different origins will have different flavour notes, so use a chocolate you enjoy eating!

    I found the walnut crust to be pleasing, particuarly with the added salt! Mmmm salted chocolate! But walnuts tend to be a little on the bitter side, so next time, I’ll probably try using pecans (possibly a walnut/pecan mix) or maybe hazelnuts (Mmm nutella style!) in a bid to reduce the bitterness.

    I reckon these are the prefect valentines dessert to share with a loved one, and I’m serious when I say share! good luck attempting one of these alone, in one sitting! (I do NOT condone, suggest OR recommend this!)


  4. Double Chocolate Crisps (Havreflarn)

    February 5, 2012 by Tali

    errrrrr…… you said what now!?

    So, quite a few months ago – maybe even a year ago, Mo’s mom had bought a box of these strange looking biscuits/cookies.

    (Mo is my fiance for those that are interested)

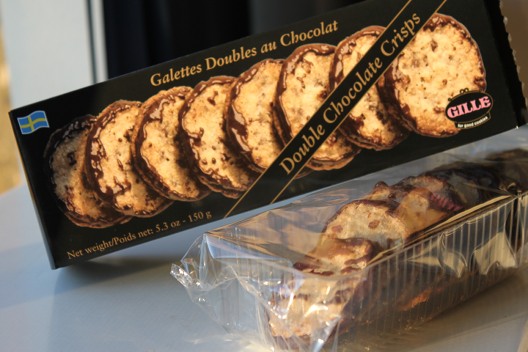
    The box called them ‘double chocolate crisps’. I was intrigued, but not overly excited.

    I don’t tend to get all that excited about biscuits and the like.

    One bite of these babies and I was hooked! I could have eaten the entire box! Thankfully I was in company, and totally lacking in chutzpah.

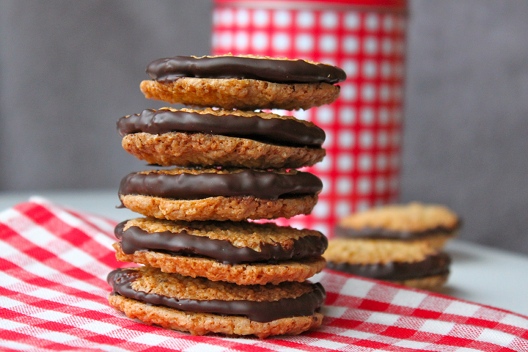
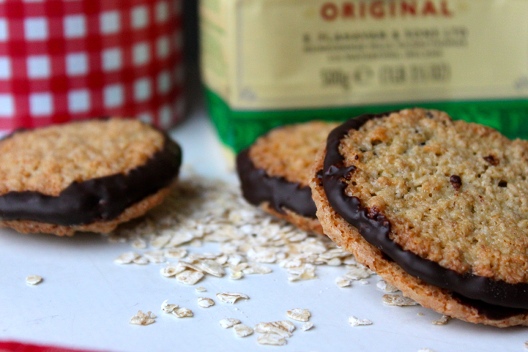
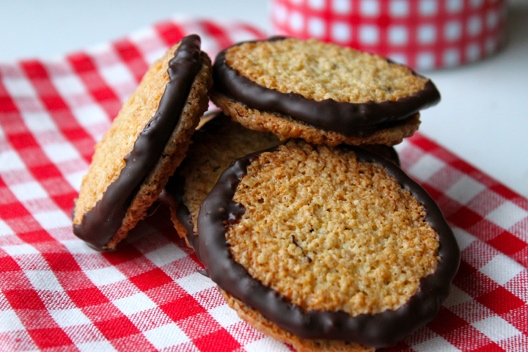
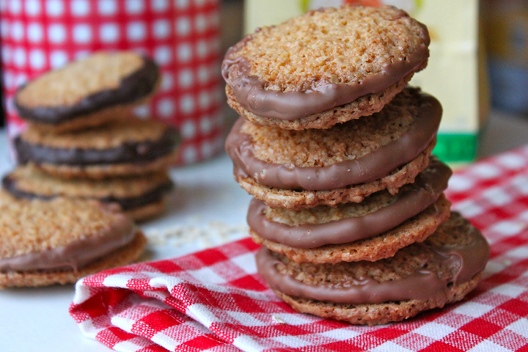
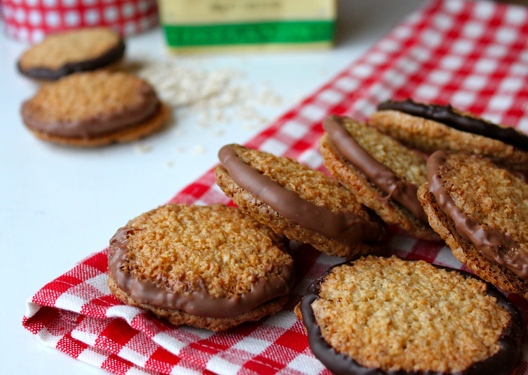
    They were incredibly crisp, totally delicious, oat-ey with and almost nutty flavour (although no nuts are mentioned in the recipe) and a generous amount of chocolate adhering the 2 halves together make them rich and totally decadent, the perfect partner to a cup of tea or coffee.

    It was on that day, I decided that these were my favourite of all store bought biscuit/cookie confections.

    Being the lover of baking that I am, I finally decided to take it upon myself to attempt to recreate these gems!

    I knew (from the packaging) that these were a Swedish biscuit. But I had no idea what the Swedes called these, or how to find a genuine recipe.

    I was largely helped along, by Clotilde of Chocolate & Zucchini who started off a search for a recipe (in 2004) by asking her readers if they knew of any. The contributions range from 2004 up until 2011 and there were a few different suggestions mentioned.

    What I found largely beneficial, was discovering the Swedish name for them, HAVREFLARN,  which allowed me to search further for an appropriate recipe.

    It comes as no surprise to me that there was a vast array of recipes online. Some were similar, some identical and some quite strange.

    My first attempt used one of the more simple recipes (including syrup in the mix). It produced a very tasty, but highly textured cookie whereas the boxed version has a lot less texture.

    I then decided to try processing the oats – with disastrous results! They turned out crumbly and dry.

    I then attempted an alternative recipe whose ingredients better matched up to those noted on the box – minus all the added preservatives…

    I decided to try a half recipe, see how it turned out, and in my rushed attempt to throw the mixture together,  I made a few little errors.

    Firstly, the whole recipe calls for 1 egg, instead of using half an egg I threw in a whole one, making the mix rather wet. Secondly, I also failed to use half the amount of sugar. I’ve never claimed to be a genius!

    I spooned a few dollops onto a baking tray anyway, and was quite pleased with my results! They didn’t look quite as refined as the boxed cookies, but they had a similar crunch, just not quite as nutty in flavour. Maybe the people over at GILLE toast their oats?

    So in some ways, I guess I developed my own recipe, and despite the doubling of sugar, they weren’t overly sweet. Woohoo!

    Double Chocolate Crisps / Havreflarn

    Makes: 10 double cookies   Time: 40-45 mins

    Ingredients

    50g Butter, melted
    120g Oats
    1 whole Egg
    130g Caster Sugar
    1 Tbsp Plain Flour
    1 tsp Baking Powder

    150g good quality dark chocolate

    Preheat oven to 175 C/ 347 F

    • Combine oats, sugar, egg and melted butter.
    • Sift in flour and baking powder, and mix through.
    • Take teaspoon sized amounts of mixture, roll into balls, and space generously onto a lined baking tray. (You should have approx 20 pieces to make 10 biscuits)
    • Wet the back of a teaspoon and gently flatten the balls, they will spread, but this should allow them to spread evenly, reducing a dome in the centre.
    • Place trays in preheated oven and bake for 7mins, then turn trays, and bake for a further 3-4mins.
    • They should be a nice even golden brown so you may have to adjust your timing to suit your oven.
    • Once ready, place onto a cooling rack.
    • Chop chocolate finely, and melt either over a bain marie, or very gently in the microwave.
    • Once biscuits are cool, and chocolate is melted, dip the underside of once, and then place another underside onto the chocolate, adhering the two together, leave to set. If you are impatient like me, stick them in the fridge to set.
    • Pour yourself a cold glass of milk, or pop the kettle on and make yourself a brew.
    • Eat and thoroughly enjoy!

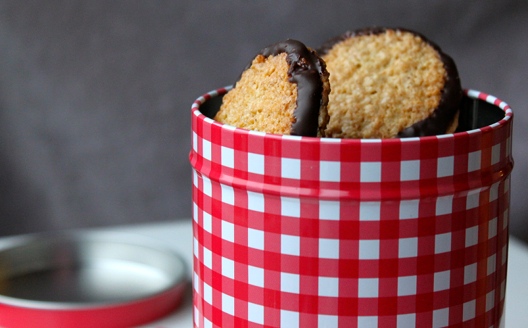
    When I made this batch pictured, I was feeling a little experimental, and decided to try some with milk chocolate.

    They were good, but I think part of the charm of these biscuits is the intensity of the rich dark chocolate, paired with the warm nuttiness of the crisp, oat-ey biscuit.

    I feel like maybe I could have refined this recipe a little further, but I’ll leave that to another day.

    I’m pretty certain this is a recipe I’ll come back to!

    Hmm… Think I’ll go get myself that glass of milk – these things aren’t gonna eat themselves!


  5. M&M’s Truffles

    January 31, 2012 by Tali

    Yes… I said it! Truffles and M&M’s in one single delectable form!

    Where does this come from you ask?

    Well, Let me tell you!

    Last weekend was a friend’s birthday. After a little research, I discovered that she was a big fan of both original choco and crispy M&M’s.

    How was I to take humble M&M’s and turn them into something exciting, slightly unusual and totally delicious?

    I began by trying to see what others had done creatively with M&M’s, and most of my research drew me to cakes, brownies, cheesecakes and cookies. I wanted to do something a little different… something special… something unique!

    Now… I guess I had noticed for some time, that there is a definite trend in truffles popping up online, and I suppose that is what triggered the idea of M&M truffles!

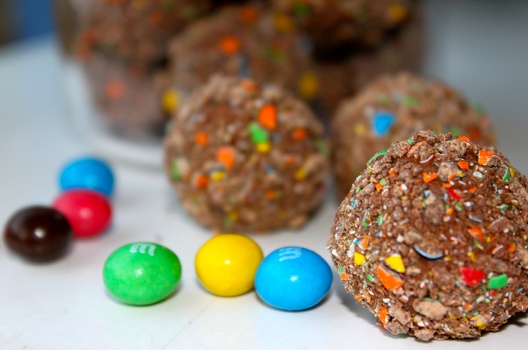
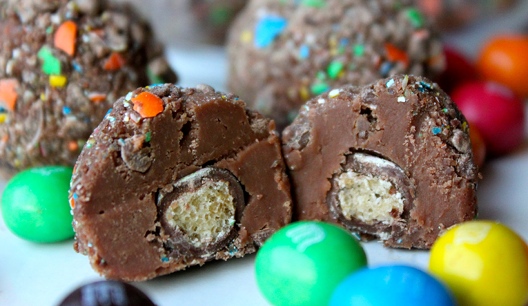
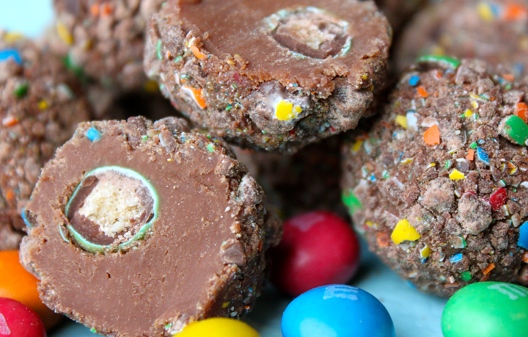
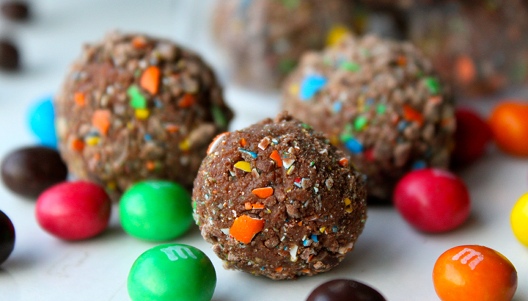
    Having a brief that included both original and crispy M&M’s in the mix, I began to imagine, a crispy M&M, surrounded by a rich and creamy milk chocolate ganache, coated in crushed choco M&M’s, with the intention of all the broken up colourful shells to pop brightly against the rich warmth of the chocolate tones.

    Mmmmmmmmmm!

    I did a little research to see if anyone else had thought up the same idea, and to my surprise there was a complete lack of truffle recipes containing M&M’s!!! I found one single truffle recipe which mentions M&M’s from Busy-at-Home. This though, was nothing like what I had in mind.

    Had I thought up something original?

    Had I stumbled upon the almost-undiscovered?

    (possibly not – someone may have made these and just not blogged about it.)

    I got very excited about these truffles – I wanted to make them instantly. Only, for some reason I found it a little difficult to get hold of M&M’s from my local supermarket. Shameful! I had to go to my 3rd choice store!

    Anyhow! Once I had got my ingredients together I set to work on making these marvelous confections.

    I was using a fairly humble confection as my feature ingredient, yet I still wanted these truffles to be of the highest standard. So, I threw together a ganache using a high quality milk chocolate and luxurious double cream. The truffle element needed to be refined – to allow the M&M’s to be taken to the next level.

    M&M Truffle Recipe

    Makes: 25-30 pieces  Time: 30-35mins

    Ingredients:
    300g good quality milk chocolate
    150g double cream
    60g crispy M&M’s (2 small bags)
    185g choco M&M’s (large bag)

    • Chop your milk chocolate very finely, a serrated knife works best. Place into a shallow bowl or dish.
    • While preparing your chocolate, start to heat up the cream in a saucepan over a medium to low heat to avoid overheating it and scalding the cream.
    • Once the cream has heated (but not boiling) pour over your chocolate, let it settle for a few seconds, and then gently stir together.
    • When fully combined, cover the surface with cling film, and place in the fridge until firm, or until you are ready to make the truffles (the ganache can be made a day or 2 in advance).
    • Prepare 2 baking trays by placing a sheet of greaseproof paper on each.
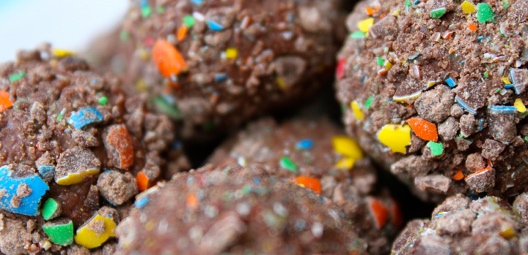
    • Place your choco M&M’s in a sealable bag, and using a rolling pin, or another device, evenly crush the M&M’s. be sure to leave some remnants of the colourful sugar shells. Pour some out into a shallow dish or plate.
    • Scrape a heaped teaspoon of the ganache, and warm up gently in your hands (I wore gloves for this process) when slightly softened, take a crispy M&M and place it in the centre, enrobe it in the smooth milk chocolate ganache. Roll into a ball, and place onto one of the baking sheets. Continue to do this until you have used up all of your ganache and/or crispy M&M’s
    • Once you have all the balls ready, they will have firmed up slightly, so you will need to warm them up gently in your hands before coating in the crushed choco M&M’s.
    • Place your coated M&M’s truffles onto your clean, lined tray, and place in the fridge to firm up. Store in fridge.
    • Wrap up for a gift, or eat and ENJOY!

    Making the Truffles

    These should last about a week. However I seriously doubt they would live to see more than 3 days… even if they’re lucky. My left over truffles lasted no more than a day and a half.

    (I feel I must stress they were not all eaten by myself!)

    This recipe could produce more truffles if you chose to make them a lot smaller. The ganache to crispy M&M’s ratio is not exactly 1:1, so if when I make these in the future, I will definitely play around with the size of the truffles! Maybe use a level teaspoon of ganache? If you chose to do this, you will need more crispy M&M’s and possibly more crushed choco M&M’s for coating.

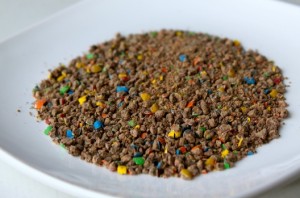
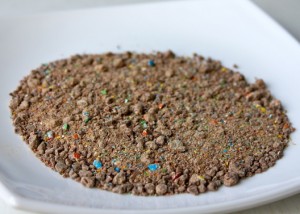
    I should add, that I tried two methods in breaking down the M&M’s for the coating, the first was the obvious – placing the sweets in a zip-sealing bag, and hammering them with a rolling pin or other utensil, the other method I attempted was putting the sweets in a food processor, and pulsing until ready.

    By Hand

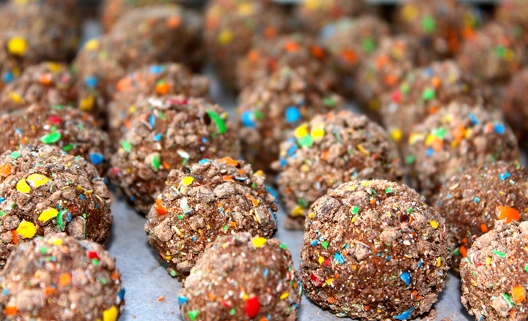
    By Machine

    I found that the first method produced better results.

    In my opinion, the machine didn’t process them evenly, so I was left with some pieces which were just too big and mounds that were just too fine for coating the truffles. Therefore I recommend the ‘by hand’ method, making it a lot easier to control AND you get to relieve yourself of some frustration… those poor little M&M’s dudes!

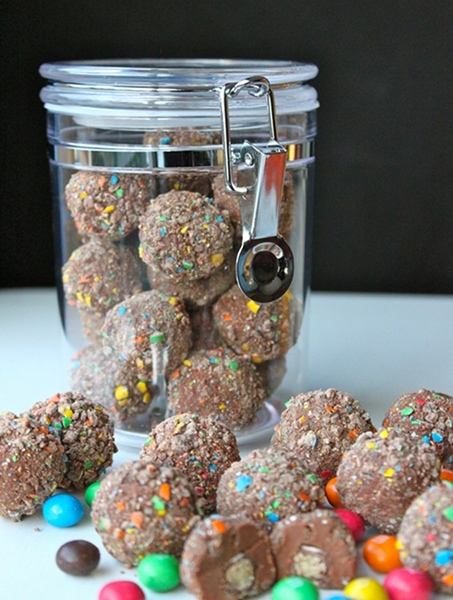
    For their purpose I filled a jar with as many M&M truffles as could fit. I presented these babies to my friend, who very quickly hid them at the back of her fridge for her own personal consumption. I don’t blame her – and neither would you!

    These things are EPIC!

    Therefore there is no real need for the recipient of these delightful gems to share them with anyone. You have my blessing.

    These could quite possibly only be bettered by using pretzel M&M’s in the centre… Or peanut butter M&M’s… Or just plain ol’ peanut!

    Oh WOW!

    Off I go to track some down!


  6. Hello World! This is Honeycomb!

    January 18, 2012 by Tali

    I’d been toying with the idea of starting a blog for quite some time.

    I knew it was going to involve food – particularly baking.

    Being the slave to procrastination that I am, it took me a while to get things started, and even then it has taken me quite some time (I dare not tell you how long) – to get this first post started. My hope is that once this gets rolling it will keep on going.  *fingers crossed*

    Besides being momentarily unemployed, one of the elements that truly sparked this mission was my love of baking. [I was training to become a pastry chef – see about me for more details.] It is something I would like to share with the world – because sometimes some of the people around me don’t appreciate/understand/care about me rambling on about how its Macarons NOT macarOOns! or how cupcakes are very different to muffins, or how buying a good quality chocolate really does make ALL of difference!

    Wanting to share my passion and experiences in the kitchen, I have been further spurred on by being completely spoiled on my birthday and received the following pile of books:

    I was serious about the pile! Whats worrying is that I received a few other books just a few days later for Chanukah/Christmas!

    My wonderful Fiance bought most of these books for me – I cant decide if he is mad for buying these all at once – or just really keen for me to fatten him up!? I did have them on my wish list- I just did not expect to receive them all on one day – not even in the same month….. oh dear!

    Now – I’ve not exactly set myself a mission a la Julie Powell, but I have got a vague plan to work my way through a vast array of recipes from the super healthy to over-crazy gorge-on-this-once-in-a-lifetime kinda treats.

    The book shelf - and I've just realised there are a number of my books that are not on there. They didn't fit on the shelf, so I'm working on convincing my dad to donate another shelf to his dear daughter!

    I’ve got a growing list of things I would like to make and post. Whilst flipping through Couture Chocolate by William Curley this morning (looking for his recipe for Pistachio Opera) I stumbled upon his recipe for Honeycomb and decided on that instant that I needed to make some honeycomb- TODAY!

    Its something I’ve never really felt any acute urge to make – until this morning. I know of a certain friend would will be banging my door down once she finds out what I’ve been up to.

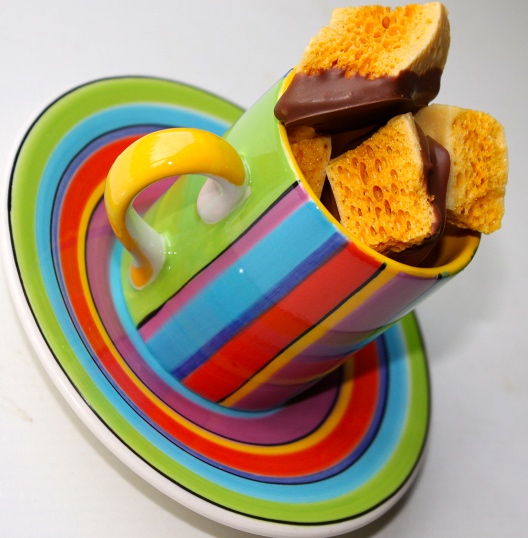
    So I pulled all the ingredients together – luckily I had everything to hand in the kitchen. Within mere minutes, I had made my batch of Honeycomb. William Curley calls for the block to be broken down once cool and then coated in dark and milk chocolate (what would a Curley recipe be without chocolate?). I had no good quality chocolate lying around, so a trip to the supermarket it was!

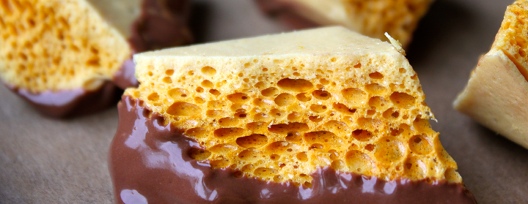
    Golden slabs of crunch-yummy goodness!

    At first, as it came out the pan the honeycomb was quite pale in colour, but as it was left to cool and set, the rich golden colour developed. One of the most enjoyable tasks, was hacking into the large slab and cracking off oddly shaped piece of the honeycomb…

    Nugget!

    …then enrobing each nugget in rich, Velvety chocolate.

    I chose to coat most in milk chocolate. Having tried both the milk and dark chocolate coated honeycomb I think I prefer the richer dark chocolate. It took some getting used to after a childhood of eating Cadbury’s Crunchies. But I feel that the darker chocolate brought out the deeper caramel tones of the honeycomb.

    When you start to run out of chocolate....

     
    Chocolate Coated Honeycomb
    Adapted From William Curley, Couture Chocolate: A Masterclass in Chocolate (Cinder Toffee)
     
    Ingredients
    50ml Water
    190g Caster Sugar
    50g Light Soft Brown Sugar
    140g Liquid Glucose*
    60g Honey
    10g Bicarbonate of Soda (sifted)
    500g Tempered Dark Chocolate
    500g Tempered Milk Chocolate
     
    • Line a pan or large shallow dish with baking parchment.
    • Place into a large pan, Water, Caster Sugar, Brown Sugar, Glucose and Honey. Combine. Turn flame/heat on low, and allow all the sugar to fully dissolve. When this has fully melted – making sure all sugar has dissolved, turn heat onto medium/high and let the mixture boil until is reaches 144-146 C (291-295 F).
    • Take the pan off the heat immediately, add the Bicarbonate of Soda, and mix in well, quickly. The mixture will rise, once it looks as though its about to over-flow, pour directly into your lined pan/dish. Leave this in a cool, moisture free place to cool down and set.
    • Once cool, remove paper, and cut into reasonable bite-sized portions.
    • Prepare your chocolate being careful not to over-heat, and dip half the honeycomb into the dark, and the other half into the milk chocolate. Alternatively you could keep it as it is and leave it bare – but as my man would say – anything is good if chocolate is involved!
    • Be sure to store in an air-tight container.

    *William Curley’s recipe actually calls for 150g liquid glucose and 50g honey, as my tube of glucose only contained 140g, I substituted that 10g with an extra 10g of honey. It seemed to turn out just fine… sometimes we have to adapt our recipes to suit whats lying around in the kitchen!


    Golden nuggets, enrobed in rich milk chocolate... Mmmm!


    They are perfect for wrapping up in cellophane gift bags, tying with a ribbon and giving to someone as a gift.

    Serve up a few pieces with a shot of espresso!

    Equally as delicious accompanying a large cup of tea 🙂

    Mmmmmmm!