RSS Feed

Posts Tagged ‘dessert’

  1. Gluten-Free Primal Jaffa Cakes

    March 19, 2013 by Tali

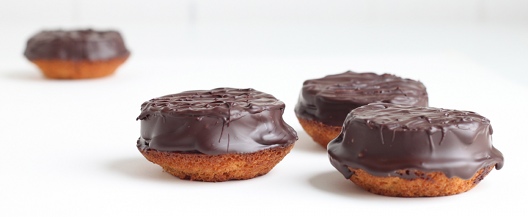
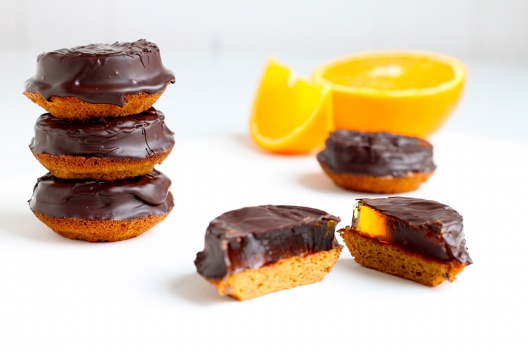
    The other day I had a major hankering for some Jaffa cakes. The magical combination of light sponge, zesty orange jelly topped with a coating of dark chocolate.

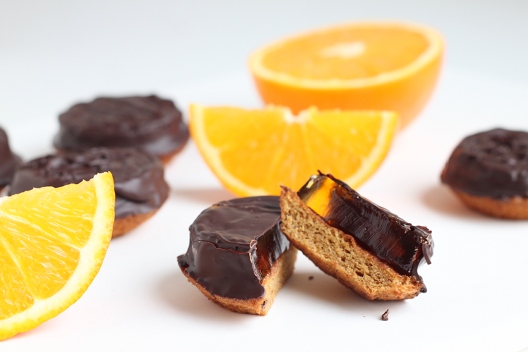
    Biting into one is a true sensory experience – as you bite down, your teeth crack through the delicate snap of tempered dark chocolate into the squidgy Jaffa orange jelly, finishing off with a comforting bounce of delicate sponge cake.

    And the flavours…. well who can argue with the truly exquisite combination of orange and dark chocolate?

    No one I know!

    This snack item is quite deceptive. They are so light and moreish – before you know it – you’ve gobbled up half the pack. And so the only option is to destroy the evidence!

    There is another problem with the humble Jaffa Cake. It contains wheat flour (gluten – nasty stuff), refined sugars, and preservatives. We don’t need or want these things in our food. So I took it upon myself to re-invent the Jaffa Cake, making it gluten-free, refined sugar-free and preservative free!

    I bet you’re thinking ‘yeah, alright, but I bet it’s also taste-free too!’

    Well, you would be wrong!

    These babies are truly epic. You get the same flavour burst and texture combination that makes for a totally immense sensory experience – without any of that yucky business.

    How did you manage that? – you ask!?

    Well just take a wee look!

    Gluten-Free Primal Jaffa Cakes

    Makes: 12   Takes: 40mins

    Ingredients:
    2 large free range eggs
    50g(1.76oz) raw coconut palm sugar
    50g(1.76oz) ground almonds

    2 large oranges (preferably Jaffa)
    1 Tbsp orange marmalade (optional)
    1 (11g/0.38oz) sachet gelatine OR 4 leaves of gelatine sheets (soaked)

    150g (5.5oz) dark chocolate (minimum 70% cocoa solids)

    Make the sponge

    • Pre-heat oven to 180 C/350 F. Grease a 12 hole cupcake/muffin tin
    • Place the eggs and coconut palm sugar in a heat resistant bowl. Place on top of a pan of simmering water making sure the bowl doesn’t touch the water
    • Whisk the eggs and sugar (by hand or using an electric hand beater) until it reaches the ribbon stage. This should take 4-5 minutes with an electric beater, and 5-10 minutes by hand
    • Add the ground almonds and mix to combine
    • Divide the mixture evenly between the 12 muffin holes. I found it useful to use my medium sized scoop to portion these out evenly
    • Place in the middle of the oven and bake for 8-10mins. They should spring back when gently pressed
    • Gently remove out of the baking pan, and leave to cool on a wire rack

    While the sponge is baking, make the jelly

    • Line a square brownie tin with plastic wrap – allow excess over-hang
    • Zest 1 orange, and place the zest in a saucepan. Juice the 2 oranges (you should hopefully get around 150-200ml of juice – that’s just over 1/2 cup-3/4 cup) place this into the saucepan along with the (optional) tablespoon of marmalade
    • Heat the mixture up until the marmalade has dissolved. Make sure the mixture doesn’t boil
    • Once the mixture has heated up, sprinkle the gelatine onto the surface and whisk briskly until the gelatin is thoroughly dissolved and incorporated into the mix
    • Gently pour the liquid into the tin and fold over the excess plastic wrap to touch the surface
    • Allow this to cool to room temperature before placing in the fridge to set properly.

    Putting the Jaffa cakes together and chocolate coating them

    • Take your jelly out the fridge, making sure it has set fully. Then cut 12 rounds slightly smaller than the tops of the sponge cakes
    • Place the jelly on top of the sponge
    • Chop your dark chocolate and put it into a microwavable bowl
    • Warm up your chocolate at half power in 30 second bursts mixing gently between each 30-second burst
    • Be patient and make sure not to over-heat your chocolate. You want to keep that chocolate tempered to ensure a nice crisp shell (for that full sensory experience!)
    • Once the chocolate is ready, using a silicone pastry brush – any of these will do – brush the chocolate over the top of the jelly allowing it to coat the sides and just onto the surface of the sponge
    • Leave them to set on a wire rack
    • Arrange them on a pretty plate and serve to guests – OR – devour and repeat recipe, then serve!

    The recipe does look long and a little overwhelming but it’s really not so difficult and it’s worth the effort! It may be wordy but I just wanted to make sure you get all the steps right!

    If you are just after the gluten-free (and aren’t so worried about the refined sugar) feel free to use the jelly recipe from here to fill your Jaffa cakes. I tested this recipe but actually found that the flavour of the orange jelly using the fresh orange juice produced a more authentic Jaffa cake taste.

    True story!


  2. Primal Ginger Cheesecake with Rhubarb Compote

    March 15, 2013 by Tali

    For the last few weeks I have had the craziest craving for cheesecake. Not unusual. I often get cravings for sweet things.

    As a way to control myself I try to make the foods that I’m craving. That way I appreciate them more, and more importantly, I can control what goes in them – which is pretty important when you’re trying to eat a Primal diet.

    Some people may argue over the true primal-ness of dairy – and whether it should be a part of our adult diet. I admit that I should cut back a little on my dairy consumption – but I find that I cope just fine with a little dairy in my diet.

    Do whatever works for you!

    I would recommend checking the ingredients list of the cream cheese you buy. I found that a brand like Philadelphia contains all kinds of additives, and my supermarket own brand soft cheese simply lists: milk. I like that! Or better yet – make your own cream cheese! But who has time for such things?!

    Cheesecake is not something I eat often and so I wanted to have something as close to the real deal as possible! Without all those additives, all that gluten and those refined sugars.

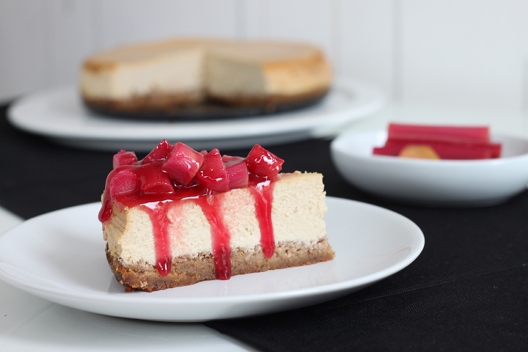
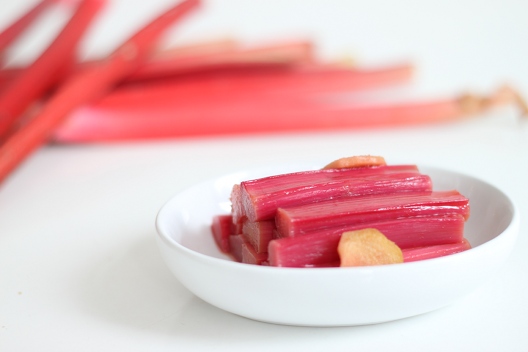
    It was only when the first crops of forced rhubarb hit the shelves that I thought it would be a brilliant idea to make a Rhubarb Cheesecake!

    AND whats goes brilliantly with rhubarb…. GINGER of course!

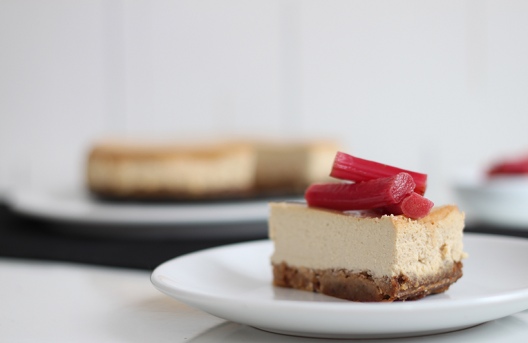
    There were so many ways in which I could have gone about putting this cheesecake together but in the end I decided to make a ginger cheesecake and use the rhubarb as a compote to accompany it.

    My recipe came to be with a little help from Adriana at Living Healthy with Chocolate.

    Primal Ginger Cheesecake with Rhubarb Compote

    Makes: 1 8-inch cake   Takes: 2.5hrs

    Crust
    Ingredients:

    1/2 cup pecans
    1 cup ground almonds/almond meal
    1 Tbsp Raw Honey
    1/2 tsp ground ginger
    6 Tbsp Butter/coconut oil (melted)

    • Preheat oven to 150 C/300 F
    • Place pecans in a food processor with blade attachment. Process until finely ground
    • Add ground almonds, honey, ground ginger and melted butter – process until it all comes together
    • Press into the base of a greased and lined 8 inch spring-form pan
    • Bake for 10-12mins. Set aside to cool

    Cheesecake Filling
    Ingredients:

    450g full fat cream cheese (at room temperature)
    1 cup full fat Greek yoghurt
    4 large eggs
    15g fresh stem ginger (grated)
    3 Tbsp raw coconut palm sugar

    • Turn oven temperature down to 110 C/230 F
    • Cream together the cream cheese, yoghurt and coconut palm sugar until light and fluffy
    • Add eggs to the mixture, one at a time
    • Finely grate the fresh ginger and fold it into the mix
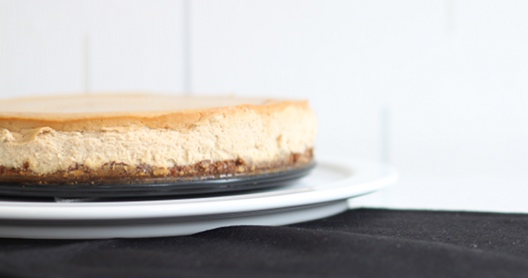
    • Pour mixture on top of cooled base. Place in the oven and bake for about 1.5 hours. Start checking from 1 hour. You will notice that it will be wobbly in the centre. You want to bake this until it JUST stops wobbling. For me it took 1.5 hours in a fan assisted oven
    • Switch off oven leaving the door slightly a jar and let the cake cool with the oven. After 20-30mins, remove from oven and set aside to cool
    • Once the cheesecake is at room temperature, you can cover and place it into the fridge to chill until you are ready to serve

    Rhubarb Compote
    Ingredients:

    400g fresh rhubarb stems
    250ml water
    20g coconut palm sugar
    35g raw honey

    • Preheat oven to 180 C/350 F
    • Chop rhubarb stems into even pieces, lay them evenly in a shallow dish
    • Dissolve the coconut palm sugar and honey in the water, then pour over the rhubarb
    • Place dish in oven, and roast for 15mins, until the rhubarb is tender but still holds its shape.
    • Leave to cool

    When ready to serve, slice cheesecake (best done when cheesecake has been well chilled, preferably overnight) and top with a couple of spoons of rhubarb compote.

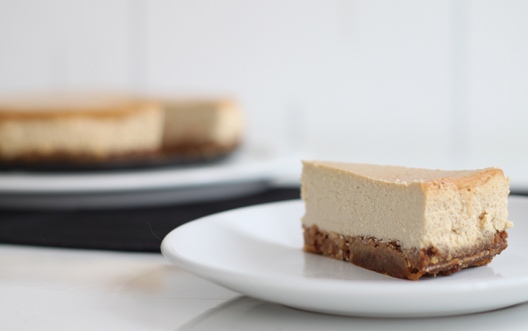
    I found that the ginger cheesecake on its own was was quite delightful – and that it didn’t really need the compote. Don’t get me wrong, the tart rhubarb compote was a welcome contrast to the creamy and gingery cheesecake – but if you were to skip the rhubarb this dessert will not disappoint!

    You could even serve this with another complimentary ingredient to ginger… chocolate for example. Ooo or a citrus curd, lemon OR lime would work great along-side the ginger. Or go exotic and pair the cheesecake with perfectly ripe mango slices. Oh, I could go on and on!

    Notes:
    I found the base to be a little on the soggy side – I guess this could be because it’s made with nuts. Next time I may try using coconut palm sugar instead of honey and maybe coconut oil instead of butter to see if that makes a difference.

    In a further attempt to rid the cheesecake base of moisture – I will attempt next time to drain the cream cheese and yoghurt of as much moisture as possible by straining it though some cheesecloth.


  3. Honey Roasted Figs

    February 27, 2013 by Tali

    Don’t you just love it when seriously delicious and fairly rare fruits appear on the shelves of your stores?

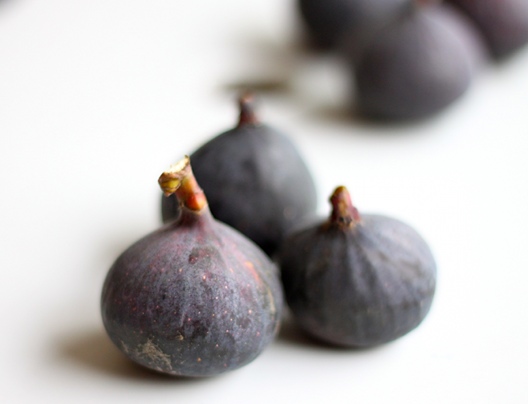
    I couldn’t say no to these beautiful figs – even if they do come all the way from South Africa. I’m not usually a big fan of buying foods with lots of air-miles… but they are from my homeland and it would therefore only be rude not to buy them!

    I was never a big fan of figs when I was younger. They often found their way into the kitchen in dried form – and therefore fresh figs where always a little bit of a mystery!

    There was also the story of my dad’s childhood experience. Having just picked figs off the tree in his back garden – He took a healthy bite into one fresh off the tree only to look down and discover that the inside was crawling with ants… some may argue he was getting a healthy dose of protein with those carbs, but that’s enough to put someone off figs for life!

    I always cut open and check my figs before eating!

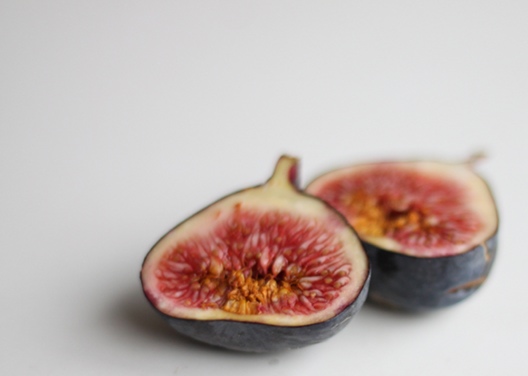
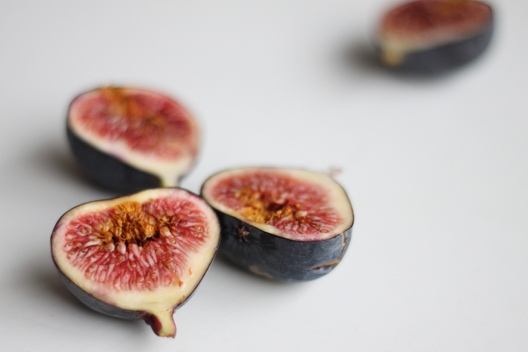
    Who could possibly resist the bold pink tones of the flesh of these sweet juicy nuggets of fruity pleasure?

    To me, the best way to prepare a fig (if you’re not gonna eat it fresh) is oven roasting it…

    …with a drizzle of honey.

    This recipe could not be more simple, or more delicious.

    Honey Roasted Figs

    Makes: as many as you wish (although I would suggest 1.5-2 figs per person)   Takes: 20 mins

    Ingredients:
    Figs
    Honey
    Walnut Halves

    • Pre-heat your oven to 180C/350F
    • Line a baking sheet with foil or baking parchment
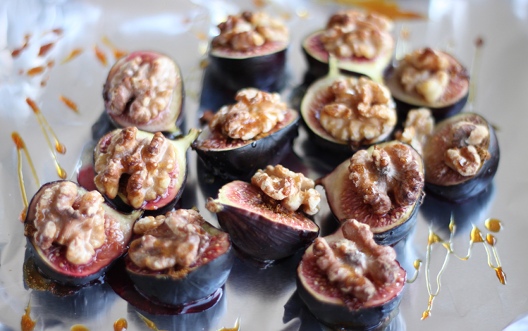
    • Slice the figs in half and lay (cut side up) out onto the baking sheet
    • Place a walnut half on top of each fig
    • Drizzle with Honey – don’t over do it. You want the honey to bring out the sweetness of the figs, not over-power it!
    • Place the sheet in the centre of the oven and let them roast for about 15 mins – be sure to check them around 10 mins as all ovens tend to be different. They may need up to 20-25mins.
    • Once done, transfer onto a serving dish (or plate up each individual serving – oooo how posh!) and devour whilst warm!

    Feel free to add a dollop of whipped cream/coconut cream, mascapone or vanilla ice cream next to these bad boys for a truly decadent dessert.

    YUM!