RSS Feed

Posts Tagged ‘fruit’

  1. Honey Roasted Figs

    February 27, 2013 by Tali

    Don’t you just love it when seriously delicious and fairly rare fruits appear on the shelves of your stores?

    I couldn’t say no to these beautiful figs – even if they do come all the way from South Africa. I’m not usually a big fan of buying foods with lots of air-miles… but they are from my homeland and it would therefore only be rude not to buy them!

    I was never a big fan of figs when I was younger. They often found their way into the kitchen in dried form – and therefore fresh figs where always a little bit of a mystery!

    There was also the story of my dad’s childhood experience. Having just picked figs off the tree in his back garden – He took a healthy bite into one fresh off the tree only to look down and discover that the inside was crawling with ants… some may argue he was getting a healthy dose of protein with those carbs, but that’s enough to put someone off figs for life!

    I always cut open and check my figs before eating!

    Who could possibly resist the bold pink tones of the flesh of these sweet juicy nuggets of fruity pleasure?

    To me, the best way to prepare a fig (if you’re not gonna eat it fresh) is oven roasting it…

    …with a drizzle of honey.

    This recipe could not be more simple, or more delicious.

    Honey Roasted Figs

    Makes: as many as you wish (although I would suggest 1.5-2 figs per person)   Takes: 20 mins

    Ingredients:
    Figs
    Honey
    Walnut Halves

    • Pre-heat your oven to 180C/350F
    • Line a baking sheet with foil or baking parchment
    • Slice the figs in half and lay (cut side up) out onto the baking sheet
    • Place a walnut half on top of each fig
    • Drizzle with Honey – don’t over do it. You want the honey to bring out the sweetness of the figs, not over-power it!
    • Place the sheet in the centre of the oven and let them roast for about 15 mins – be sure to check them around 10 mins as all ovens tend to be different. They may need up to 20-25mins.
    • Once done, transfer onto a serving dish (or plate up each individual serving – oooo how posh!) and devour whilst warm!

    Feel free to add a dollop of whipped cream/coconut cream, mascapone or vanilla ice cream next to these bad boys for a truly decadent dessert.

    YUM!


  2. Primal Lemon Curd

    May 4, 2012 by Tali

    Lemon curd, its fruity sweetness and citrus tang make for a seriously delicious taste sensation.

    I had never tasted lemon curd until I was the age of about 10. I remember thinking it was one of the most delicious yet unusual breakfast spreads I’d ever tasted. I was more familiar with spreads such as peanut butter, jam, honey, maybe even the occasional treat of chocolate spread. I never acquired a taste for marmalade, and the bitterness that comes with it. So tasting this unusual citrus spread, which was both sweet & sour culminating in a smooth and creamy mess was a totally new experience.

    Little did I know that the versatility of lemon curd could stretch so far! I later discovered it works amazingly as a filling for cakes, or used within pie crusts or tart shells. Not just (generously) spread over toast.

    You’re probably wondering how I could possibly have lived such a sheltered life, having never tasted a lemon meringue pie until I was at least 12 – I too wonder the same!

    This may have had something to do with me making a bee-line for chocolate related desserts, but as my palette matured and developed, I began to appreciate the greater things in the culinary world.

    The other day, my dad had some friends over to play cards, and the evening is often rounded off with teas and coffees along with some cake and savory snacks. I’m often roped into making something for this – which I find is always a great opportunity to try out a new recipe or improve on a old favourite.

    This particular occasion, I decided that I wanted to make something that allowed me to explore some primal recipes, but make it user friendly towards the (non-primal) clientelle.

    I don’t know what made me think of Lemon Meringue Pies – possible just a personal craving of mine, but I thought it would be great to make the filling primal – surely there is a recipe out there for primal friendly lemon curd!?

    I did some research and discovered this great recipe which uses honey as the sweetener.

    I followed the recipe and produced a delicious, smooth and silky lemon curd. As the linked recipe suggests, this is a Lemon Honey curd, and you really can taste the honey.

    I’m very keen to attempt this recipe another time using less honey and if I can get hold of them, some Meyer lemons. They are a sweeter lemon (the taste of a lemon and tangerine combined) which I hope would help to round out the flavour of this curd with a reduced honey content. Unfortunately Meyer lemons are out of season… and from what I understand impossible to get hold of here in the UK anyway – therefore I’ll have to wait for the season and hit up every gourmet food market I can!

    In the mean-time, I might consider investing in a plant… although I’ve not got a great track record with plants… but we shall see!

    I doubled the recipe from Friday Delights – because I wanted to use the curd for both a batch of mini lemon meringue pies, and to have some left over.

    Primal Lemon Curd

    Makes: 3 cups Takes: 15 mins

    Ingredients:
    10 large Egg Yolks
    2 large Eggs
    1 1/3 cups freshly squeezed Lemon Juice (about 6-8 lemons)
    2 teaspoons grated Lemon Zest
    3/4 cup Honey
    8 tablespoons Butter (unsalted) cubed

    • start by zesting your lemons
    • then warm up and roll the lemons between your hands to encourage the juices. Using a hand held or electric juicer, extract as much lemon juice outta them fruits as possible. You can always save any left overs for another recipe
    • place ingredients except the butter into a bowl and combine, then place the bowl over a pot of simmering water – making sure the water doesn’t touch the bowl, and stir
    • continue stirring for 10-12 mins while the mixture thickens. It will be slow at first, but will suddenly thicken at the 9-10 min mark. You’ll want to keep it moving and thickening for a little while longer. This will produce a sturdier product
    • once you have reached your desired consistency, remove the bowl from the heat
    • add the cubed butter and keep stirring to fully incorporate and cool the mixture
    • once the butter has been well incorporated, transfer into a shallow dish and cover the surface with clingfilm to avoid a crust forming
    • let the lemon curd cool down a bit before placing in the fridge until you’re ready to use it

    For my dad’s card evening, I made some (non-primal) miniature lemon meringue pies. I made a simple pate sucre, which I rolled to 2-3mm thick and then cut into circles, which I placed into a muffin pan making small tart shells.

    Pate Sucre

    Makes: 20 mini tart shells   Takes: 5 mins + 30mins chilling time

    Ingredients:
    250g Soft Flour
    1 pinch Salt
    125g Butter (unsalted)
    65g Caster Sugar
    1 Medium-Large Egg
    1-2 drops Vanilla Extract

    • begin by sifting your flour and salt together, set aside
    • cream together your butter and sugar
    • gently beat your egg to break it up, then add bit-by-bit to your butter and sugar mixing well between each addition
    • once well combined, add vanilla extract
    • mix in sifted flour and salt, until the mixture  JUST comes together, bring into a ball and flatten
    • cover in cling film and leave it to rest in the fridge for 30mins or more (the longer the better)

    I then placed a cupcake liner on top of each pastry disc and filled with baking beans; after blind baking for 10mins I removed the beans and liners, and then baked them for a further 5-6mins until they were a nice golden brown.

    I left these to cool.

    Once I was ready to assemble the tarts, I filled the mini tart shells with 1 1/2 to 2 teaspoons of lemon curd, and then topped them off with an Italian meringue which I browned with a blow torch.

    Italian meringue

    Ingredients:
    60g egg whites
    120g caster sugar
    water

    • place the egg whites in a stand mixer, or bowl if using a hang whisk
    • with the sugar in a small saucepan, JUST cover the surface with water and place on the stove at medium heat
    • once the sugar has dissolved turn the heat up and begin to whisk your egg whites
    • once the sugar syrup reaches around 120C/248F remove from the heat
    • reduce the speed of your mixer and slowly and steadily, pour your sugar syrup into you egg whites along the side of the bowl. Be careful that stuff is HOT
    • once all the sugar has been added, turn up the speed of your mixer to max, and continue to mix until your meringue drops in temperature. you should have a sturdy and glossy Italian meringue

    Transfer this to a piping bag, with a round or star-tipped nozzle. Pipe meringue onto your tartlets and finish by using a blow torch to burn the top or place under the grill/broiler for a few minutes.

    (unfortunately I wasn’t able to photograph the ones I made with the fresh Italian meringue, but I saved a few shells, baked off the surplus meringue, filled the tarts with left-over curd and then topped them with crushed baked meringue)

    Even though these were a quick fix solution because I couldn’t be bothered didn’t have time to make a small batch of Italian meringue – I feel they are still appealing, and add something in the texture department. The buttery crisp bite of the tart shell, with the sweet but tangy lemon curd topped with sweet crunchy meringue. YUM – E!


  3. Blackberry Macarons

    March 14, 2012 by Tali

    3 weeks into my 4 week 100% Primal challenge, and I’ve found myself baking a batch of macarons…

    Don’t worry though people! I’m keeping on track – rather impressively in fact! Considering my weekend was spent on a hen/bachelorette weekend, where pretty much all food on offer was processed, coated in breadcrumbs and/or involved some form of bread or pastry.

    I managed to control any urge to eat anything I shouldn’t have, and I took along some primal snack items including my onion crackers and some primal chocolate chip cookies which I had been experimenting with a couple of days before.

    I know, I know – I probably shouldn’t have eaten treats such as cookies during a pure challenge, but I anticipated the junk food and thought its probably better to have primal snacks to nibble at, rather than eat what was on offer. I was pretty pleased with my efforts – except I did get back on Sunday evening feeling like I needed to eat as much as possible to make up for being deprived. Thankfully it was all primal approved fodder!

    I did however drink a crazy amounts of wine :S

    Oops!

    Well… it’s full of antioxidants right?!

    Now, “why on earth am I making macarons during this challenge?” you ask. “You have but a mere 5 days until your challenge is up!”

    WHY!?

    I’ll tell you why!

    Yesterday evening I attended a book launch. (HA! I love how that makes me sound all important, like I rub shoulders with stars of the literary world! I suppose in such circumstances, I did)

    Mo’s Aunt Miriam is launching Illegal the second book in her cycle of three novels set on Hayling Island, Hampshire, UK.

    I was asked to make a tasty treat for the exclusive family-only after party – and I was very quick to accept the challenge, and immediately jumped at the chance to make some more macs! After my last batch of salted butter popcorn macarons, I was back with the mac buzz, and raring to go!

    My only concern was what flavour to make them!

    I knew that a lot of the audience might not have appreciated the wacky flavour combinations of Adriano Zumbo, so I tried to think up a more tame choice. I got Mo to help me out, and with blackberries being one of his favourite fruits, and them being on offer at the supermarket, I decided to tackle the mighty blackberry.

    I turned to the master of macs, Pierre Herme and my go-to book when making macarons. I searched through the entire book, and there was NO sign of blackberry anywhere, so I moved on to my SIX other macaron dedicated books, which also showed no sign of a  blackberry inspired recipe.

    Of course, I could have worked up some kind of simple blackberry buttercream… but I don’t work like that. I wanted to create something AWESOME!

    I went back to Monsieur Herme’s Macarons and decided to adapt his recipe for blackcurrent macarons. I mean, they’re both a type of berry!

    The recipe was decided upon, I was to make a blackberry ganache in the same way M. Herme makes his blackcurrent ganache, and macerate the blackberries in much the same way he macerates his blackcurrents. SORTED!
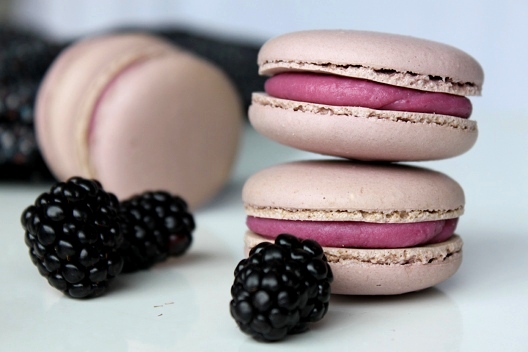
    Blackberry Macarons
    Adapted from Pierre Herme’s Macarons Cassis

    Makes: 50 generous sized Macarons (72 regular)  Takes: Long times

    Ingredients for the macerated blackberries:
    200g blackberries (the smaller the better)
    200g water
    100g caster sugar

    • start by making your macerated blackberries the day before
    • place water and sugar in a small-medium saucepan, bring to the boil.
    • once boiling, add your blackberries and wait until the water just starts to come back to a boil, remove pan from heat and transfer to a bowl. Leave to cool, then cover and refridgerate until needed. (preferably overnight)

    Ingredients for the ganache:
    450g blackberries
    400g white chocolate

    • next, make your ganache.
    • Puree your blackberries, and then pass the puree through a fine sieve to remove all the seeds and tough pulp
    • place the puree into a small saucepan
    • transfer the white chocolate to a bain marie
    • while the chocolate is gently melting, slowly heat your blackberry puree
    • stir your chocolate constantly and once is has all melted, remove from heat and pour in your warm puree 1/3 at a time. stirring well between each addition
    • once the ganache has come together, pour into a dish and cover the surface with clingfilm/plastic wrap
    • place ganache in the fridge to cool and set

    Ingredients for the macarons:
    300g ground almonds
    300g icing sugar
    300g caster sugar
    75g water
    220g egg whites
    red gel food colouring
    blue gel food colouring

    • prepare your baking trays with parchment paper or silicone mats
    • sift the ground almonds and icing sugar to remove the coarse pieces of almond
    • in the bowl of your mixer with whisk attachment weigh out 110g of egg whites
    • place the remaining 110g with your almond/icing sugar mix
    • place water and caster sugar into a small saucepan, and start to heat it up – placing a thermometer in the pan
    • while the sugar is heating up, combine the egg whites with the almond and icing sugar into a paste
    • at this point add colouring. Blackberries aren’t actually black, so you’ll want to bring your mix to a purple. be sure to make the shade extra intense, once you add the meringue the colour will dilute, a lot
    • once your sugar syrup has reached 115C/239F turn your mixer on high speed to begin whipping up your egg whites.
    • when the temperature reaches between 118-121C/224-249F carefully take the pan of boiling sugar over the the mixer
    • turn the speed down to very low and gently pour the boiling sugar down the side of the bowl
    • once all of the sugar has been poured in, increase the mixer speed back up  to maximum, and let the meringue whip until it has dropped in temperature
    • fold meringue into the almond mix 1/3 at a time, being sure to break up the paste-like mixture. once all the meringue has been added, you can start to work the mix to the correct consistency.
    • fold, and work the mix so that that it changes to a lava-like consistency. A good way to test this is to allow the mix to ribbon, then wait a few seconds and the definition of the lines should disappear
    • transfer the mix to a piping bag fitted with a 6mm round nozzle
    • pipe uniformly sized rounds of mix onto your ready-lined trays
    • once piped, turn your oven on to 140C/280F
    • the macarons will need to be left to dry out for about 30mins to an hour – once the oven has warmed up, and the macarons have formed skins, and are no longer tacky to the touch, you can place your first few trays in the oven to bake.
    • they should take 12-14mins to bake, check regularly, and maybe turn them about 8mins into the cooking time
    • to check if they are done, the top of the macaron shouldn’t wobble very much
    • when out the oven, remove paper/silicone mat off tray and leave on a counter-top to cool down
    • once cool, pair up the macarons ready to fill them
    • drain the macerated blackberries and lay them out on paper-towel to dry off, if they are large, cut them in half
    • place a small blackberry or half a blackberry onto the centre of a macaron half,
    • tranfer the ganache into a piping bag, pipe your ganache neatly around the berry
    • place the macaron top over the filling, and pack away into an airtight container and place in the  fridge
    • allow macarons around 2 hours to come up to room temperature for an optimum indulgent experience
    • eat and enjoy!

    [I used fresh blackberries, but you can use frozen, just remember to allow time for them to defrost]

    Phew! As always – A LOT of work and time – but totally satisfying!

    The hardest part for me was not being able to taste them – I’ve stashed some away in the freezer so I can have a binge taste on Sunday – my cheat day! Woohoo!

    Mo, the official taster, gave his verdict – it was positive. Everyone else who tried one last night seemed to enjoy them – I noticed some people even went back for thirds and fourths!

    I, however, will have to verify their success on Sunday!

    If you yourself are interested in making a batch of macarons and are new to the skill, I found Mad about Macarons by Jill Colonna to be a really helpful starter guide to making macarons. Pierre Herme’s Macarons is also an excellent book (even despite the few translation errors) for anyone who is a macaron fan – this is THE book to own – even if its just to gawk at the pictures!